 Almost all of us were, and are still using Windows based computers, even though we have locked ourselves firmly into the Apple world by buying iPhones and iPads. I am sure you have noticed (Like I Have) there are definitely some issues that arise by being “Multi Platform”. Slowly but surely, the software writers of the world are delivering apps that allow your iPhone and Windows 7 Laptop to co-exist a little more seamlessly.
One such app is called “Buzz Player“.
For over a decade now, all of the home video I have, all of my DVD backups, TV programs I have recorded, in other words, my entire video collection is in AVI format. My movies are in DIVX format (I bought Dr DIVX years ago to rip my DVD’s and have stuck with it), and everything else is in XVID. That’s just the way it has ALWAYS been! And I sure as heck aren’t going to convert them all to Quicktime, I’ll be dead before it finishes re-encoding.
Enter Buzz Player, or in my case, Buzz Player HD for iPad. Buzz Player is an app for your iPhone/iPod Touch/iPad (Even iPhone 3GS) that will allow you to create folders, copy movie files to your device, and play them seamlessly without the need for jail breaking your device! And my favorite part, it will even stream from your network shares!

To get started watching AVI files on your iPad/iPod Touch/iPhone, download the correct version of Buzz Player for your device from the iTunes app store, and in my opinion, the nominal fee of $2.99 for this app is ridiculously low for the functionality it provides.
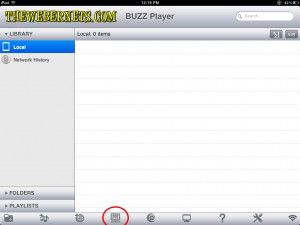
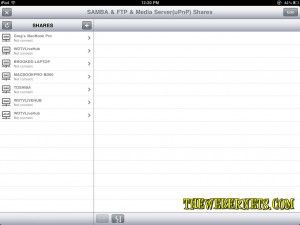
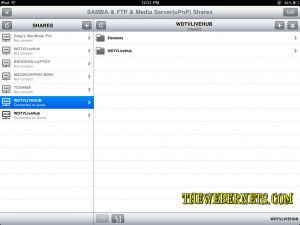
 Once it is installed and open, you can start creating and organizing folders for your local media (media that is physically on your device), or if your like me, your gonna want to start watching stuff from Desktop and your Media Server. To watch stuff from other devices (In my case, my Western Digital WDTV Live Hub) click the icon that says “SMB/FTP”. This will query your home network and display a list of all devices that are set up to serve media on your home network. It also tells you the protocol they are using to serve.
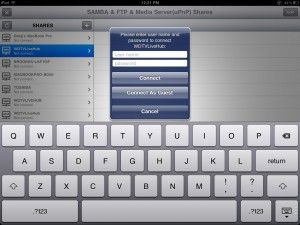
 I noticed that some devices appear more than once, and I expect that is because they broadcast different services that they are able to provide. I selected my WDTV’s Samba feed, and was asked to input credentials.
 As my network shares are not password protected within my own home network, I used “Guest” as my username, and left the password blank, and was able to connect easily. I tried to click “Connect As Guest” but that didnt work. I guess my WDTV needed to have at least the username of Guest. If your shares are password protected, this is the place to enter them to gain access. Don’t worry, Buzz Player can remember your devices and logins if you want it to, so you only have to do it once. Just remember to add it to your source list before you disconnect.
Once you have connected, you can see a list of all of the available drives/folders/files being shared.
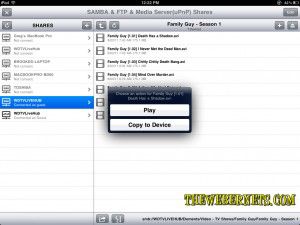
 Now, Its just a matter of selecting the file you want to watch from the appropriate directory, and selecting it. What comes next is pretty cool! Buzz Player asks you if you want to copy the file to your device, or if you want to watch it from a stream! YEAH BABY!
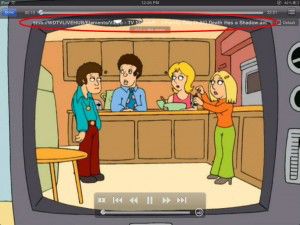
 In my case, Im happy to watch the stream, so when you click play, it spends a few seconds buffering the file, and then starts to play your video!
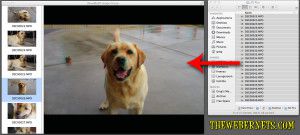
 As you can see from the above screen cap, I’m streaming Family Guy “Death Has A Shadow.AVI” over Samba, and watching it flawlessly on my iPad!
 Buzz Player supports: .mpv, .mov, .mp4, .m4v, .3gp .avi, .divx, .dat, .vcd, .wmv, .bin, .iso, .vob, .mkv, .rmvb, .ogg, .flv, .swf, .rm, .ts, .nsv, .ram, .vfw, .mpg, .mpeg, .m1v, .m2v, .dv3, .gp, .mqv, .ogm, .ogv, .asf, .dvr-ms, .m2t, .m2ts, .rec, .bik, .dv as well as many audio codecs.
**HINT** – If your playback is choppy and/or breaks during playback, CHECK YOUR NETWORK!!!!!! I’ve seen a lot of people slagging this app because they cant stream a 2GB 720HD video over their 802.11g networks! VIDEO FILES ARE HUGE! Your network might not be capable of streaming it in real time, so COPY it to your device, and then watch it uninterrupted.
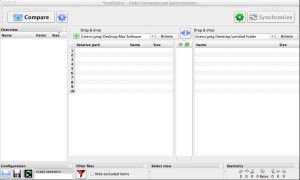
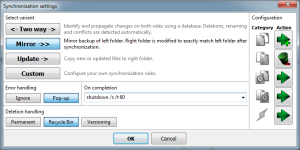
 Boy have I got a GEM for you! I’ve just stumbled upon Free File Sync – a FREE file and folder sync program. It does everything that the programs you have to pay for do, and more, FOR FREE!
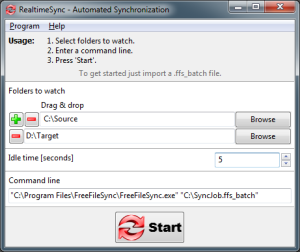 When synchronization is occurring, you get a nice informative window telling what is going on.
 I am really blown away by this program. I have just deleted my copy of Chronosync (Which I payed $40 for) as well as my copy of Martian Slingshot (Real Time Sync which I payed $30 for) and now have Free File Sync on all my machines – FOR FREE!
