How To Use iPhone Android or Nokia Smart Phones as cameras in Vidblaster

Epoccam Icon

httpvh://youtu.be/Z5E-vEalubM

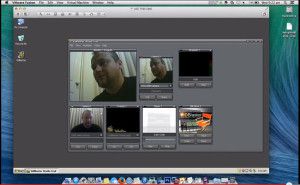
This video will show you step by step how to download and install software that will allow you to use your iPhone, Android Phone, or Nokia Smart Phone as a camera in Vidblaster.

**NOTE** – Your phone and computer need to be connected to the same wifi network

To get started, download the free Epoccam App from your devices app store and install it. Then, on your computer, browse to kinoni.com to download the free virtual device drivers. The software relies on Apple’s Bonjour networking technology, and if it isn’t already on your system, the installer will download and install it automatically for you. Don’t worry, it’s harmless!

Once everything is installed, open the app on your phone, then open Vidblaster, and add a new camera module and select “Kinoni Video Source” and you should be up and running.

How To Make Your Own Internet TV Show – Part 5 – Desktop and Browser Capture

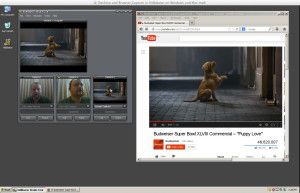
Web Browser and Desktop Capture in Vidblaster Image

Part 5 – Desktop and Browser Capture

In this video I show you how to capture your desktop, and incorporate your web browser into your Vidblaster setup in either Windows or Mac, so you can include media (Such as Youtube) in your broadcast.

Note to Pros – These articles are aimed at beginners, who wish to spend little or no money until they have a grasp on the topic, and are hoping to learn how to get started quickly and easily, using equipment they most likely already have.

httpvh://youtu.be/b9IieU22bF8

You can download a free unrestricted trial copy of Vidblaster from vidblaster.com

vidblasterbuynow234x60
Part 1 – Selecting Video Switcher Production Software – The Heart of Vidcasting – VIEW HERE
Part 2 – Installing Vidblaster, Connecting Your Webcam, Switching and Interface Basics – VIEW HERE Part 3 – Adding Additional Cameras – VIEW HERE
Part 4 – Mixing Audio, Mics, and Avoiding Looping in Software – VIEW HERE
Part 5 – Desktop and Browser Capture – VIEW HERE
Part 6 – Connecting Guests Via Skype – VIEW HERE
Part 7 – How To Make A Lower Third Overlay – VIEW HERE
Part 8 – Adding flair with Effects, Soundboards and Chat Streams – COMING SOON!
Part 9 – Green Screen/Chroma Keying and Virtual Sets with iClone – COMING SOON!
Part 10 – Recording and Streaming – COMING SOON!

How To Make Your Own Internet TV Show – Part 3 – Adding Additional Cameras

Adding Additional Cameras
Part 3 – Installing Additional Cameras

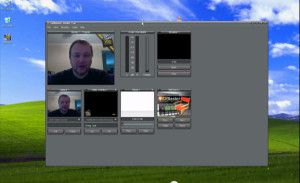
In this video I show you how to add additional cameras to your Vidblaster setup in either Windows or Mac, and how easy it is to switch between them.

Note to Pros – These articles are aimed at beginners, who wish to spend little or no money until they have a grasp on the topic, and are hoping to learn how to get started quickly and easily, using equipment they most likely already have.

httpvh://youtu.be/VTpJ5ZkTShQ

You can also use your iPhone, Android and Nokia smart phones as cameras by using Epoccam as shown in this tutorial.

httpvh://youtu.be/Z5E-vEalubM

You can download a free unrestricted trial copy of Vidblaster from vidblaster.com

vidblasterbuynow234x60
Part 1 – Selecting Video Switcher Production Software – The Heart of Vidcasting – VIEW HERE
Part 2 – Installing Vidblaster, Connecting Your Webcam, Switching and Interface Basics – VIEW HERE Part 3 – Adding Additional Cameras – VIEW HERE
Part 4 – Mixing Audio, Mics, and Avoiding Looping in Software – VIEW HERE
Part 5 – Desktop and Browser Capture – VIEW HERE
Part 6 – Connecting Guests Via Skype – VIEW HERE
Part 7 – How To Make A Lower Third Overlay – VIEW HERE
Part 8 – Adding flair with Effects, Soundboards and Chat Streams – COMING SOON!
Part 9 – Green Screen/Chroma Keying and Virtual Sets with iClone – COMING SOON!
Part 10 – Recording and Streaming – COMING SOON!

How To Make Your Own Internet TV Show – Part 2 – Installing Vidblaster, Connecting Your Webcam, Switching and Interface Basics

vidblaster-basics PART 2 – Installing Vidblaster, Connecting Your Webcam, Switching and Interface Basics

In this tutorial I show you how easy it is to install Vidblaster in both Mac and Windows, and get started with some basic switching between modules, adding a title, playing a video and showing a picture.

Note to Pros – These articles are aimed at beginners, who wish to spend little or no money until they have a grasp on the topic, and are hoping to learn how to get started quickly and easily, using equipment they most likely already have.

httpvh://youtu.be/wk7UC-ZVHeI

You can download a free unrestricted trial copy of Vidblaster from vidblaster.com

vidblasterbuynow234x60
Part 1 – Selecting Video Switcher Production Software – The Heart of Vidcasting – VIEW HERE
Part 2 – Installing Vidblaster, Connecting Your Webcam, Switching and Interface Basics – VIEW HERE Part 3 – Adding Additional Cameras – VIEW HERE
Part 4 – Mixing Audio, Mics, and Avoiding Looping in Software – VIEW HERE
Part 5 – Desktop and Browser Capture – VIEW HERE
Part 6 – Connecting Guests Via Skype – VIEW HERE
Part 7 – How To Make A Lower Third Overlay – VIEW HERE
Part 8 – Adding flair with Effects, Soundboards and Chat Streams – COMING SOON!
Part 9 – Green Screen/Chroma Keying and Virtual Sets with iClone – COMING SOON!
Part 10 – Recording and Streaming – COMING SOON!