
httpvh://youtu.be/1xWwLmQEilM
I have been looking at sites and blogs lately that describe how to make a 3D Anaglyph (viewed using Red/Blue Glasses) picture from a 2D picture using the channel mixer in Adobe Photoshop, and I was wondering if this method could also be implemented in Adobe Premier Pro? After a little bit of testing, and finding a few video’s on Youtube about it, I decided to give it a try.
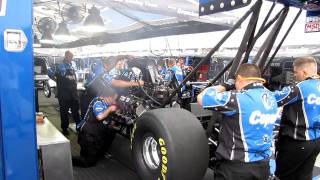
For this experiment, my donor file will be a AWESOME video I found on Youtube by z400hauls featuring Brandon Bernsteins 8000hp Nitro Methane Dragster warming up.

This video is shot in 720p Hi Def, with great audio, and it does a great job conveying what it is like to be so close to one of these fire breathing monsters. Please check out z400hauls other videos too!
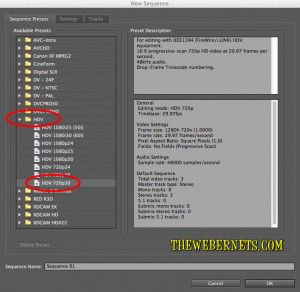
To begin, open Premiere Pro (If you don’t have it, you can download a fully functioning 30 day free trial from Adobe.com) and create a new project. As z400hauls source video is 720P at 30fps (Frames Per Second), I am going to stick with this for my 3D transformation settings.
 Once you have created the appropriate editing environment for your videos specs, import your source/donor video by selecting the file menu, dragging down to “Import” and selecting your file.
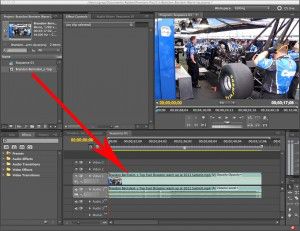
Once you have it in Premiere Pro, Drag it to the timeline.
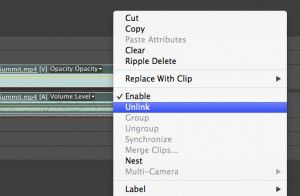
 The next step is to create a second video track from the first, so we can make the left and right channels required to trick our brains into seeing 3D. To copy the video track only (because we don’t need two identical audio tracks) click the video in the timeline to highlight it (Notice the audio track will highlight as well), then right click it and select “Unlink”. This will unlink the video and audio tracks.
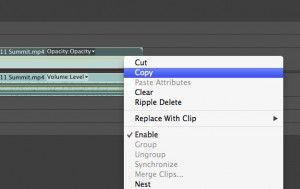
 Now you can click on the video track to highlight it only, and the audio track will stay unselected. When your video track only is highlighted, right click it and select “Copy”.
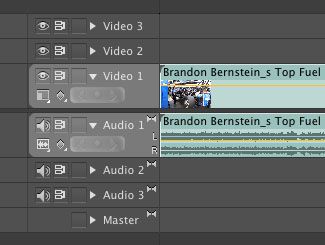
 The next step is a little tricky, so follow carefully. Premiere Pro is a bit like Photoshop, in that it uses Layers to build up the scene. If you were to select “Paste” from the edit window now, it will place the copied video on the same track as the original one, which doesn’t help us. We need to place the copied video onto a separate layer, or track, in order to achieve a stereoscopic effect. If you look closely, you will see that video track 1, and audio track 1 are highlighted, and are a different color from the other spare blank tracks that Premier Pro set up for us when we created the document.
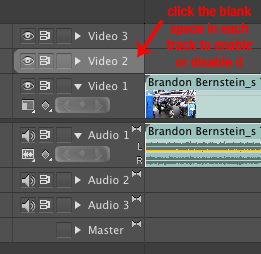
 This means that these tracks are active and are the ones we are working on. As we want to put video onto video track 2, click the blank area in the video track 1 and audio track 1 attributes bar to deselect them, and then click the blank are next to where it says “Video 2” to Activate/Highlight this track.
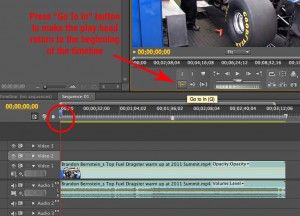
 Now that we have Video Track 2 selected, we are nearly ready to paste in the second video channel. Premiere Pro will place the video wherever the play head (red vertical line) is, so to make sure our two video tracks line up, press the “Go To In” button to make sure the play head is at the very beginning of the timeline.
 Now that the play head is at the beginning of the timeline, and Video Track 2 is selected, click edit from the menu bar, and select “Paste”. Now you have two video tracks! WOOHOO!!!
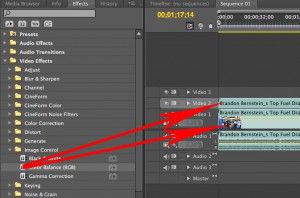
 Now comes the fun part! Our next task is to separate the color channels, and create the “Parallax” effect. This is what tricks our brains into thinking that what we are seeing is 3 Dimensional. As we are creating a Red/Blue Anaglyph 3D effect, we need to separate the red and blue colors in our 2 video tracks. At this point, we will define “Video 2” track as our left/red channel, and “Video 1” track as our right/blue channel. To separate our colors, we will be using the “Color Balance RGB” effect. Open “Video Effects” then “Image Control” and drag and drop the “Color Balance” effect icon onto Video 1 track, and then again onto Video 2 track.
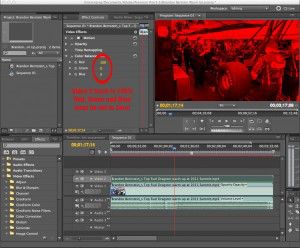
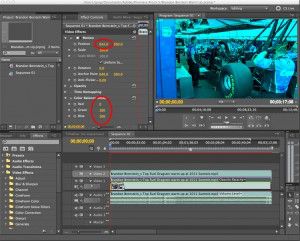
 First, lets do the left/red channel. Click the video in the “Video 2” track to highlight it, and in the “Effect Controls” window set the green and blue channels to Zero. This will leave only red.
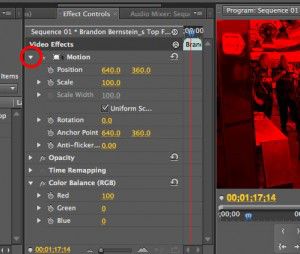
 To create the “Parallax Effect”, whilst in “Effect Control”, click the little triangle next to “Motion” to expand this option so we can tinker with its settings.
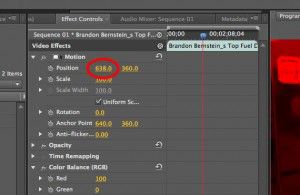
 As this videos dimensions are 1280px x 720px, you can see next to “Position” that the center point of the video is at 640px on the horizontal plane, and 360px vertical. To create the Parallax, we need to offset the left channel to the left of the screen slightly. To do this, simply adjust “640” to “638”. This will move our left channel 2 Pixels to the left of the screen.
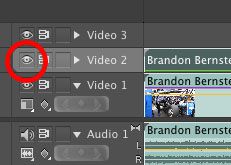
 We are now finished with the left channel for the moment, so lets make it invisible, so we can get to work on the right channel. To make it invisible, simply click the “Eyeball” icon in the attributes field as shown below.
 Your video preview window should loose the red tinge, and be restored to normal. Next, Highlight the Video 1 track (Right/Blue) in the timeline, and set the red to zero in Color Balance, leaving blue and green at 100. Then, enhance the Parallax by moving the Right/Blue channel 2 Pixels to the right. Again, click the triangle next to “Motion” to expand and reveal the options, and set the horizontal plane to 642. If you have done everything right, your video preview will now look all Blue-Ish.
 It is now time to bring the left and right channels together and create the Anaglyph. Go back to the Video 2 (red/left) track’s attributes area and make it visible again by clicking the eyeball icon. Your video preview will turn red again. If you click the eyeball repeatedly a few times you will see that not only does your video turn from red to blue, but it also moves position – Yes! That’s the Parallax Effect – You have made a 2D video 3D!
YAY YOU!!!!!
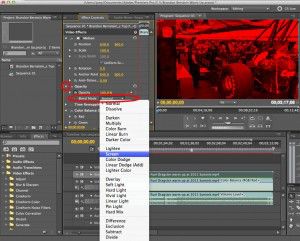
To finish up, we need to blend them together. This is where Premiere Pro borrows from Photoshop. Blending is what makes Photoshop so powerful. With your Left/Red channel visible (Eyeball Icon clicked so the video preview window has the red tinge), click the little triangle next to “Opacity” in the “Effect Control” panel. Click the drop down menu next to “Blend Mode” and select “Screen”.
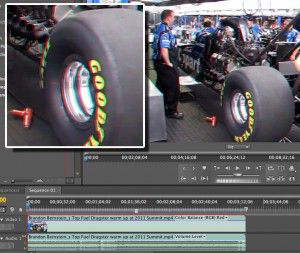
 VOILA! ANAGLYPH VIDEO!

Using these settings, the 3D effect is only mild. To really make a strong 3d Parallax Effect, you move the left and right frames further apart. Instead of 638 for the Red/Left channel, and 642 for the Blue/Right channel, try 636 for the left and 644 for the right, or 630 for the left and 650 for the right. Experiment with these numbers until it looks right for you.
But BE CAREFUL – Don’t push these numbers to far, because you can make the video really blurry.
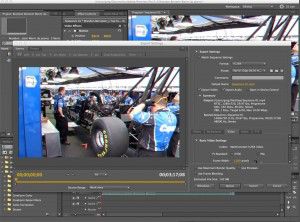
To save and export the video, select file, export, media from the menu bar. I will be exporting it in exactly the same format as I imported it, but you can play with these settings if you want to export your video in a different format, or for another device.
 Once you have exported your new Anaglyph 3D video file, All you need to do now is put on your Red/Blue 3D glasses, turn your volume up to 11, and enjoy this AWESOME video from z400hauls in 3D!
If you, or your friends pass out, or barf, try reducing the Parallax Effect by moving your Red/Left and Blue/Right fields closer together 🙂
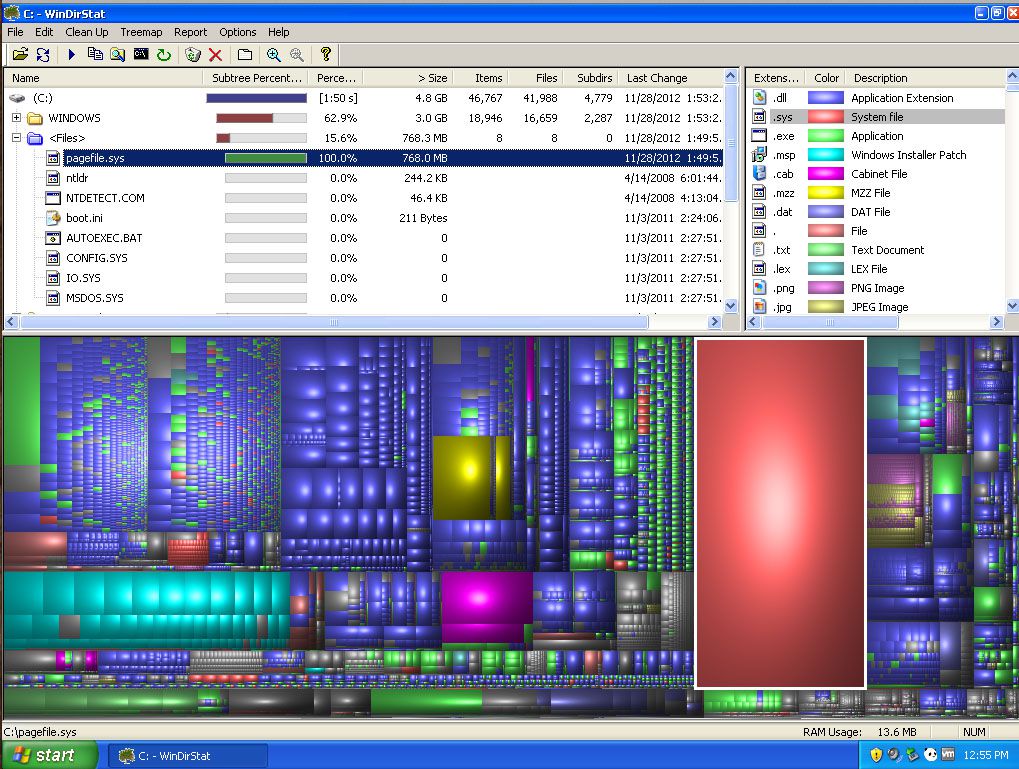
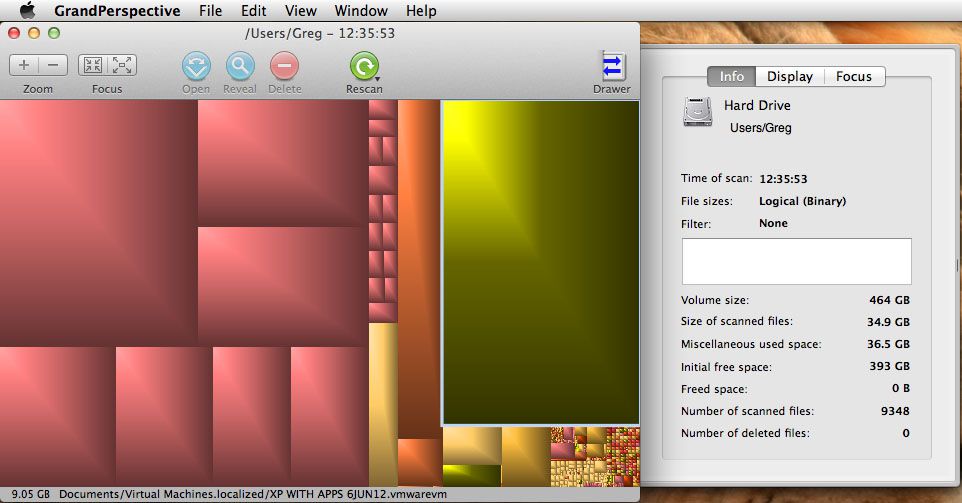
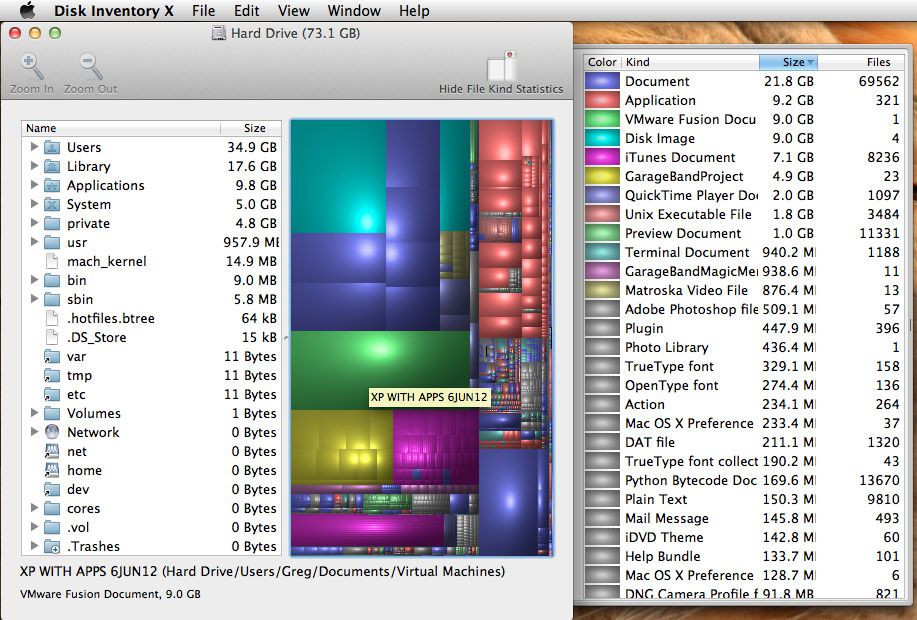
 Earlier today I tried to copy a large file I had made in Photoshop and I was told that the operation couldn’t complete because there wasn’t enough room on my hard drive for it. So, I needed a way to get a lot of space back, but I wasn’t sure what was taking up all of the room. I set about looking for ways to see what was going on on my drive and I happened upon some really great tools to help you visualize all your files. The process is called “Treemaps”.
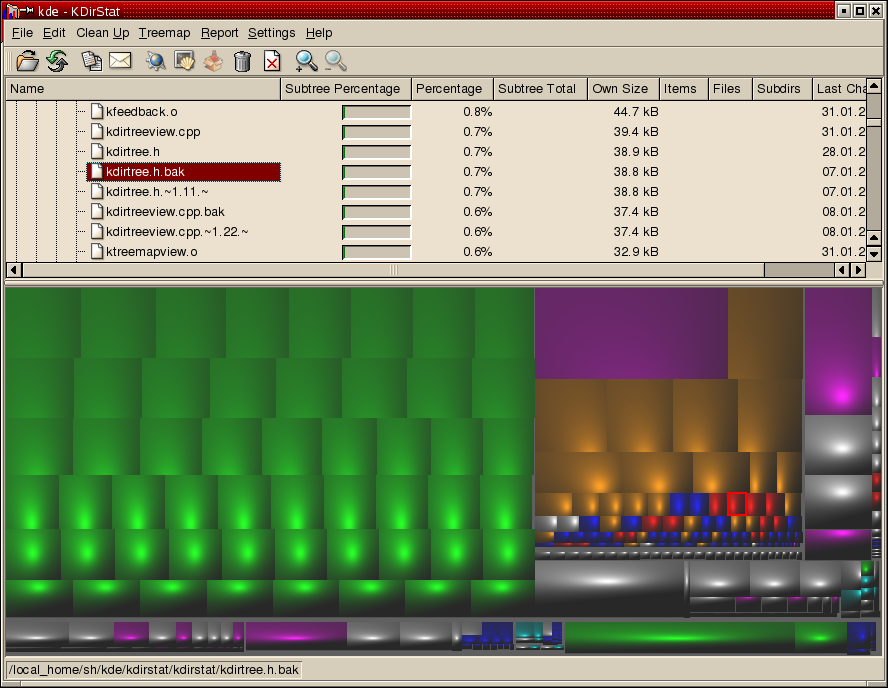 They are all fairly easy to use. Just roll your cursor over the big ones and the filename appears in the bottom left corner of the window. You can then decide which files you want to delete, and start enjoying some free space on your hard drive again.
