 From time to time most of us see something on Youtube that we would like to download and save.
In my case this week, I found a Youtube channel that has the video broadcast from every NHRA drag racing event of the 2012 season. As my wife and I flew from Australia to attend the Sonoma round of racing, it makes a really great souvenir for us to have the video broadcast. The problem is though, Each days racing is split into about 9 or 10 pieces, and it was a three day event. Thankfully though, KMan2100 has arranged the videos into playlists, so they can be viewed in order.

Now, you could download the videos one at a time using the method described in my post about Video Download Helper HERE, but that will take a LOT of time. If you want to download all of the videos in a playlist quickly and easily, you need to make a download list, then download them all!
To do this, you need to be using the Firefox web browser. Its free, it runs on Windows, Mac and Linux, and if you are not already using it, you should be. You can get it free HERE.
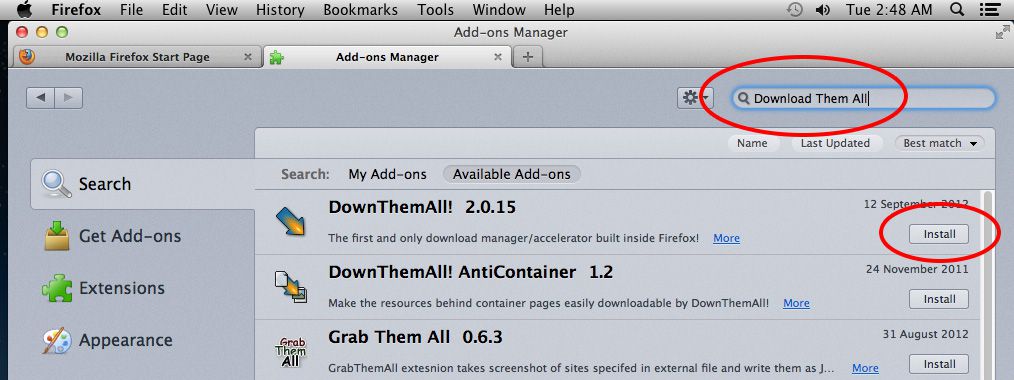
With Firefox open and running, select “Add-ons” from the “Tools” menu in your menu bar. The first Add-on you need is the one that takes all of the videos in the playlist and turns them into a series of links. It is called BYTubeD, Bulk Youtube Downloader. To get it, type “BYTubeD” into the search bar in the top right corner.
 Click the “Install” button to the right of it when you see it in your “results” list. This will download and install it. When this is finished, go back to the search bar and type “Download Them All”. As before, click the “Install” button to the right to install it.

To make your new add-ons active you need to restart Firefox. To do this, simply click the text that says “Restart now”

Once you have clicked restart, you can close the Add-ons window, and any other windows that may have popped up.
And now the fun starts!
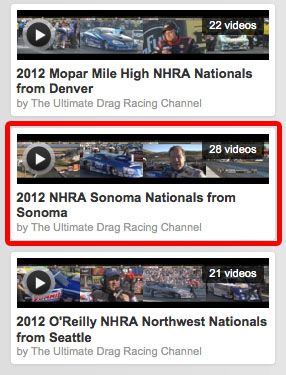
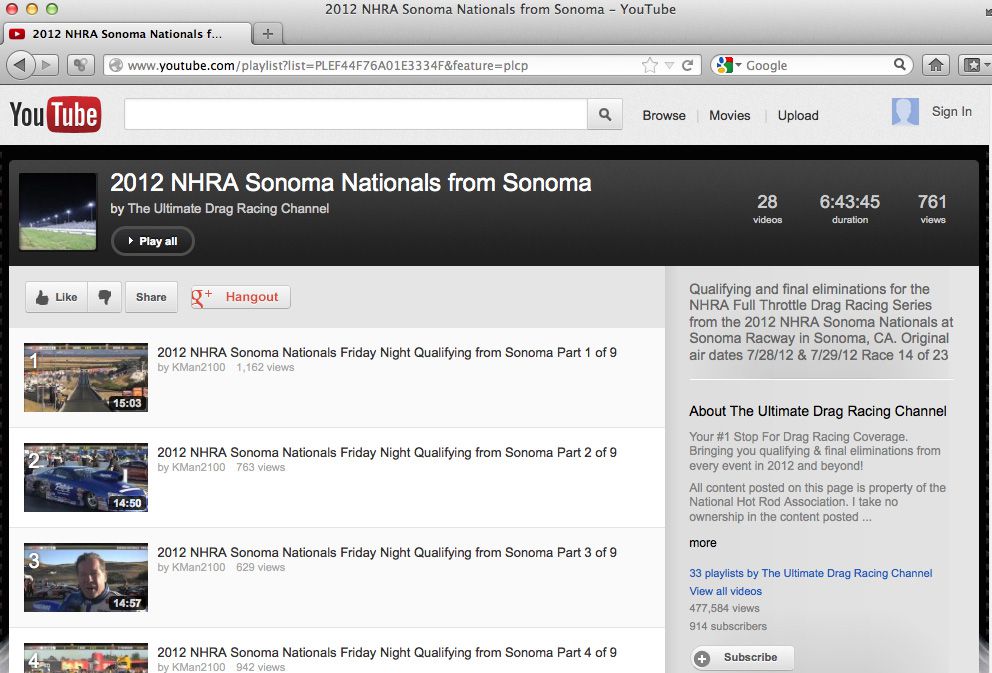
To get downloading, go to Youtube and find your channel, and click the playlist you want to download.

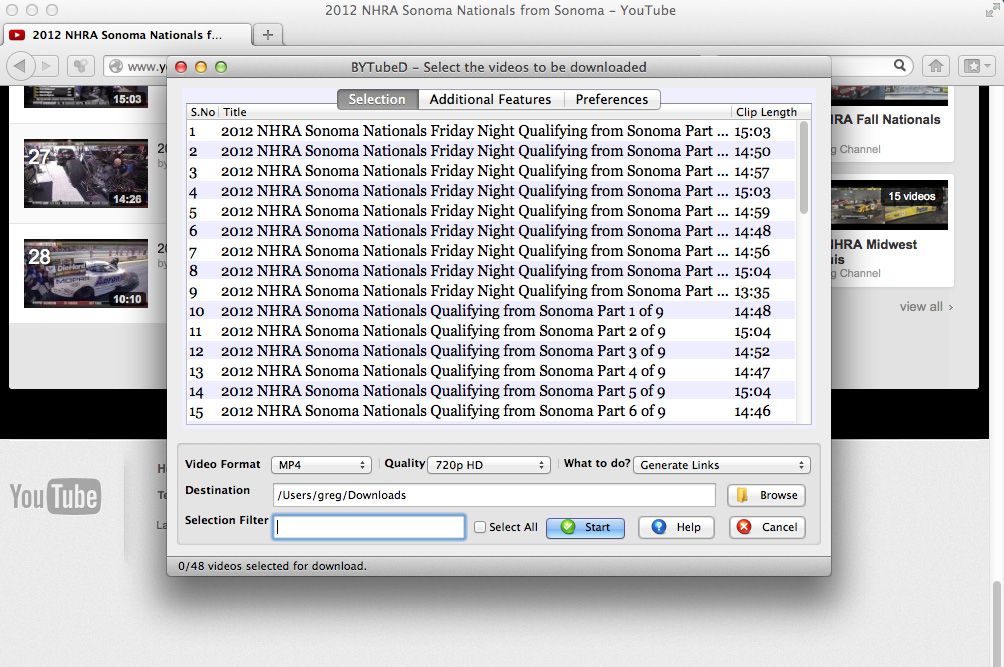
As you can see, there are 28 videos on this playlist. To download them all, open your “Tools” tab on your menu bar and select “BYTubeD”. It should be at the bottom. This will open a new window.

**BEWARE** – Not only does this window contain info for all the videos you want, it also contains the info for other playlists and videos that are on this page that you may not want as well! As highlighted below, you can see the Sonoma videos I want, but I am not interested in Phoenix or Gainsville etc etc…..
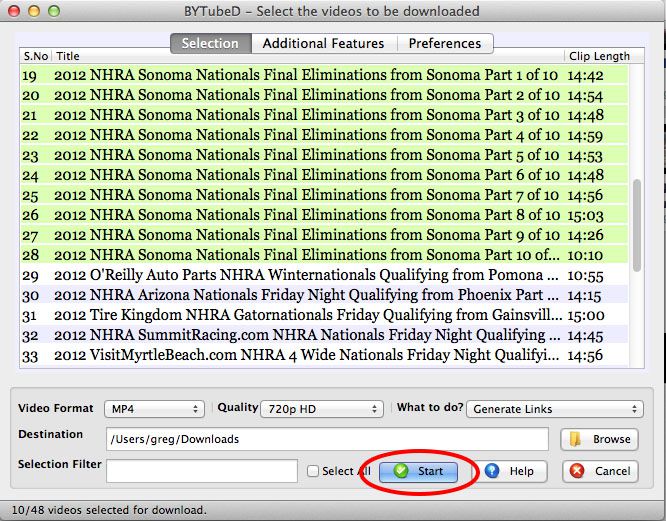
 For the next step, you need to tell BYTubed which videos you DO want to keep. To do this, simply highlight them. To select multiple videos (Which is kinda the point of this article) hold down your control key, then click each one if your using Windows, or your command key and click if you’ve got a Mac. Once you have highlighted the videos you want to download, click the start button.

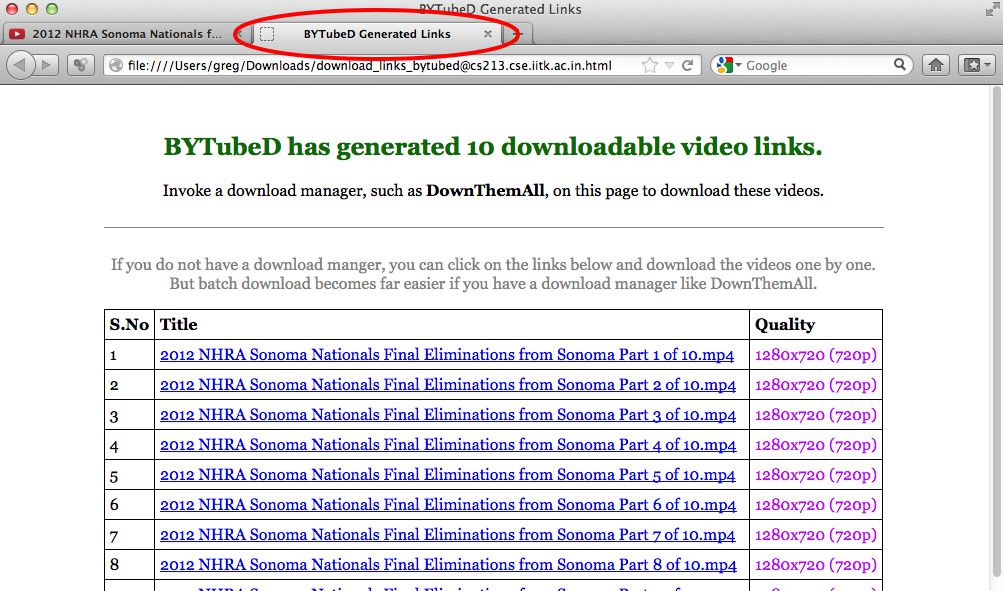
BYTubed will now chew through the playlist and open up a new web page with links to all your videos.

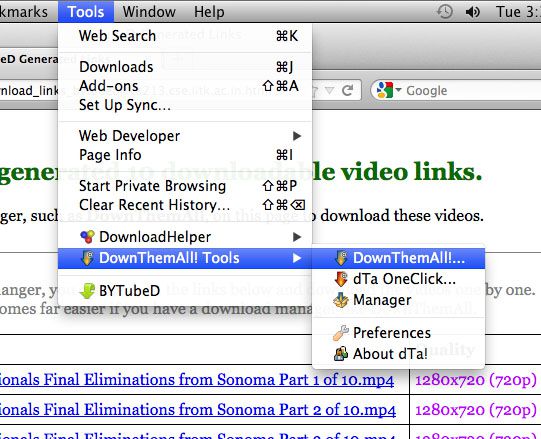
Now’s where the magic happens. To download them all, open “Download Them All” from your “Tools” menu in your menu bar.

All that is left to do now is to check mark (click the circles to the left of the names) the videos you want to keep, choose your download location (I usually download to my desktop) then click “Start” to watch those babies start loading down!

That’s all there is to it!
![]()

