Want to Move Search Bar Back To The Top In Safari On iPhone?
For some reason in iOS 15 Apple decided to turn our world upside down, and put the Search Bar at the bottom of the window in the Safari web browser. To put it back to the top where it has always been open settings
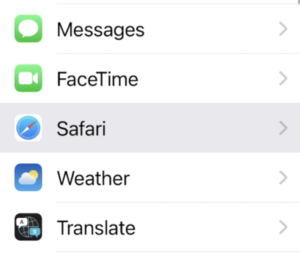
Scroll down to Safari and open it up
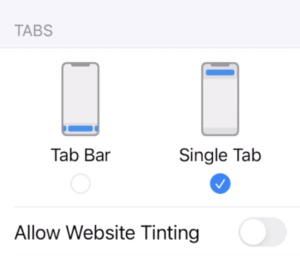
Scroll down about halfway so you can see the “Tab Bar/Single Tab” option – Change this to “Single Tab” as shown below
Now close out of settings and go back into Safari, and your Search Bar is back where it belongs
I haven’t had a High Horse opinion on this site since 2011, but this change has really made me furious. I wish Apple would focus their attention on making what we have now work reliably, as opposed to changing things needlessly so they can announce it as a new feature at the next World Wide Developers Conference (WWDC).
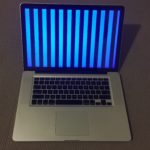
If you are reading this, there is a good chance it is because your 2011 Macbook Pro bit the dust big time, just like mine did. I paid over $3000 for it, and whilst it is 6 years old now I have grown incredibly fond of it, and I really wanted to revive it.
The problem stems from the Graphics Card. There are actually two graphics processors in these machines, the Discrete Card which is an ATI Radeon (This is the one that fails) and an Integrated one, which is an Intel Chip integrated into the motherboard. The reason Apple included two graphics processors is that the ATI Radeon is super fast, which is great for the gaming experience and video, and when you are working on spreadsheets or sending emails, the integrated Intel processor uses way less power and considerably increases battery life. The truth of the matter is, if you aren’t a gamer, the Integrated Intel Graphics Processor is just fine, and thankfully this chip is what allows you to get your machine up and running again.
**THIS HAS WORKED FOR ME – I HOPE IT WORKS FOR YOU, BUT I CANT GUARANTEE IT**
This is not a guaranteed permanent fix – But it has been working for me, and hopefully you experience similar results.
My machine kept crashing not long after it would boot, which made it impossible to work on, until I found out that if you don’t have it plugged in to the power, it should boot using the integrated graphics. When its plugged in the power hungry faulty card is used, so disconnect from power.
Disconnect The Power
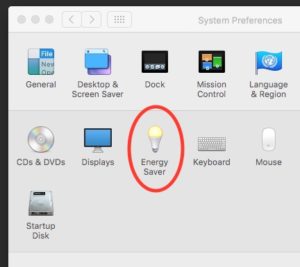
Once you get it booted go into system preferences and look for “Energy Options”
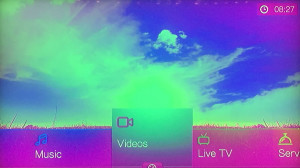
If the power goes off, or I need to reboot my WDTV for any reason, when it comes back on my screen is always tainted with a pink hue, it seems to be called the “Pink Screen Issue”. From what I can gather, its caused by a mismatch in frame rate when using HDMI. Here’s how I fix it on my unit. I hope this works for you as well.
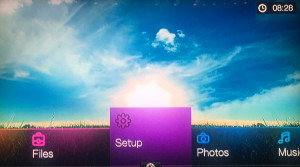
Start at the home screen
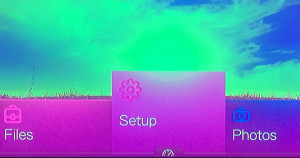
Scroll through and select the “Setup” option
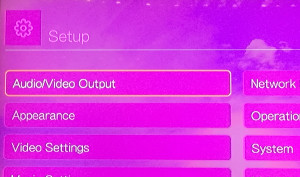
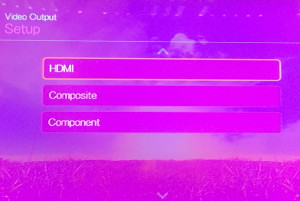
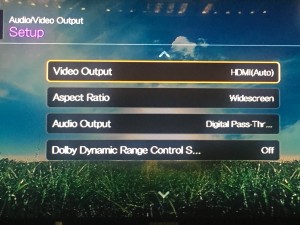
Then select Audio/Video OutputThe next step is to select HDMI
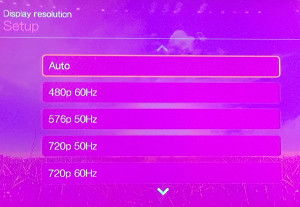
Now select AUTO
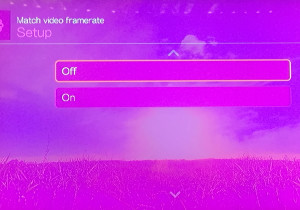
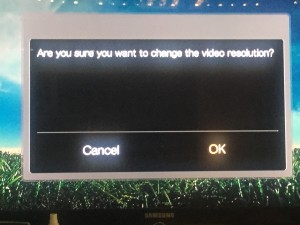
Next, choose OFFPINK BE GONE! Click OK to save the changes
Close out of setup by pressing the Home button on your remote
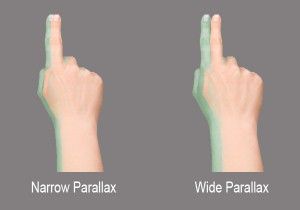
I got an email from a reader asking how 3D movie makers make things feel like they are coming out of the screen. The best answer I can give is that to achieve this effect, you show a lot of depth and dimension when you are actually shooting the video. In other words, have a very distant background, and have the object you want to leap out of the screen positioned a lot closer to the camera. This causes the background to have a narrow parallax effect, and the item in the foreground to have a wide parallax effect.
Here’s a sample video showing the effect, and you will need your red/cyan 3d glasses to see the effect – Check it out! I Got’s me a block of wood Yo! BOOYAH!
httpvh://youtu.be/ekua0h2r8Iw
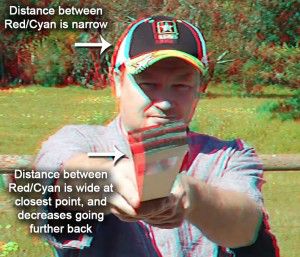
Below is a screen capture from the video. If you look closely at the tip of the block of wood you can see that the gap between the left/red channel of video and the right/blue channel is quiet wide. This distance makes the object appear close to the viewer. If you follow along the length of the piece of wood towards my hands you will notice that the distance between the red and blue channels narrows. This narrowing gives the feeling of depth and dimension, tricking the viewers brain into thinking I am further back in the field.
If this video was shot in 2D and you wanted to convert it to 3D, the perspective of the parallax (The Wood coming out at you) would be lost, and the effect would not be as dramatic. You probably could rebuild it using something like Adobe After Effects, but it would be a MAJOR MAJOR undertaking. The quickest, and easiest way to achieve this effect, is to create it and shoot it in 3D.
If your like me and run Windows on your Mac using VMWARE Fusion, you have probably been getting really frustrated lately at the blank black screen you see when you try to run your virtual machine. I haven’t found a permanent fix for this, and I hope the folks at VMWare are looking into it, but I have found a workaround, which has worked for me.
TRY THIS AT YOUR OWN RISK – I ACCEPT NO RESPONSIBILITY IF YOU BREAK SOMETHING – THIS IS MERELY A RECOUNT OF HOW I WAS ABLE TO RESOLVE THE ISSUE – YOUR RESULTS MAY BE VERY DIFFERENT!!!
I have performed this workaround not only on my Macbook Pro, but on my Mac Pro as well – it worked in both instances.
To begin, I went back to VMWare’s site HERE and re-downloaded VMWare Fusion 4 (I use the lite version without McAfee)
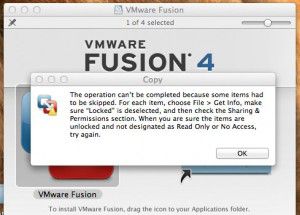
Once the download was complete, I mounted the .dmg and tried to simply drop the app icon onto the Applications Folder……..FAIL!
I cant stress enough, I accept NO responsibility if you try this and it fails for you ok!
At this point I opened up my Applications folder and dragged the VMWare app to the trash – I had to type in my admin password before the system allowed this. Initially I was worried that my license would get deleted as well, but I had a hunch the license would be stored elsewhere deeper in the bowels of my Mac, so I pressed on.
After the app was successfully moved to the trash, I was able to drag the VMWare logo from the .dmg into the Applications folder. Again, I was asked to type in my Admin password.
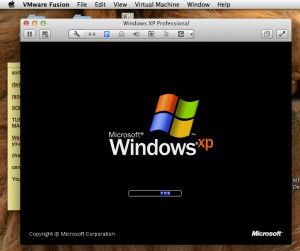
Once it had completed copying, I unmounted the .dmg, and clicked the icon in my dock to boot my Windows XP Virtual Machine. An alert popped up telling me that VMWare had to update some resources, and again I had to type my Admin password……………..AND THEN…..
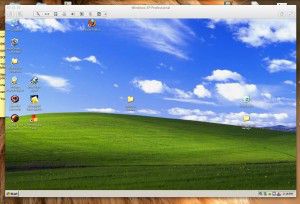
LOOKIN GOOD……………….
YES! Back in the game!
Since I discovered this workaround about 10 days ago, my Mac Pro hasn’t skipped a beat. I updated my Macbook Pro last night with new iCloud features, and my Virtual Machine Black Screened again this morning. So I re-tried the work around for the creation of this article and It worked again for the second time.
I know its a pain to perform, but it did work for me, and if I have to choose between not using my Virtual Machine at all, or spending three minutes performing the workaround to get going again, I know what I would prefer to do.
Lets hope the folks at VMWare sort this one out soon!
We use cookies on our website to give you the most relevant experience by remembering your preferences and repeat visits. By clicking “Accept”, you consent to the use of ALL the cookies.
This website uses cookies to improve your experience while you navigate through the website. Out of these, the cookies that are categorized as necessary are stored on your browser as they are essential for the working of basic functionalities of the website. We also use third-party cookies that help us analyze and understand how you use this website. These cookies will be stored in your browser only with your consent. You also have the option to opt-out of these cookies. But opting out of some of these cookies may affect your browsing experience.
Necessary cookies are absolutely essential for the website to function properly. This category only includes cookies that ensures basic functionalities and security features of the website. These cookies do not store any personal information.
Any cookies that may not be particularly necessary for the website to function and is used specifically to collect user personal data via analytics, ads, other embedded contents are termed as non-necessary cookies. It is mandatory to procure user consent prior to running these cookies on your website.