How I took back control of Music on my iPhone from Apple – A MUST Read for Musicians

iCloud Music Library ErrorsLike millions of other Apple/iPhone users around the world, I turned on Apple Music. Immediately, my whole music collection turned on its head. I had duplicate playlists, song files went missing and couldn’t be located, songs were renamed incorrectly, and music I had on my phone that is not in the Apple music library disappeared. Like most other musicians, I had a lot of music from my own bands there, and lots of music from fav’s who shunned the streaming service, like Prince. This music was ALL gone, and no matter what I tried to do, I just couldn’t get it back onto my iPhone. I tried to click the upload button next to affected tracks in iTunes to supposedly load them to iCloud, and it never worked. I could never get those tracks back onto my phone.

As time went on I grew to like the broad range of tunes available in Apple Music, and I came to accept that I just wasn’t going to have that old music on my phone anymore.

Over the weekend, I did a back up on my wife’s phone, and she asked for a specific playlist we have to be added. As she did not want to use Apple Music when it launched, I was able to click the playlist in iTunes, and sync her phone, and she had the music quickly and easily. It made me so angry that I decided enough was enough. I wanted control of my music back.

After lots of fruitless Googling, I was finally able to figure out what the issue is, and it is not Apple Music at all. It is “iCloud Music Library” that causes all of the problems. All Apple Music does is give you access to over a million songs, but iCloud Music Library tries match all of your music with songs in Apple’s collection, and then give you access to those tracks on your devices. In theory it sounds like a great idea, that should save drive space and give you high quality tunes. In the real world though, it is a poorly developed, rushed out, cacophony of errors that ruined my music collection. If you listen to mostly main stream music your issues might not be so bad, but if you have lots of live music, rare music, old vinyl you have converted yourself, or in the case of musicians your own original music, iCloud Music Library will mismatch, grey out, and in the some cases, remove music entirely from your device. And, no matter what you do, you will not be able to put it back.

**DISCLAIMER** – I TAKE NO RESPONSIBILITY FOR YOUR MUSIC COLLECTION IF YOU DECIDED TO FOLLOW IN MY FOOTSTEPS! PROCEED AT YOUR OWN RISK!
THIS ARTICLE EXPLAINS HOW I GOT MY COLLECTION BACK TO WHERE I AM HAPPY WITH IT – THESE RESULTS MAY NOT BE SUITABLE FOR YOU.

In the end, it really only took one simple step to end this misery, regain control of what music is on my phone, and still have access to songs not in my collection via Apple Music.

I Turned off “iCloud Music Library” on my phone.
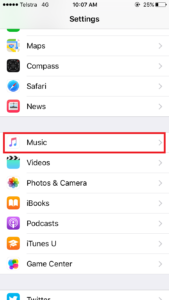
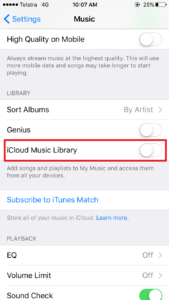
Music in SettingsI went to settings and selected music:

Turn Off iCloud Music LibraryThen I turned “iCloud Music Library” off, and got control of my Music Collection back!

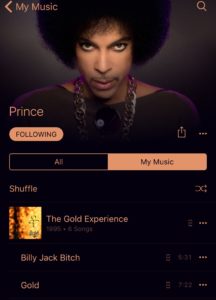
Now, doing this is not without its perils, it turns your iPhone music collection on it’s head again, just like it did when Apple Music turned it on. A large majority of my music disappeared immediately, as it was matched (poorly) with music in Apple’s cloud. Thankfully, all of my original playlists before Apple Music were still on my Mac Pro, so when I did my first sync after flipping the switch, and I was able to select which music I wanted myself again, ALL of my music pre Apple Music was back! My 80’s Hairbands playlist went from 230 songs back up to its original 400. And lo and behold, the Gold Album was there as well.

Prince in Music

The Down Side to switching off iCloud Music Library – All of the tunes I added to my iPhone  collection from Apple Music had disappeared. Playlists containing Apple music disappeared. The ability to click the plus “+” button and save a song to my phone is no longer available. I can still search for and play any song on Apple Music, but I can’t add those songs to my device or use them in playlists, because Apple is a big whiny greedy baby!
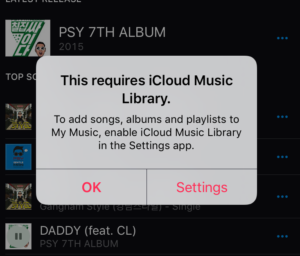
Waaa - You must use icloudWaaaaa – You cant save this song to your phone cos we want you to use
iCloud Music Library – Waaaaa-Ha-Haaaaa!!!!
NEWSFLASH APPLE – Not everybody wants to sync their computer playlists to their iPhones and vice versa!

The bottom line is I now have control again, I have all of my favorite music back on my device, and I can control what is on there and what is not. I have lost a lot of functionality with Apple Music, and it is a small price to pay in my opinion, because I can still listen to those songs, and I finally have The Con!
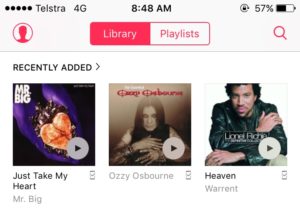
Lionel Ritchie in WarrantLionel Ritchie – Now a member of Warrant – Thanks Apple Music!

Quickly and Easily Download, Convert and Burn Media with Wondershare Video Converter Ultimate

Wondershare-Video-Converter-Ultimate-Logo

Smartphones, iPads, Laptops, Desktops, iTV’s, Game boxes, it’s amazing how many different ways we can watch video/tv these days. I, like many other people get most of the stuff I watch from the internet, and for the past few years have had to jump through a series of hoops to download my content, convert it to suitable formats, and load it onto my devices. Recently I was made aware of a piece of software that simplifies, and streamlines the whole process, called Wondershare Video Converter Ultimate.

Available for Windows and Mac, Wondershare Video Converter Ultimate has some really nice features to make your life a lot easier. Not only can you drop videos you already have into it and re-encode them into a format suitable for any of your devices in 2x clicks (1 to pick your device, another to start the conversion), the software can even download new content for you from a number of sites, and format that for you as well!

wondershare-video-converter-ulimate-main-window

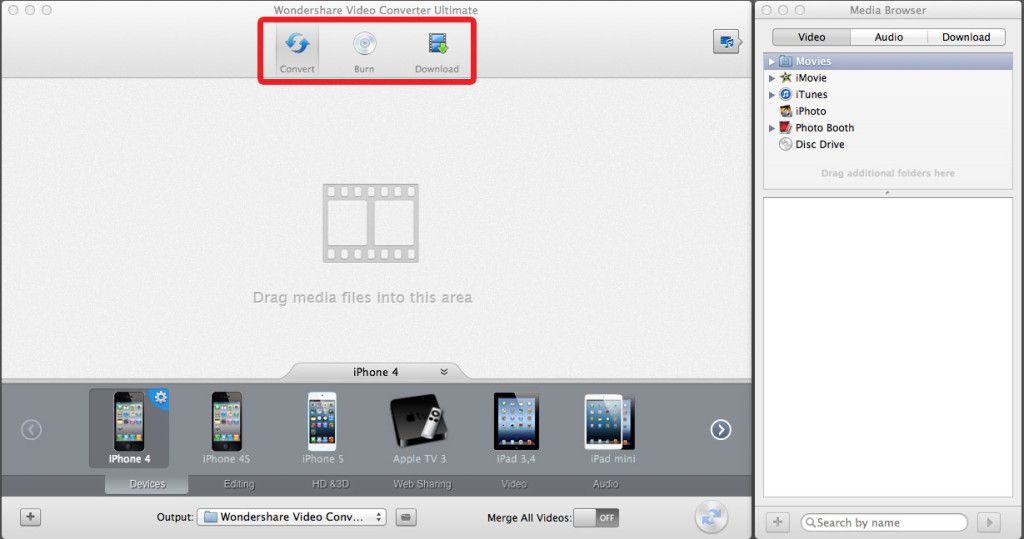
To get started, there are three buttons at the top of the main window. The CONVERT button allows you to convert your video to different formats for different devices (which you can select by clicking the appropriate picture at the bottom of the screen), and you can even make your own custom profiles. The BURN button takes you to a screen where you can simply drop your video files in, and press burn, and the program will author and burn a DVD for you. The DOWNLOAD button allows you to navigate to media you want to keep, and it will download that media for you, and save it to your local media library, where you can use it later in either the Convert or Burn areas of the program.

A friend of mine has a music video on Youtube that I really like, and I wan’t to put it on my iPhone so I can watch it, but I also want to be able to listen to it as well. I can do that easily with Wondershare Video Converter Ultimate.

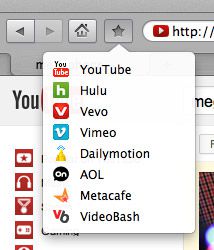
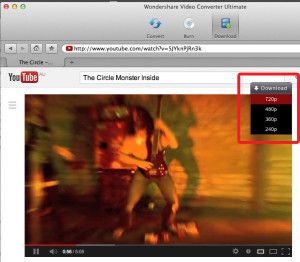
Clicking the Download button takes you to a Web Browser inside the program, and there are some bookmarks already set out for you to help you get started. In this case, I am going to navigate to Youtube.

download-bookmarks

Once you have found the file you want to download, click the download button at the top right of the window, and select which definition version you want.

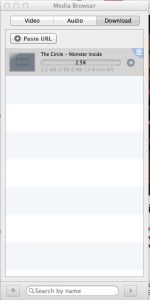
Download-ButtonThe video will now start downloading in the media browser.

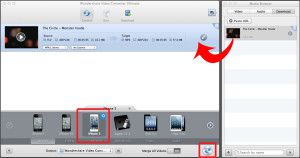
Download-ButtonOnce the video has completed downloading, you can then switch to Convert Mode, and drag the downloaded video into the convert area. Select your conversion profile from the categories below (In my case, iPhone 5), and then click the convert button.

download-to-converter

Once converting begins, you will see a progress bar. You can also tell the program to automatically add the newly converted file to iTunes when its done!

video-progress

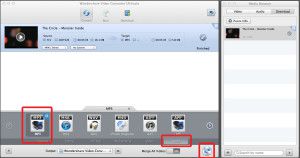
That’s how easy it is to add a video, and now lets extract the audio out of the video to a MP3, so we can listen to it, and put it in a playlist with our other favorite music. All you have to do to make the same file into a MP3, is click AUDIO at the bottom of the profiles area, click the MP3 icon, and click the Convert button again, and Wondershare Video Converter Ultimate will now make the video into a music file.

video-audio

You can then load it onto your MP3 player!

Wondershare says:

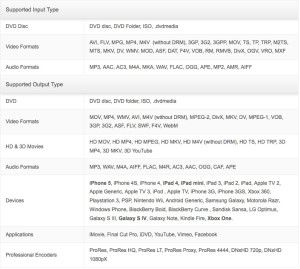
“anyone can easily convert video to 158 formats, including MOV, M4V, MP4, WMV, MKV, AVI, XviD,MPEG, DVD-Video, FLV, 3GP and load more–perfect to fit your iPad, iPhone(iPhone 5 included), iPod(iPod Touch 5 included), android,windows Phone,PSP, Xbox 360 and a rainbow of other devices.”

Below is a list of all supported formats.

Wondershare-supported-formats

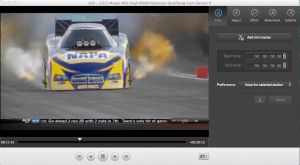
Some other cool features I really like is that you can also crop your videos so they fit your screen better, you can trim out unwanted stuff from your videos (like commercials), you can merge multiple videos into one file, perform color corrections, De-Interlace, and a swag of other really cool tweaks.

wondershare-editing-windowYou can download your free trial of Wondershare Video Converter Ultimate for Mac or Windows HERE.

You can also purchase a license key from Wondershare for $59.95 – A small price to pay for such a great piece of software!

Easily add Meta Tags to your music with Musicbrainz Picard

musicbrainz-picardThere’s nothing I hate more than dropping new music into my iTunes library only to learn once it has finished importing that it doesn’t have meta-tags (No Song Name, Artist, Album Title etc etc). So now, before I add new music, I run it through MusicBrainz Picard. Here’s the programs description from their site:

“MusicBrainz Picard is a cross-platform (Linux/Mac OS X/Windows) application written in Python and is the official MusicBrainz tagger.

Picard supports the majority of audio file formats, is capable of using audio fingerprints (PUIDs, AcoustIDs), performing CD lookups and disc ID submissions, and it has excellent Unicode support. Additionally, there are several plugins available that extend Picard’s features.

When tagging files, Picard uses an album-oriented approach. This approach allows it to utilize the MusicBrainz data as effectively as possible and correctly tag your music. For more information, see the illustrated quick start guide to tagging.

Picard is named after Captain Jean-Luc Picard from the TV series Star Trek: The Next Generation.”

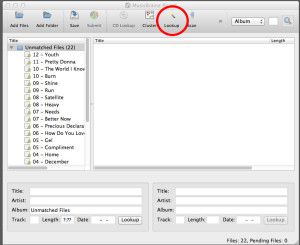
To get started, download and install MusicBrainz Picard HERE. Once you are up and running, drop the music files you want to tag anywhere in the window. They will then populate the list on the left called unmatched files.

mb1

When you have finished adding files, click the line of text with the folder icon next to it that says “Unmatched Files” to make it active. When it is active it will become highlighted. Now, go ahead and press the “Lookup” button, and MusicBrainz Picard will start scanning your music and comparing it to their database for identification.

mb2

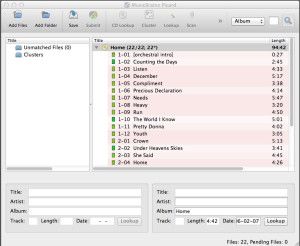
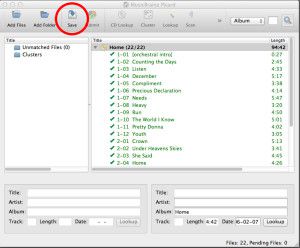
Once MusicBrainz Picard has identified the album and added all of the songs to it, the CD icon next to the album name will turn gold in color. If you don’t have all of the songs from the album, it doesn’t matter, you can still proceed, but the CD icon stays silver. The next step is to click Album Name next to the CD icon to make it active, and highlighted. You can now click “Save”.

mb3

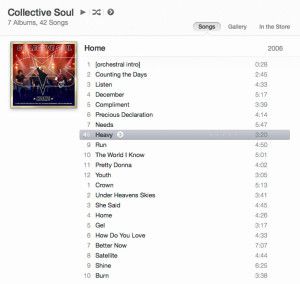
MusicBrainz Picard will now write the Meta Tag Data directly into your music files. Once it has completed, you can close out of the program, and then drop your music files into iTunes, and everything will be correctly categorised and ready to play.

mb4

How to listen to 80’s Hairband’s Music and other Internet Radio Stations 24 Hours a day – Part One – On The Go

I just love the internet radio station 181FM 80’s Hairbands. I love all of those glam rock bands like Poison, Motley Crue and Bon Jovi. I find myself listening to it daily, and in a variety of places. It occured to me that not everybody is aware of internet radio, and the plethora of cool music that is available to you, so I thought I would put together a tutorial on how you can listen to any of the thousands of internet radio stations anywhere, 24 hours a day, and we’ll use 80’s Hairbands as an example.

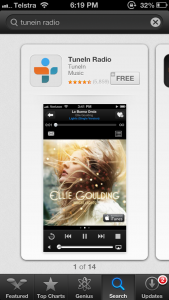
Part 1 – If you want to listen in your car, or through your head phones on the go, your phone is the best bet. Navigate to the App store for your phone (I’m using iPhone for this tutorial, but Tune In has a Free app for Android, Palm, Blackberry and Windows phones as well – see HERE) and search for the FREE Tune In Radio App.

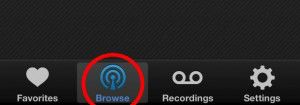
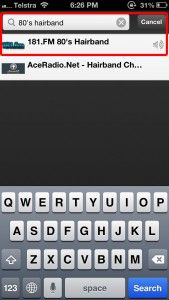
Once you have downloaded and installed the app, open it and press “Browse” down the bottom.

In the search bar that appears at the top, type “80’s Hairband”

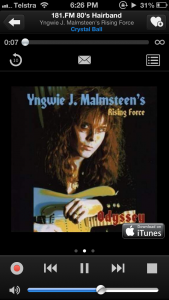
181FM 80’s Hairband Station should be the first one, so click it, and it should start playing. With in seconds of pressing it for this tutorial, I was listening to Malmsteen….SWEET HUH!

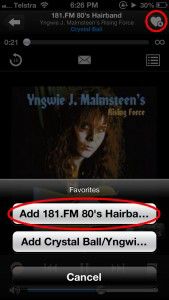
At this point it is important to make the station a favorite, so each time you want to listen, you dont have to go through the whole searching routine. To make it a Favorite, press the “Heart” in the top right corner, and then press “Add 181fm 80’s Hairbands to Favorites”.

Another station I also recommend is the Hard Drivin Radio NetworksBig 80’s Metal


How to listen to 80′s Hairband’s Music and other Internet Radio Stations 24 Hours a day – Part Two – At Work

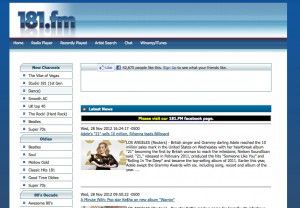
In PART 1, we looked at how to listen to internet radio (specifically 181FM 80’s Hairband Station) on the go. In this part, we will look at two ways to listen at the office on your computer with a web browser, assuming your computer has sound capabilities. The quickest and easiest way to listen is to simply navigate to www.181.fm.

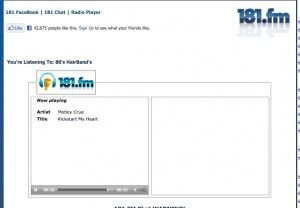
Once there, you will find a list of ALL of their cool stations down the left hand side. There’s SO much good music to listen to there. But if its Glam your looking for,  Just navigate down to “80’s Hairband”, and click it. A new window will open with a player in it, and it should start playing immediately.

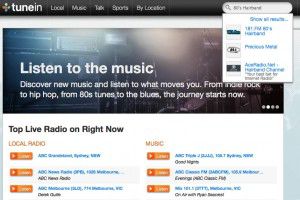
Another way to listen to internet radio through your web browser is to go to Tunein.com, and in this case, again, we will search for “80’s Hairband” in the search bar at the top.

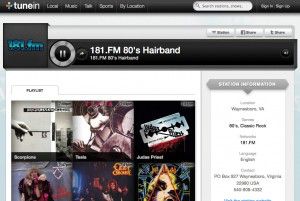
Once 181FM 80’s Hairbands appears, click it to open a new window which contains a player, and even the album art for the songs it is playing.

How to listen to 80′s Hairband’s Music and other Internet Radio Stations 24 Hours a day – Part Three – At Home

In Part 2, we looked at how to play Internet Radio on a web browser, but at home you are more likely to have iTunes installed, which is a better way to listen in my opinion.

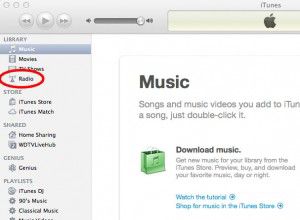
With iTunes open, look down the left hand side, and find the word “Radio”.

Bet you didn’t even know that was there did you! Give it a click, and behold the staggering amount of music you have access to that you didn’t even know was there!

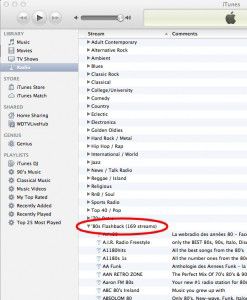
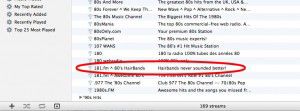
Towards the bottom of the list you will find 80’s Flashback. Expand this category by clicking the triangle to the left, and way down the bottom you will find 181FM 80’s Hairband.

Give it a click, and it will start playing.

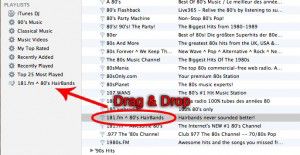
To avoid having to do the search each time, just grab the listing for “181FM 80’s Hairband” and drag it to the playlist area and drop it.

It will create a link to the station, so next time you want to listen, all you need to do is click the playlist, and it will start playing immediately. Cool Huh!