How To Make Your Own Internet TV Show – Part 5 – Desktop and Browser Capture

Web Browser and Desktop Capture in Vidblaster Image

Part 5 – Desktop and Browser Capture

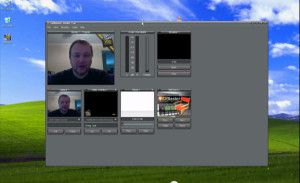
In this video I show you how to capture your desktop, and incorporate your web browser into your Vidblaster setup in either Windows or Mac, so you can include media (Such as Youtube) in your broadcast.

Note to Pros – These articles are aimed at beginners, who wish to spend little or no money until they have a grasp on the topic, and are hoping to learn how to get started quickly and easily, using equipment they most likely already have.

httpvh://youtu.be/b9IieU22bF8

You can download a free unrestricted trial copy of Vidblaster from vidblaster.com

vidblasterbuynow234x60
Part 1 – Selecting Video Switcher Production Software – The Heart of Vidcasting – VIEW HERE
Part 2 – Installing Vidblaster, Connecting Your Webcam, Switching and Interface Basics – VIEW HERE Part 3 – Adding Additional Cameras – VIEW HERE
Part 4 – Mixing Audio, Mics, and Avoiding Looping in Software – VIEW HERE
Part 5 – Desktop and Browser Capture – VIEW HERE
Part 6 – Connecting Guests Via Skype – VIEW HERE
Part 7 – How To Make A Lower Third Overlay – VIEW HERE
Part 8 – Adding flair with Effects, Soundboards and Chat Streams – COMING SOON!
Part 9 – Green Screen/Chroma Keying and Virtual Sets with iClone – COMING SOON!
Part 10 – Recording and Streaming – COMING SOON!

Stop FaceTime asking for a Password in OS X Mavericks

Facetime LogoAll of a sudden, when I turn on/log in on my Macs that are running OS X Mavericks, I am getting a window that asks me to input the password for FaceTime. This really started driving me crazy, as I don’t use FaceTime, and I don’t even have a camera connected to my Mac Pro.

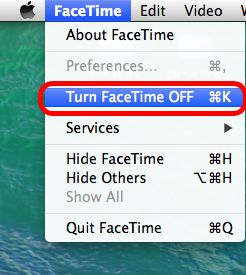
Facetime Password RequestTo stop this from happening, I just turned FaceTime off. To do this, open a new finder window, and then open your Applications folder. Now click/open FaceTime. Click and drag down the “FaceTime” menu option and simply select “Turn FaceTime Off”.

turn-facetime-off


Native 3D Editing in Premiere Pro with Vision 3 QuickS3D Plug-In

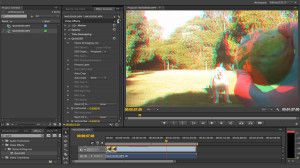
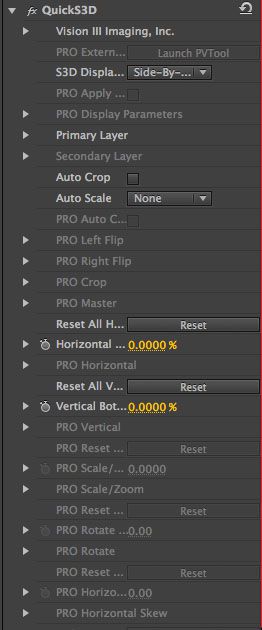
QuickS3D Plug In Sceen ShotRecently I learned about Vision 3’s QuickS3D plug-in, which provides the ability to edit 3D Multiple Streams (Stereo Pairs) and Side By Side (Multiplexed) video natively in Adobe Premiere Pro and After Effects.

After Watching several demonstration videos about the plug-in, and reading Vision 3’s site, I just had to have it. There are two different versions of the plug-in, A Lite version aimed at home users for $49, and a Pro version for $299. Most users will get the functionality they need in the Lite version.

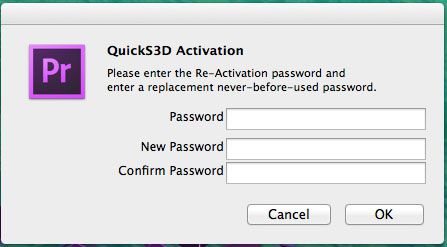
There is no trial version of the software available, so I decided to jump in and purchase the Lite version for $49. Within minutes, I had a link to download the plug-in, as well as my activation key. I downloaded the software, and it installed easily. Upon opening Premiere Pro I was asked to supply my activation key, and upon submitting, I was presented with another window asking me for a password?

Quicks3d-activation-windowAt first I was confused as to the purpose of this secondary password request window, so I began to search through the documentation supplied with the plug-in, read the EULA, and found no reference to it. I searched the Vision 3 website, and the support forums, and again, no information was found. I did notice the forum had been spammed though.

QuickS3D Forum After spending some time contemplating the situation, I entered some passwords and it activated, and Premiere Pro opened up. I imported some Side By Side 3D video and started playing with it. As claimed, the QuickS3D does indeed provide the ability to edit 3D video natively. I especially liked the way I was able to add titles to my video, apply the plug-in, and create a really nice 3D effect between the text and the background video. It felt like the text was jumping out of the screen at me.

What I didn’t like on first glance, which became incredibly annoying after applying the plug-in a few times was seeing all of the “PRO” version options greyed out. Screen real estate is at a premium in Premiere Pro anyway, but seeing so much space taken up by information which is irrelevant to me became infuriating quickly, and started to feel like a “In App Advertisement” designed to frustrate me into spending another $250 upgrading to the “PRO” version.

Quicks3d-optionsThe basic functionality of the plug-in felt a bit buggy to me at first, as quite a few times my video seemed to automatically revert back to Side By Side, not long after switching to Anaglyph mode. Having said that, this behavior did settle down after a while. I guess I might have been dragging across the “Display” option drop down somehow and once I got used to the plug-in a little more I stopped doing it? Maybe…But probably not…

Of the few options available in the Lite version, the basic tasks most of us will want to use are available. Features as listed from the Vision 3 Website:

Display Features

  • Top/Bottom
  • Side – by – Side
  • Frame Offset to Sync
  • Work with Stereo Pairs or Multiplexed file
  • Onion Skin (50-50)
  • Anaglyph (Red/Cyan)
  • v3 Parallax

Image Adjustments

  • Auto Crop
  • Scale to Fit
  • Scale to Fill
  • Stretch to Fit

Alignment Tools

  • Percent Only
  • Horizontal/Vertical Only

A feature I really liked is the auto crop option. This comes in very handy when adjusting the horizontal and vertical placements of the left and right channels. Using “Scale To Fit” the plug-in will scale your video so both channels fit correctly in the frame.

At this point, I was quite happy with my purchase, and decided to grab my Macbook Pro to write a review. After pondering the implications of the “Passwords” dialogue box, I came to the conclusion that the developer must have been taking a sensible approach to licensing, by allowing us the opportunity to transfer our single machine license to another machine, giving us the option to “Choose” which single machine we use our license on, as Adobe does… WRONG!

After installing the plug-in on my second machine, I tried to input my passwords from my first machine to no avail, I tried to create new passwords to no avail, and after 3 attempts, the plug-in no longer worked on EITHER machine!

Quite concerned, I re-read the documentation that came with the software, double checked the website and forum, Googled my problem, and found nothing. Under the “Support” option on Vision 3’s website I selected “Email Us”, and sent in a request for support/clarification regarding the purpose of the “Passwords” dialogue box. A few minutes later I received an automated reply with a Ticket number saying I would receive support soon…..

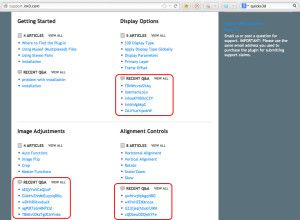
After a few days I still had not heard back, and sent of another request for support. 3 WEEKS LATER I have still yet to hear back from Vision 3 regarding this issue! And not surprisingly, the spam has not been cleaned/removed from the support forum.

The Bottom Line – In My Humble Opinion: Vision 3’s buggy QuickS3D Plug-In, whilst bursting with potential, is yet another piece of potentially excellent software crippled with anti-piracy measures to the point where those that have purchased it are “Guilty until deemed Innocent”. Vision 3 has no interest in supporting it’s paying customers or keeping a secure spam free support forum, they are interested only in getting your money. VERY DISAPPOINTING!

How To Make Your Own Internet TV Show – Part 3 – Adding Additional Cameras

Adding Additional Cameras
Part 3 – Installing Additional Cameras

In this video I show you how to add additional cameras to your Vidblaster setup in either Windows or Mac, and how easy it is to switch between them.

Note to Pros – These articles are aimed at beginners, who wish to spend little or no money until they have a grasp on the topic, and are hoping to learn how to get started quickly and easily, using equipment they most likely already have.

httpvh://youtu.be/VTpJ5ZkTShQ

You can also use your iPhone, Android and Nokia smart phones as cameras by using Epoccam as shown in this tutorial.

httpvh://youtu.be/Z5E-vEalubM

You can download a free unrestricted trial copy of Vidblaster from vidblaster.com

vidblasterbuynow234x60
Part 1 – Selecting Video Switcher Production Software – The Heart of Vidcasting – VIEW HERE
Part 2 – Installing Vidblaster, Connecting Your Webcam, Switching and Interface Basics – VIEW HERE Part 3 – Adding Additional Cameras – VIEW HERE
Part 4 – Mixing Audio, Mics, and Avoiding Looping in Software – VIEW HERE
Part 5 – Desktop and Browser Capture – VIEW HERE
Part 6 – Connecting Guests Via Skype – VIEW HERE
Part 7 – How To Make A Lower Third Overlay – VIEW HERE
Part 8 – Adding flair with Effects, Soundboards and Chat Streams – COMING SOON!
Part 9 – Green Screen/Chroma Keying and Virtual Sets with iClone – COMING SOON!
Part 10 – Recording and Streaming – COMING SOON!

Quickly and Easily Download, Convert and Burn Media with Wondershare Video Converter Ultimate

Wondershare-Video-Converter-Ultimate-Logo

Smartphones, iPads, Laptops, Desktops, iTV’s, Game boxes, it’s amazing how many different ways we can watch video/tv these days. I, like many other people get most of the stuff I watch from the internet, and for the past few years have had to jump through a series of hoops to download my content, convert it to suitable formats, and load it onto my devices. Recently I was made aware of a piece of software that simplifies, and streamlines the whole process, called Wondershare Video Converter Ultimate.

Available for Windows and Mac, Wondershare Video Converter Ultimate has some really nice features to make your life a lot easier. Not only can you drop videos you already have into it and re-encode them into a format suitable for any of your devices in 2x clicks (1 to pick your device, another to start the conversion), the software can even download new content for you from a number of sites, and format that for you as well!

wondershare-video-converter-ulimate-main-window

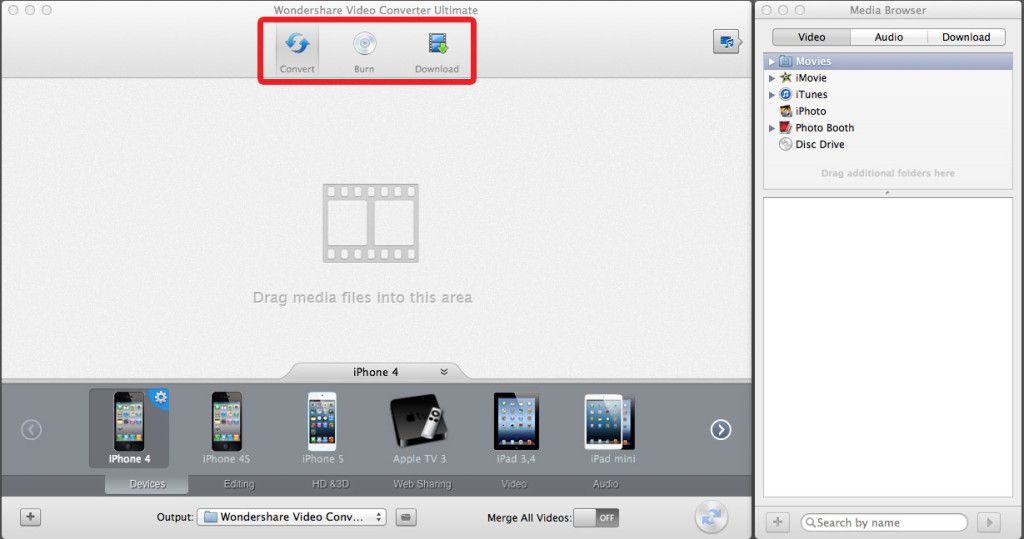
To get started, there are three buttons at the top of the main window. The CONVERT button allows you to convert your video to different formats for different devices (which you can select by clicking the appropriate picture at the bottom of the screen), and you can even make your own custom profiles. The BURN button takes you to a screen where you can simply drop your video files in, and press burn, and the program will author and burn a DVD for you. The DOWNLOAD button allows you to navigate to media you want to keep, and it will download that media for you, and save it to your local media library, where you can use it later in either the Convert or Burn areas of the program.

A friend of mine has a music video on Youtube that I really like, and I wan’t to put it on my iPhone so I can watch it, but I also want to be able to listen to it as well. I can do that easily with Wondershare Video Converter Ultimate.

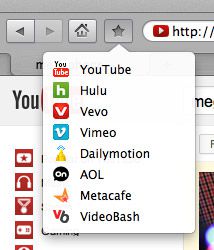
Clicking the Download button takes you to a Web Browser inside the program, and there are some bookmarks already set out for you to help you get started. In this case, I am going to navigate to Youtube.

download-bookmarks

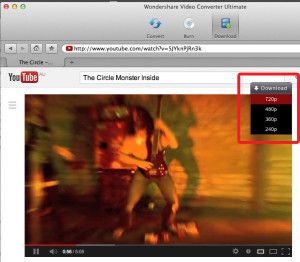
Once you have found the file you want to download, click the download button at the top right of the window, and select which definition version you want.

Download-ButtonThe video will now start downloading in the media browser.

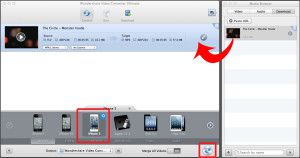
Download-ButtonOnce the video has completed downloading, you can then switch to Convert Mode, and drag the downloaded video into the convert area. Select your conversion profile from the categories below (In my case, iPhone 5), and then click the convert button.

download-to-converter

Once converting begins, you will see a progress bar. You can also tell the program to automatically add the newly converted file to iTunes when its done!

video-progress

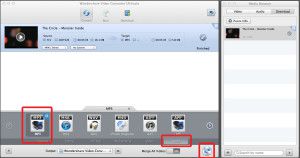
That’s how easy it is to add a video, and now lets extract the audio out of the video to a MP3, so we can listen to it, and put it in a playlist with our other favorite music. All you have to do to make the same file into a MP3, is click AUDIO at the bottom of the profiles area, click the MP3 icon, and click the Convert button again, and Wondershare Video Converter Ultimate will now make the video into a music file.

video-audio

You can then load it onto your MP3 player!

Wondershare says:

“anyone can easily convert video to 158 formats, including MOV, M4V, MP4, WMV, MKV, AVI, XviD,MPEG, DVD-Video, FLV, 3GP and load more–perfect to fit your iPad, iPhone(iPhone 5 included), iPod(iPod Touch 5 included), android,windows Phone,PSP, Xbox 360 and a rainbow of other devices.”

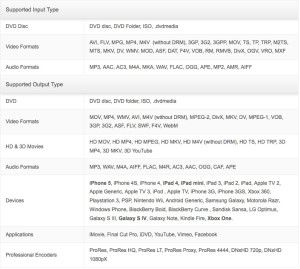
Below is a list of all supported formats.

Wondershare-supported-formats

Some other cool features I really like is that you can also crop your videos so they fit your screen better, you can trim out unwanted stuff from your videos (like commercials), you can merge multiple videos into one file, perform color corrections, De-Interlace, and a swag of other really cool tweaks.

wondershare-editing-windowYou can download your free trial of Wondershare Video Converter Ultimate for Mac or Windows HERE.

You can also purchase a license key from Wondershare for $59.95 – A small price to pay for such a great piece of software!
How To Make Your Own Internet TV Show – Part 2 – Installing Vidblaster, Connecting Your Webcam, Switching and Interface Basics

vidblaster-basics PART 2 – Installing Vidblaster, Connecting Your Webcam, Switching and Interface Basics

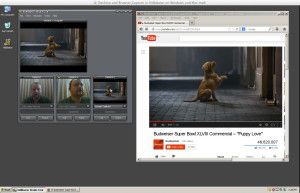
In this tutorial I show you how easy it is to install Vidblaster in both Mac and Windows, and get started with some basic switching between modules, adding a title, playing a video and showing a picture.

Note to Pros – These articles are aimed at beginners, who wish to spend little or no money until they have a grasp on the topic, and are hoping to learn how to get started quickly and easily, using equipment they most likely already have.

httpvh://youtu.be/wk7UC-ZVHeI

You can download a free unrestricted trial copy of Vidblaster from vidblaster.com

vidblasterbuynow234x60
Part 1 – Selecting Video Switcher Production Software – The Heart of Vidcasting – VIEW HERE
Part 2 – Installing Vidblaster, Connecting Your Webcam, Switching and Interface Basics – VIEW HERE Part 3 – Adding Additional Cameras – VIEW HERE
Part 4 – Mixing Audio, Mics, and Avoiding Looping in Software – VIEW HERE
Part 5 – Desktop and Browser Capture – VIEW HERE
Part 6 – Connecting Guests Via Skype – VIEW HERE
Part 7 – How To Make A Lower Third Overlay – VIEW HERE
Part 8 – Adding flair with Effects, Soundboards and Chat Streams – COMING SOON!
Part 9 – Green Screen/Chroma Keying and Virtual Sets with iClone – COMING SOON!
Part 10 – Recording and Streaming – COMING SOON!