Speed Up Your Mac – Quick Easy way to make Mac OS X Lion/Mountain Lion faster

Mac OS X LionI am sure there are dozens of methods, and dozens of programs and apps that do wonderful things for your Mac computer running OS X Lion/Mountain Lion, but in my opinion, the folks at Apple have built in the best, quickest, and easiest way to give your Apple computer a boost. It’s called “Repair Permissions”.

A few years ago I was involved heavily in editing high def video for a motorsport operation, and it never ceased to amaze me how much quicker and happier my mac pro was after a permissions repair.

**NOTE** – It can take a while for this operation to complete, so make sure you have plenty of down time before tying up your computer with this procedure.

The good thing about OS X Lion/Mountain Lion is that you don’t have to go and find your install disk to do this anymore (Like you used to have to do with Snow Leopard, Leopard and Tiger). When you installed Lion/Mountain Lion, it created a rescue partition for you, and to access this partition, and speed up your mac, all you gotta do is hold down your “ALT” key, and turn your mac on! Once you here the “BONG” sound, you will see this:
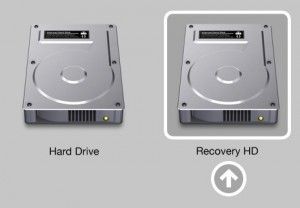
Mac Alt Recovery HDWhen your Mac boots, it selects the regular hard drive automatically. But when you hold down the ALT key, your telling your Mac that you want to see what other devices you can boot. Lion/Mountain Lion creates a very small “Virtual” hard drive, that you can boot into instead of your normal hard drive and operating system, that lets you perform maintenance operations. To restore your permissions, click the arrow for “Recovery HD”. Your computer will boot from this second partition, leaving your main partition unmounted, so you can perform maintenance.

Once your computer has booted up from the Recovery Hard Disk you will see Utilities Window.
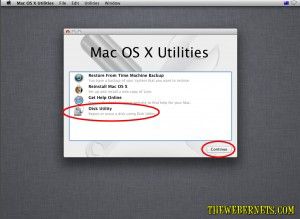
mac os x utilities windowTo get started, select the “Disk Utility” option, then click continue in the bottom right corner. The Disk Utility will now open.
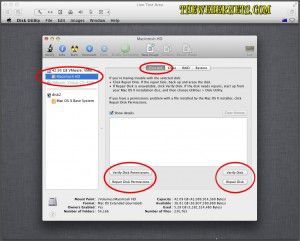
restore permissions mac osx lion disk utility windowSelect/Highlight your main hard drive partition (the one you want to speed up) in the left side of the window, and click “First Aid” to get to the repair window. Here you can verify/repair the condition of the disk. I usually just hit “Repair Disk” and let it do its thing. This can take a bit of time, so go put the coffee on!
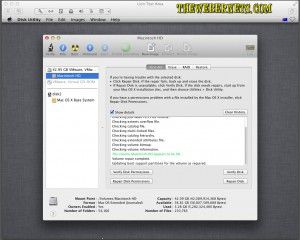
mac lion repair disk processYou will see all kinds of activity, but the only thing you need to worry about is that green text that says the disk is ok, and that the repair is complete. The next step is to click “Repair Permissions”. Again, this may take some time, but when it is complete it will tell you down the bottom of the window in bold font.
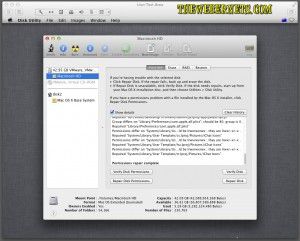
mac osx lion repair permissions window completeWhen its done, Quit out of Disk Utility using the “Disk Utility” menu bar option.
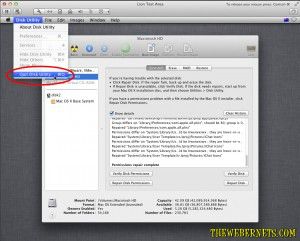
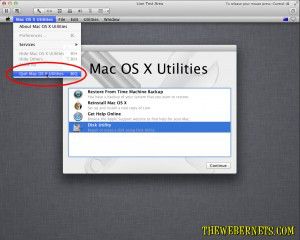
quit disk utilityThen Quit out of the Utilities Window from the Mac OS X Utilities menu bar option.

quit mac utilities

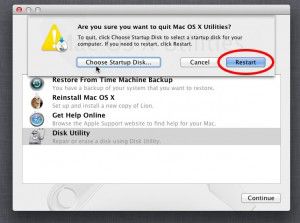
The final window/step is to click “Restart” from the “Choose Start Up Disk” Window. As we didnt permanently change the start up disk, there is no need to change any other parameters here, just click Restart.

choose start up disk

Your computer will now restart (It may take a little longer than normal to do so – so don’t worry if it does!) and hopefully you will notice a pleasant increase in performance!

If you want to go one step further and clean your caches and log files, rebuild indexes and execute your Macs built in maintenance scripts, check out my follow on article about using the free application called ONYX!

How to Save your OS X Mavericks, Mountain Lion and Lion Install Program and make a Install/Boot DVD or USB key

OS-X-Mavericks-Header

UPDATE – **I HAVE TESTED THIS METHOD WITH OS X MAVERICKS AND IT WORKS GREAT!**

This tutorial was written using Mountain Lion as an example, but it works for Mavericks as well – just follow the same process

Just like OS X Lion, it is really important to save your OS X Mountain Lion and Mavericks “Install File” BEFORE you install it. Without it, you can not make an install disk, and it is deleted automatically once you install your new operating system.

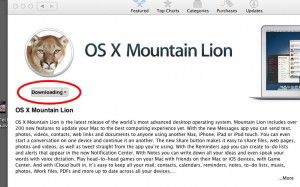
Once you have purchased Mountain Lion or Mavericks, your purchase/price button will turn into a “downloading” button.

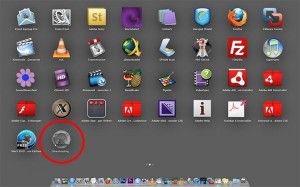
mountain lion download screenA short time after, your launchpad may spring open and show you the downloads progress.

mountain lion download progress screen in launchpadYou can leave it open and watch the progress if you want. Close it up when your finished watching, or when the file has completely downloaded.

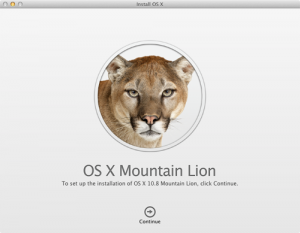
**CRITICAL** – When the file has finished downloading, a window will pop up and ask you if you want to go ahead and install the new software. QUIT THE INSTALLER IMMEDIATELY! This can be done by clicking the file menu and selecting the “Quit” option.
mountain-lion-install-begin-now

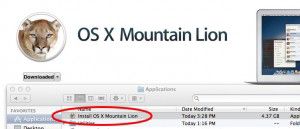
Don’t worry, you are not going to loose the program you just bought, you are just telling your computer that you want to install later. Once you have closed out of the installer, open a new finder window, then open your “Applications” folder. Inside this folder you will see your OS X Mountain Lion or Mavericks Install File.

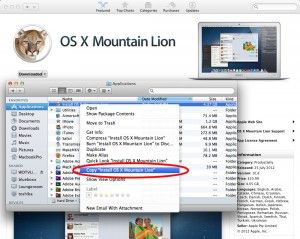
mountain lion installer in applications folderRight click and “Copy” the installer file, then “Paste” it onto your desktop.

save your mountain lion install fileOnce the file finishes copying to the desktop, you can go back into your applications folder and double click and run the installer, if you are ready to install your update.

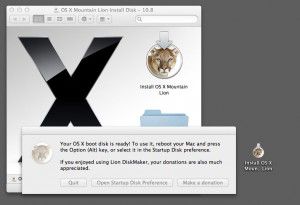
If you want to make a bootable install DVD disk or a USB Key, the easiest way to do this is with Disk Maker X (Formerly called Lion Disk Maker).

LDM_GemGo to the Disk Maker X web site HERE and download the latest version of the program. Once downloaded, unzip and run the program.

TO MAKE A DVD DISK:

With Disk Maker X open, select Mountain Lion to make a Mountain Lion DVD, Or Mavericks to make a Mavericks Install DVD.

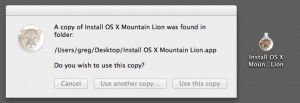
lion disk makerOnce you select your Operating System, the program will try to locate the install program automatically. It doesn’t matter if it uses the one in your Applications folder, or the one on your desktop. In my case, it found the one on my desktop.

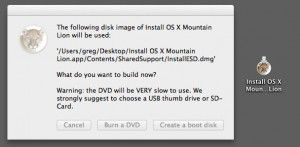
lion disk maker location confirmThe next step is to tell Disk Maker X if you want to make a DVD or a USB key. Keep in mind, if you want to make a DVD you will need a 8.5gb Dual Layer DVD, and a Dual Layer DVD Burner, as the installer will not fit on a single layer 4.7gb DVD.

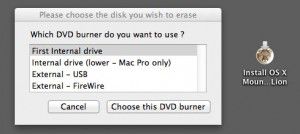
lion disk maker dvd or usbClick “Burn A DVD”. Disk Maker X will ask you to select your Burner.

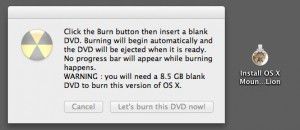
choose dvd driveYou will now be prompted to insert a disk, and begin the burning process.

burn disc now

TO MAKE A USB KEY:

With Disk Maker X open, select Mountain Lion to make a Mountain Lion USB or Mavericks to make a Mavericks install USB key.

lion disk makerOnce you select your operating system, the program will try to locate the install program automatically. It doesn’t matter if it uses the one in your Applications folder, or the one on your desktop. In my case, it found the one on my desktop.

lion disk maker location confirmThe next step is to tell Disk Maker X if you want to make a DVD or a USB key. Keep in mind, if you want to make a USB Key you will need a 8gb thumb drive, due to the size of the installer. Click “Create a Boot Disk”.

lion disk maker dvd or usbNext, Disk Maker X will ask you about your Thumb Drive. In keeping with the recommendations of the makers of the program, we will select “8gb USB Thumb Drive”.

(My understanding is, that this option will completely erase the entire USB drive, and ALL existing data will be over-written. If you have a larger drive, which is divided up into partitions, and you do not want to erase the whole drive, use the “Another kind of disk” option. IF this is incorrect, or there is also another reason, please reply in comments.)

You will now be asked to confirm your drive selection, and its location.

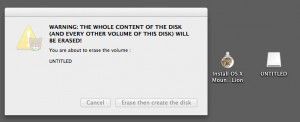
usb selectOne last warning! Your thumb drive will now be erased COMPLETELY!

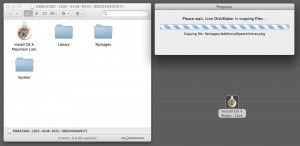
final warningDisk Maker X will now begin crunching files to make your USB Installer.

usb creation in progressDuring this process, particularly towards the end of the process, a lot of new windows and “Get Info” dialogues will pop up, and disappear. This is normal. This is just your computer acknowledging the creation and mounting of new drives and volumes.

Once it is all completed, you will hear Homer yelling “WooHoo!” and see your new USB drive ready to go!

Finished!

homer-woohoo

Make a Mac OSX Lion Virtual Machine in Mac OSX Lion

A OSX Lion Virtual Machine running on OSX Lion I hear you cry? Why?

Much like Windows (but not quiet so bad) Mac OSX creates support files for most program you install. Even though a lot of programs you download seem like a self contained package, and if you don’t like it, you just trash it and its gone, that isn’t really the case. Like Windows, your mac has a large amount of hidden files, and new ones are created with most programs you run. Things like preferences files, registration data, and a swag of other stuff that hangs around after the main app file has been deleted.

(If you are interested in viewing this sort of stuff, and easy way to get started is to Download Tinker Tool, set it to “Show Hidden Files and Folders”, click “Relaunch Finder” and open up hard drive/library folder. BE WARNED! – You can do a LOT of damage in there, tinker with care!)

If you are like me, and feel uncomfortable with the possibility that clutter and orphaned files may be affecting your systems performance, a great way to test out new programs to see if you want to commit to them long term is to try them in a Mac Virtual Machine. This way, all of the files stay in the Virtual Machine, and you can roll back to a previous snapshot, or even delete it when your done, and your live system hasn’t been modified at all.

It’s pretty easy to install a Mac OSX Lion Virtual Machine in VMWare Fusion………as long as you managed to intercept/save your “Install Mac OS X Lion” Installer app from your Applications folder before you installed OSX Lion on your computer.

The problem here, is that a lot of us didn’t. I certainly didn’t. And for some reason it seems to be automatically deleted once you have installed it. I tried lots of methods that claimed to be able to reclaim the installer app, but none of them really worked. I ended up wiping my hard drive completely, re-installing Snow Leopard, then going back into the App Store and re-downloading the Lion Installer App, and saving it out before I ran it. As I had already purchased it, there was no cost, but it was still a lengthy process.

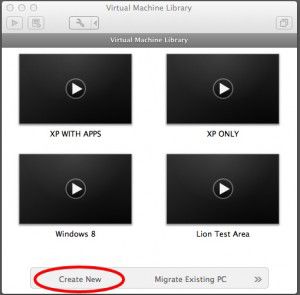
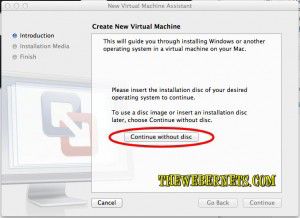
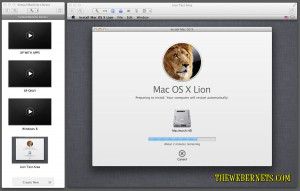
Once you have the Lion Installer app, open VMWare Fusion and click “Create New” in your virtual machine library to create your new Virtual Machine.

The next Window will ask you for your installation file. As you most likely don’t have OSX Lion on a disc, you will need to point it to your Lion Installer App. Click “Continue Without Disc”

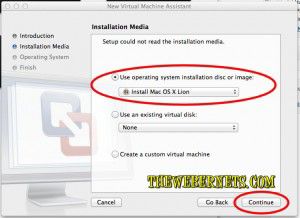
Next, select your installer app’s location from the drop down menu and click continue.

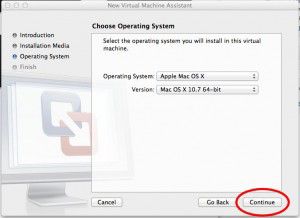
The installer is pretty clever at picking what operating system you want to install, so in most cases you can just click “Continue” once it has correctly identified the installer.

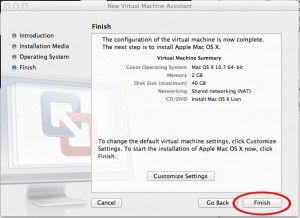
The next window allows you to customize aspects of the new virtual machine. You can assign more memory, more hard drive space, and a lots of other variables by clicking “customize settings”. Again, VMWare is pretty clever about choosing the best settings for you, so feel free to accept them and click “Finish”. You can always change them later if you need to by right clicking your virtual machine in the virtual machine library and selecting “Settings”.

The final step is to name your virtual machine. VMWare Fusion selects a default name based on your operating system, but you will probably want to change it to something a little more meaningful. In my case, I changed it to “Lion Test Area”, as this is where I will be testing software.

And now it begins!

And before too long, your in business! You now have a sand-boxed version of OSX Lion running inside of OSX Lion!

Now, again, if your like me, your probably thinking “Can I use the same technique to run Leopard or Snow Leopard in Lion so I can use my old PPC apps?” At this stage, I am not aware of any simple easy way to make Leopard or Snow Leopard run. I am looking into it though, and if you already know, please let us know!

Enjoy!

Bring back one tap dragging in Mac OSX Lion

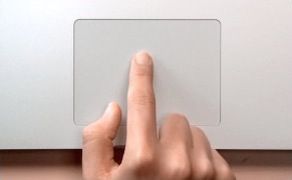
One Tap Drag LockSomething else that has been bugging me lately about OSX Lion is that “One Finger Tap Dragging” has changed to “Click and Drag”. By default, you can’t just move the cursor to the windows top bar, tap once and drag it around the screen. It’s really difficult to break the habit if you have been a Mac user for several years. Thankfully, it is still available in Lion, but it is REALLY hidden away.

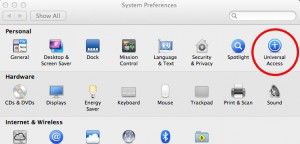
I spent ages going through every aspect of the “Trackpad” preferences pane, and watching all the little videos on gestures, but it turns out that this feature isn’t even in there. To turn One Tap Dragging back on, you need to go into “Universal Access”! How do you like those APPLES! Thanks APPLE!

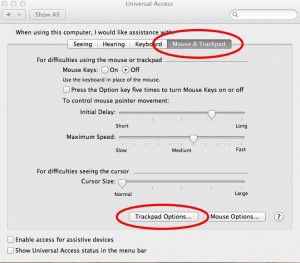
Universal Access Preference PaneOnce you have opened Preferences and clicked Universal Access, click the “Mouse & Trackpad” tab, and then “Trackpad Options” towards the bottom.

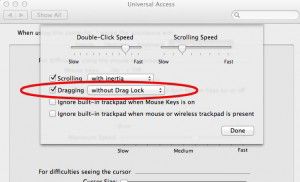
Trackpad PreferancesNow, by checking one simple checkbox, all of that anguish and suffering will go away! Simply check the box next to “Dragging” and One Tap Dragging is restored. And if you were used to the “Drag Lock” feature in previous versions (where you have to tap again to release”, you can also restore that feature in the drop down to the right of “Dragging” as well.

Dragging Check Box

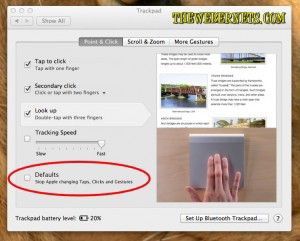
Below is a screen capture of an option I would REALLY like to see Apple implement in coming versions of their operating system.

Trackpad Option Recommendation for future OS's

Disable and stop that annoying delete confirmation dialogue box in OSX Lion

delete-dialogue-boxI know that dialogue warning boxes are there for a reason, and they protect us from accidentally deleting stuff we don’t really want to delete, but I work with dozens of files, and dozens of versions of files at a time. If you are someone who has the need to delete files a lot, and likes to see the “Empty” trash can icon (like me) it is possible to disable that annoying “Are you sure you really want to empty your trash can, even though you just specifically right clicked on the icon and purposely selected the “empty trash” option?” dialogue box.

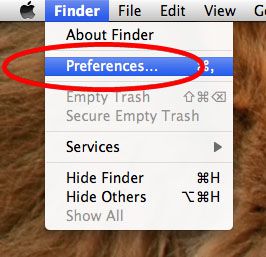
Click on your desktop to activate the finder, then under the “Finder” menu, select preferances.

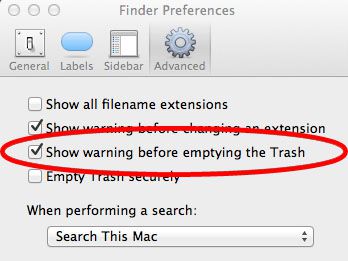
delete-confirmation-dialogue-boxOnce you have selected “Preferences” and the preferences pane is open, its just a simple matter un-checking the “Show warning before emptying the Trash” option.

delete-confirmation-dialogue-box

Its only a little thing I know, but if you are a true “Power-User”, this is a godsend that can save you a lot of extra clicks.