Fix Zoom in ProMovie Recorder on Apple iPhone

Fix Zoom in ProMovie Recorder

Fix Zoom in ProMovie Recorder

ProMovie is a fantastic app for your iPhone that takes recording video to a new level. It has a host of professional features that allow you to fine tune many aspects of video recording, and goes way beyond the capabilities go the built in Camera App. You can check it out on the ProMovie Recorder web site. Note, this is not a free app, but it is worth every penny!

After not using it for a short while, I went in today only to discover that I no longer had the ability to zoom or movie between the wide angle, telephoto and normal lenses on my iPhone 13 Pro. I guess some things may have changed in a recent update. I found this quite frustrating. I was not able to find the answer online either. But after a great deal of messing around I figured it out.

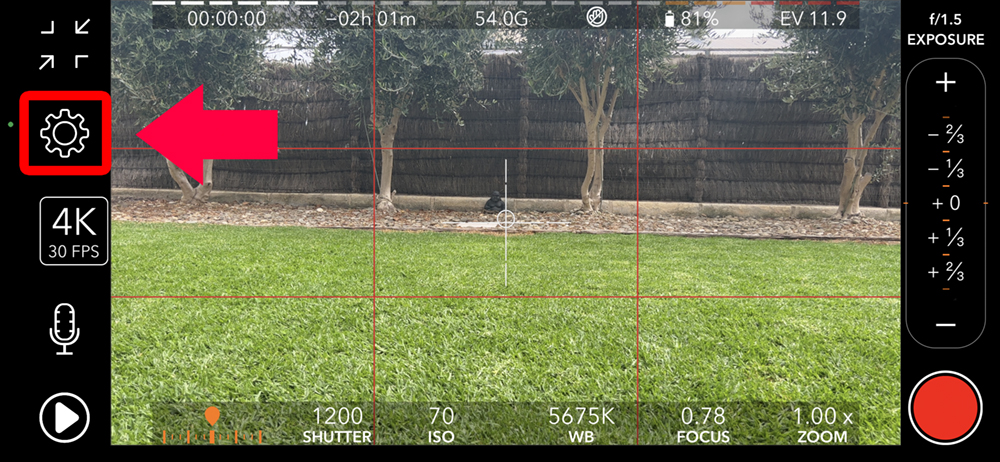
To get the zoom and wide angle working again, click the settings icon, it looks like a little gear.

fix zoom in promovie recorder - start

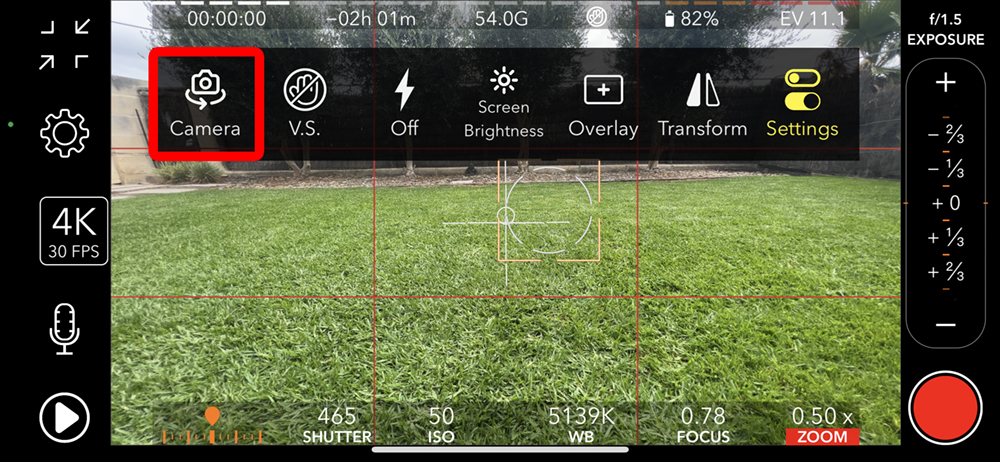
This will open a menu on the screen – select “Camera”

fix zoom in promovie recorder - first panel

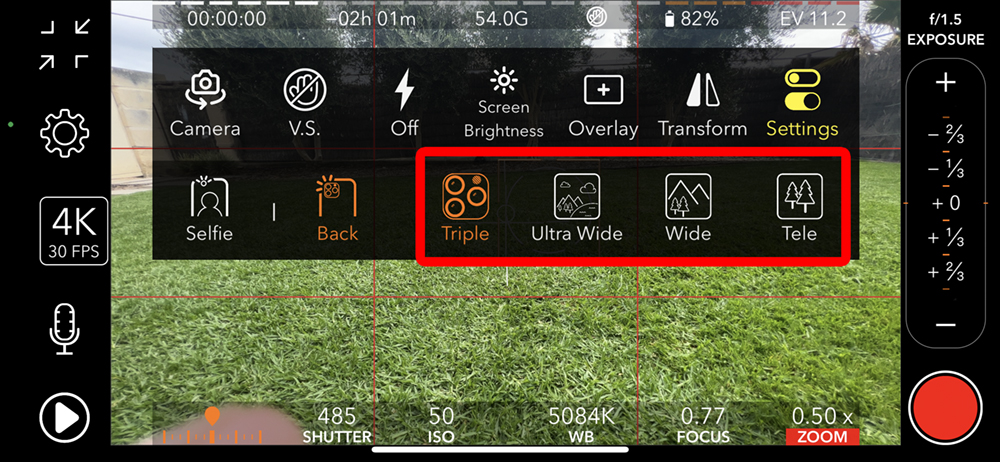
Another menu will appear, and it is in here that you can select which lens to use.

fix zoom in promovie recorder - second panel

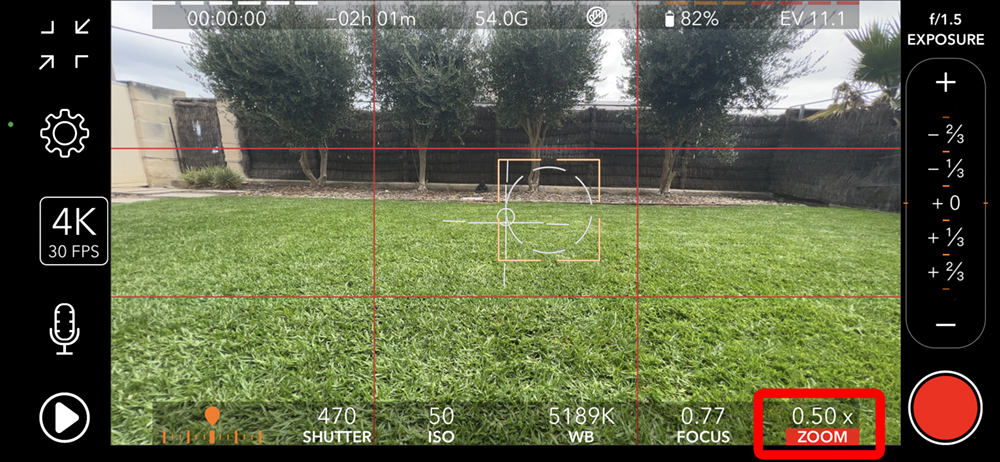
I selected “Triple”, which gave me back the ability to use all three lenses again, and choose from ultra wide angle and zoom al the way through telephoto. You can also lock in on a specific lens if you choose.

fix zoom in promovie recorder - wide

Move Search Bar Back To The Top In Safari On iPhone

Want to Move Search Bar Back To The Top In Safari On iPhone?

Move Search Bar Back To The Top In Safari On iPhone

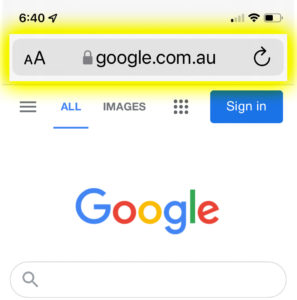
For some reason in iOS 15 Apple decided to turn our world upside down, and put the Search Bar at the bottom of the window in the Safari web browser. To put it back to the top where it has always been open settings

settings icon

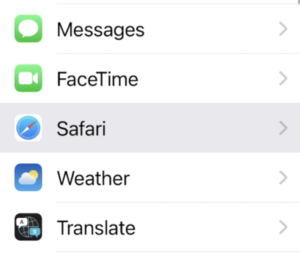
Scroll down to Safari and open it up

safari settings option

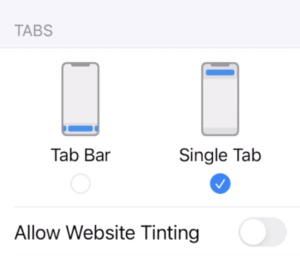
Scroll down about halfway so you can see the “Tab Bar/Single Tab” option – Change this to “Single Tab” as shown below

tab bar or single tab

Now close out of settings and go back into Safari, and your Search Bar is back where it belongs

High Horse Opinion

I haven’t had a High Horse opinion on this site since 2011, but this change has really made me furious. I wish Apple would focus their attention on making what we have now work reliably, as opposed to changing things needlessly so they can announce it as a new feature at the next World Wide Developers Conference (WWDC).

How I took back control of Music on my iPhone from Apple – A MUST Read for Musicians

iCloud Music Library ErrorsLike millions of other Apple/iPhone users around the world, I turned on Apple Music. Immediately, my whole music collection turned on its head. I had duplicate playlists, song files went missing and couldn’t be located, songs were renamed incorrectly, and music I had on my phone that is not in the Apple music library disappeared. Like most other musicians, I had a lot of music from my own bands there, and lots of music from fav’s who shunned the streaming service, like Prince. This music was ALL gone, and no matter what I tried to do, I just couldn’t get it back onto my iPhone. I tried to click the upload button next to affected tracks in iTunes to supposedly load them to iCloud, and it never worked. I could never get those tracks back onto my phone.

As time went on I grew to like the broad range of tunes available in Apple Music, and I came to accept that I just wasn’t going to have that old music on my phone anymore.

Over the weekend, I did a back up on my wife’s phone, and she asked for a specific playlist we have to be added. As she did not want to use Apple Music when it launched, I was able to click the playlist in iTunes, and sync her phone, and she had the music quickly and easily. It made me so angry that I decided enough was enough. I wanted control of my music back.

After lots of fruitless Googling, I was finally able to figure out what the issue is, and it is not Apple Music at all. It is “iCloud Music Library” that causes all of the problems. All Apple Music does is give you access to over a million songs, but iCloud Music Library tries match all of your music with songs in Apple’s collection, and then give you access to those tracks on your devices. In theory it sounds like a great idea, that should save drive space and give you high quality tunes. In the real world though, it is a poorly developed, rushed out, cacophony of errors that ruined my music collection. If you listen to mostly main stream music your issues might not be so bad, but if you have lots of live music, rare music, old vinyl you have converted yourself, or in the case of musicians your own original music, iCloud Music Library will mismatch, grey out, and in the some cases, remove music entirely from your device. And, no matter what you do, you will not be able to put it back.

**DISCLAIMER** – I TAKE NO RESPONSIBILITY FOR YOUR MUSIC COLLECTION IF YOU DECIDED TO FOLLOW IN MY FOOTSTEPS! PROCEED AT YOUR OWN RISK!
THIS ARTICLE EXPLAINS HOW I GOT MY COLLECTION BACK TO WHERE I AM HAPPY WITH IT – THESE RESULTS MAY NOT BE SUITABLE FOR YOU.

In the end, it really only took one simple step to end this misery, regain control of what music is on my phone, and still have access to songs not in my collection via Apple Music.

I Turned off “iCloud Music Library” on my phone.

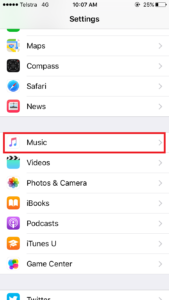
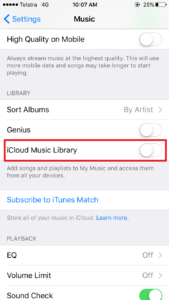
Music in SettingsI went to settings and selected music:

Turn Off iCloud Music LibraryThen I turned “iCloud Music Library” off, and got control of my Music Collection back!

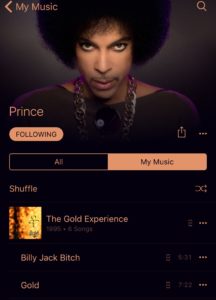
Now, doing this is not without its perils, it turns your iPhone music collection on it’s head again, just like it did when Apple Music turned it on. A large majority of my music disappeared immediately, as it was matched (poorly) with music in Apple’s cloud. Thankfully, all of my original playlists before Apple Music were still on my Mac Pro, so when I did my first sync after flipping the switch, and I was able to select which music I wanted myself again, ALL of my music pre Apple Music was back! My 80’s Hairbands playlist went from 230 songs back up to its original 400. And lo and behold, the Gold Album was there as well.

Prince in Music

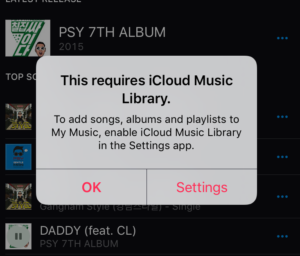
The Down Side to switching off iCloud Music Library – All of the tunes I added to my iPhone  collection from Apple Music had disappeared. Playlists containing Apple music disappeared. The ability to click the plus “+” button and save a song to my phone is no longer available. I can still search for and play any song on Apple Music, but I can’t add those songs to my device or use them in playlists, because Apple is a big whiny greedy baby!

Waaa - You must use icloudWaaaaa – You cant save this song to your phone cos we want you to use
iCloud Music Library – Waaaaa-Ha-Haaaaa!!!!
NEWSFLASH APPLE – Not everybody wants to sync their computer playlists to their iPhones and vice versa!

The bottom line is I now have control again, I have all of my favorite music back on my device, and I can control what is on there and what is not. I have lost a lot of functionality with Apple Music, and it is a small price to pay in my opinion, because I can still listen to those songs, and I finally have The Con!

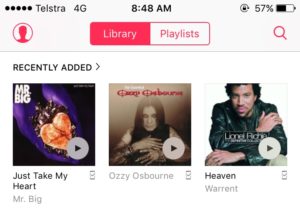
Lionel Ritchie in WarrantLionel Ritchie – Now a member of Warrant – Thanks Apple Music!

How to easily create a group and send a SMS Text Message to everyone in it on iPhone

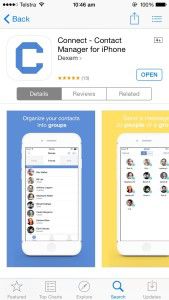
connect-contact-managerMy boss at work asked me if there was an easy way to create a group of contacts, and send a message to everyone in the group on her iPhone, and with a little digging I turned up this free GEM app called Connect Contact Manager for iPhone. An example of its use would be if you were a coach of a team, and you need to let all the players know practice is cancelled, you just select the group, type “Practice is cancelled” as a text message, and when you press send, the same message is sent to the entire team automatically (Assuming you have all of their mobile/cell numbers on your phone).

Go to the app store and download the free app. Find it by searching for Connect Contact Manager, or go HERE.

Connect Contact Manager Download

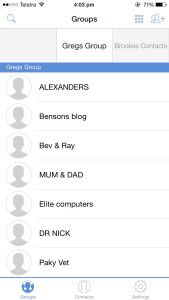
Once downloaded, open it up.Contact Screen

Create A New Group

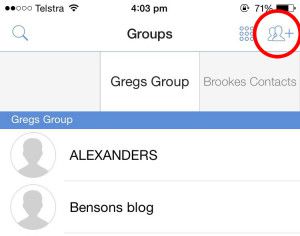
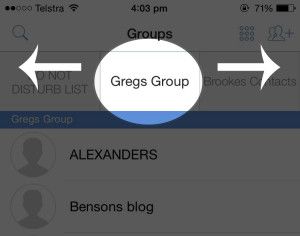
You can scroll through the groups you have already made by swipping left and right on the group names, and if you want to create a new group click the plus icon in the top right corner. If you have already created the group you want to message, skip down to the “Send A Message To The Group” section

Add Group

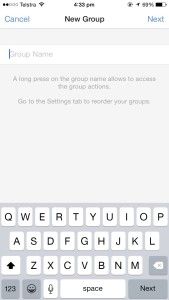
Give your new group a name

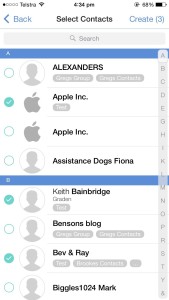
New GroupSelect the contacts that you want to be in your group

Confirm Create

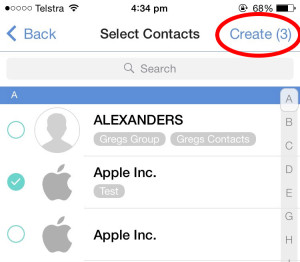
When you have selected all of the contacts you want in your group, confirm your selections by clicking create in the top right cornerconfirm-createSend A Message To The Group

Now, select the group you want to message by scrolling left and right, and hold down/press the groups name for a few seconds

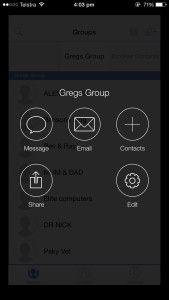
Select GroupThen select “Message”

Select Message

Now you can type your message

Send Message

When you are done typing, simply press “Send”, and everyone in the group will get your message

How To Use iPhone Android or Nokia Smart Phones as cameras in Vidblaster

Epoccam Icon

httpvh://youtu.be/Z5E-vEalubM

This video will show you step by step how to download and install software that will allow you to use your iPhone, Android Phone, or Nokia Smart Phone as a camera in Vidblaster.

**NOTE** – Your phone and computer need to be connected to the same wifi network

To get started, download the free Epoccam App from your devices app store and install it. Then, on your computer, browse to kinoni.com to download the free virtual device drivers. The software relies on Apple’s Bonjour networking technology, and if it isn’t already on your system, the installer will download and install it automatically for you. Don’t worry, it’s harmless!

Once everything is installed, open the app on your phone, then open Vidblaster, and add a new camera module and select “Kinoni Video Source” and you should be up and running.

Total Offline Geocaching on iPhone with Looking 4 Cache App

Looking For Cache Icon

Recently I was made aware of a great Geocaching App for iPhone called Looking 4 Cache. It has quickly become my favorite Geocaching App, and not by a little. I think it is easily the “Ultimate” application for Geocaching on the iPhone at the moment! There is one thing this App can do, that the others can’t, that places it head and shoulders above the rest – 100 Percent Complete Total OFFLINE Geocaching!

homer-woohooNow that I have satisfied the “SEO Gods” with my first paragraph, let’s get down to business. To begin with, I downloaded the free version, Looking 4 Cache lite. My first impression of Looking 4 Cache Lite was not good. I didn’t find it intuitive. As I had previously been using iGeoknife, I thought Looking 4 Cache’s interface was ugly by comparison, and I actually deleted it from my phone. It was only after discussing offline caching on a Facebook group that I learned the Full version/Pro version offered offline maps. I then paid my $10, bought the Pro version, and gave it another go. This was a big enough feature to force me to revisit and re-assess my opinions on this application.

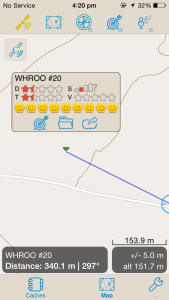
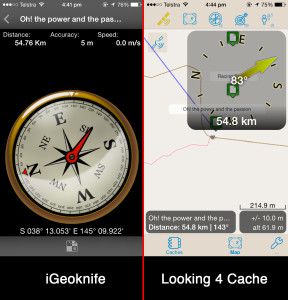
Looking 4 Cache Screen CaptureNot only do I find the App’s Icon to be somewhat disturbing, Initially, and still today, the interface looks somewhat like a “Pirate Map” to me… Perhaps that is what the developer was going for, and I can see why – Geocaching is somewhat of a “Treasure Hunt”. Having just played with iGeoknife (A far more polished, but considerably less capable app) prior to Looking 4 Cache (from hereon referred to as L4C), it’s cleaner and sharper (especially on iPad) appearance was still at the forefront of my mind. The first thing I did with each App, was to go and look for a cache. I am sure you will agree, the appearance of the compass in iGeoknife slaughters L4C’s offering.

iGeoknife vs Looking 4 Cache Compass ComparoIn my opinion, opening L4C for the first time is confusing, un-intuitive, and messy.

BUT……………….

If you can get past that, and give it a few minutes, and try and dig down into it, once the penny drops and you get the gist of how it is laid out, you will quickly forget the initial awkwardness forever, and like me, will also forget every other Geocaching App (Including the Official Geocaching App) you have ever tried.

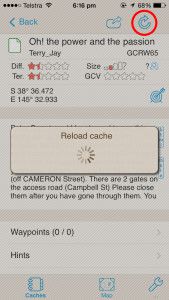
Unlike the Official Geocaching App (Which is the biggest data allowance gulping app on my iPhone), L4C seems to be built on the concept of low/no data usage. If you are caching online, it saves your “Live” searches, so if you leave your current location, and come back another day, those results are still available to you (assuming you haven’t cleared them). You might be thinking “but I wont be seeing the latest logs”. L4C gives you the option to update or reload the cache you are chasing, to get the latest information (obviously you need connectivity for this). Just hit the “Reload” icon in the top right corner.

L4C ReloadIf you are using “Live” maps, it also seems to “Cache”…(pardon the pun) the map tiles as well, so once they are downloaded, it doesn’t appear to have to re-download them again whilst you are still active in that area.

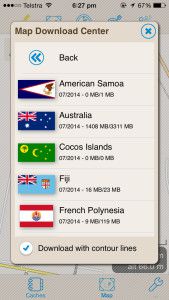
Where L4C cements itself as the number one Geocaching App, is it’s ability to download very detailed maps, and save them for offline use. The Map Download Centre gives you the ability to download detailed offline maps from pretty much everywhere in the world. But, be warned, as you would expect, detailed maps equals big impact on free space! If you want to cache offline, it is going to take up some room to do so! The offline Australia map is 3.3Gb! You cant have one without the other!

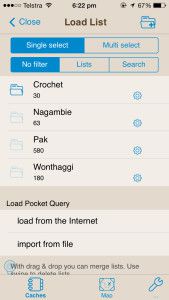
Map-Download-CentreCombine this with its ability to digest/ingest pocket queries from the Geocaching web site, as well as GPX files and databases that you might create using GSAK (Geocaching Swiss Army Knife), and you have got a 100 Percent Totally Offline solution.

L4C-PQsYou can now go Geocaching literally in the middle of nowhere, completely cut off from the internet, provided you have your maps and pocket queries in order before you leave. Once you have found your caches you can create “Found It” logs as you go, and once you have data coverage again L4C will send them off to geocaching.com automatically. Cool Huh!

L4C has a website you can check out Here.