 Like millions of other Apple/iPhone users around the world, I turned on Apple Music. Immediately, my whole music collection turned on its head. I had duplicate playlists, song files went missing and couldn’t be located, songs were renamed incorrectly, and music I had on my phone that is not in the Apple music library disappeared. Like most other musicians, I had a lot of music from my own bands there, and lots of music from fav’s who shunned the streaming service, like Prince. This music was ALL gone, and no matter what I tried to do, I just couldn’t get it back onto my iPhone. I tried to click the upload button next to affected tracks in iTunes to supposedly load them to iCloud, and it never worked. I could never get those tracks back onto my phone.
As time went on I grew to like the broad range of tunes available in Apple Music, and I came to accept that I just wasn’t going to have that old music on my phone anymore.
Over the weekend, I did a back up on my wife’s phone, and she asked for a specific playlist we have to be added. As she did not want to use Apple Music when it launched, I was able to click the playlist in iTunes, and sync her phone, and she had the music quickly and easily. It made me so angry that I decided enough was enough. I wanted control of my music back.
After lots of fruitless Googling, I was finally able to figure out what the issue is, and it is not Apple Music at all. It is “iCloud Music Library” that causes all of the problems. All Apple Music does is give you access to over a million songs, but iCloud Music Library tries match all of your music with songs in Apple’s collection, and then give you access to those tracks on your devices. In theory it sounds like a great idea, that should save drive space and give you high quality tunes. In the real world though, it is a poorly developed, rushed out, cacophony of errors that ruined my music collection. If you listen to mostly main stream music your issues might not be so bad, but if you have lots of live music, rare music, old vinyl you have converted yourself, or in the case of musicians your own original music, iCloud Music Library will mismatch, grey out, and in the some cases, remove music entirely from your device. And, no matter what you do, you will not be able to put it back.
**DISCLAIMER** – I TAKE NO RESPONSIBILITY FOR YOUR MUSIC COLLECTION IF YOU DECIDED TO FOLLOW IN MY FOOTSTEPS! PROCEED AT YOUR OWN RISK!
THIS ARTICLE EXPLAINS HOW I GOT MY COLLECTION BACK TO WHERE I AM HAPPY WITH IT – THESE RESULTS MAY NOT BE SUITABLE FOR YOU.
In the end, it really only took one simple step to end this misery, regain control of what music is on my phone, and still have access to songs not in my collection via Apple Music.
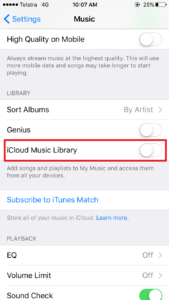
I Turned off “iCloud Music Library” on my phone.
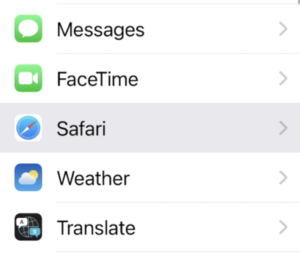
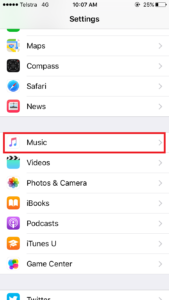
 I went to settings and selected music:
 Then I turned “iCloud Music Library” off, and got control of my Music Collection back!
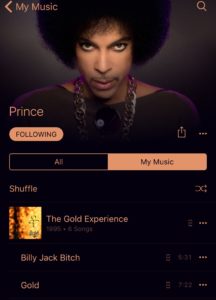
Now, doing this is not without its perils, it turns your iPhone music collection on it’s head again, just like it did when Apple Music turned it on. A large majority of my music disappeared immediately, as it was matched (poorly) with music in Apple’s cloud. Thankfully, all of my original playlists before Apple Music were still on my Mac Pro, so when I did my first sync after flipping the switch, and I was able to select which music I wanted myself again, ALL of my music pre Apple Music was back! My 80’s Hairbands playlist went from 230 songs back up to its original 400. And lo and behold, the Gold Album was there as well.

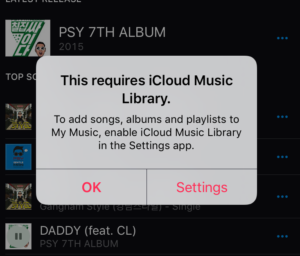
The Down Side to switching off iCloud Music Library – All of the tunes I added to my iPhone collection from Apple Music had disappeared. Playlists containing Apple music disappeared. The ability to click the plus “+” button and save a song to my phone is no longer available. I can still search for and play any song on Apple Music, but I can’t add those songs to my device or use them in playlists, because Apple is a big whiny greedy baby!
 Waaaaa – You cant save this song to your phone cos we want you to use
iCloud Music Library – Waaaaa-Ha-Haaaaa!!!!
NEWSFLASH APPLE – Not everybody wants to sync their computer playlists to their iPhones and vice versa!
The bottom line is I now have control again, I have all of my favorite music back on my device, and I can control what is on there and what is not. I have lost a lot of functionality with Apple Music, and it is a small price to pay in my opinion, because I can still listen to those songs, and I finally have The Con!
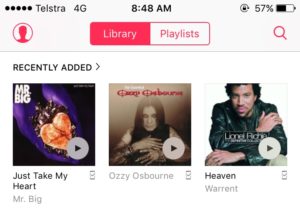
 Lionel Ritchie – Now a member of Warrant – Thanks Apple Music!

