Fix Zoom in ProMovie Recorder on Apple iPhone

Fix Zoom in ProMovie Recorder

Fix Zoom in ProMovie Recorder

ProMovie is a fantastic app for your iPhone that takes recording video to a new level. It has a host of professional features that allow you to fine tune many aspects of video recording, and goes way beyond the capabilities go the built in Camera App. You can check it out on the ProMovie Recorder web site. Note, this is not a free app, but it is worth every penny!

After not using it for a short while, I went in today only to discover that I no longer had the ability to zoom or movie between the wide angle, telephoto and normal lenses on my iPhone 13 Pro. I guess some things may have changed in a recent update. I found this quite frustrating. I was not able to find the answer online either. But after a great deal of messing around I figured it out.

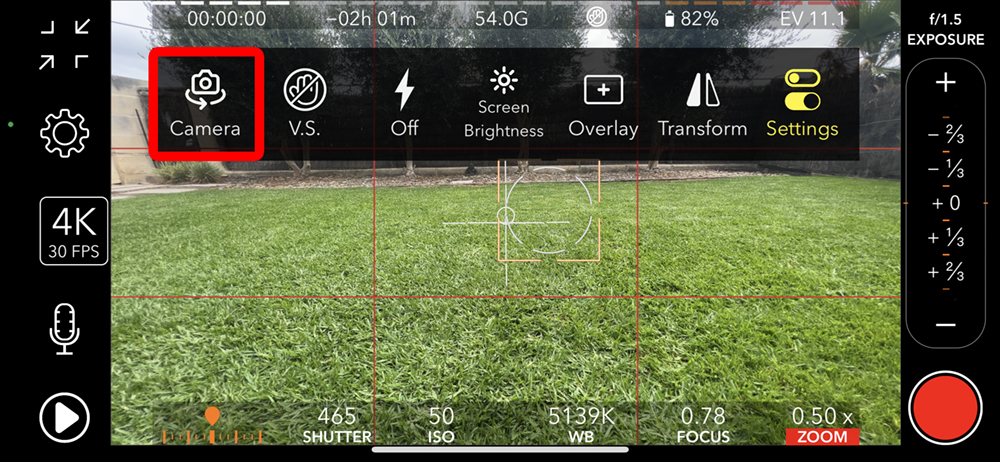
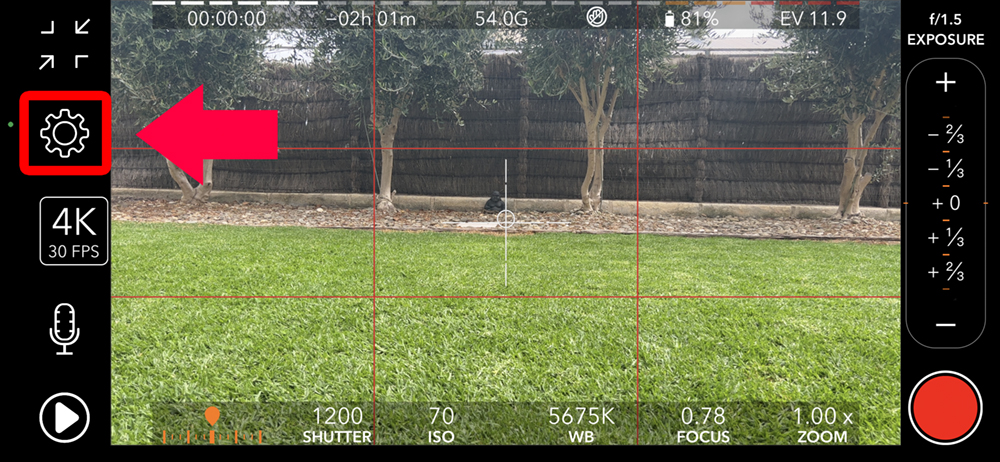
To get the zoom and wide angle working again, click the settings icon, it looks like a little gear.

fix zoom in promovie recorder - start

This will open a menu on the screen – select “Camera”

fix zoom in promovie recorder - first panel

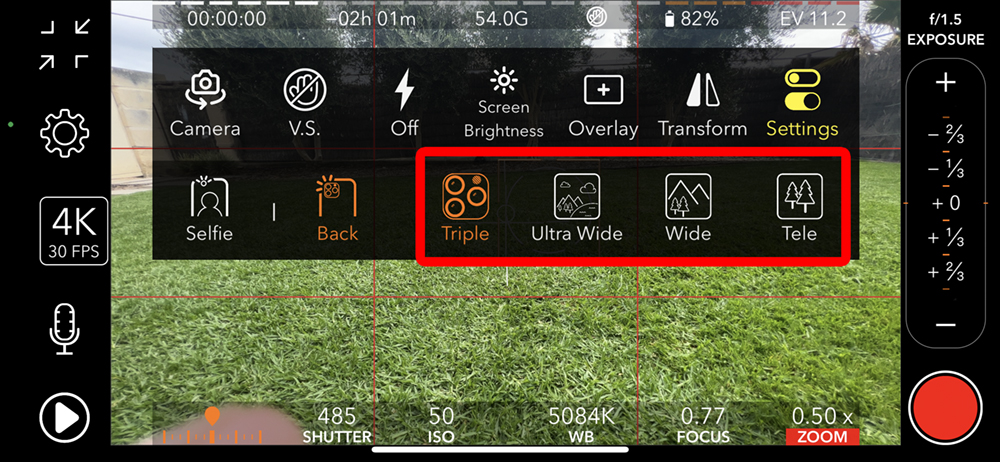
Another menu will appear, and it is in here that you can select which lens to use.

fix zoom in promovie recorder - second panel

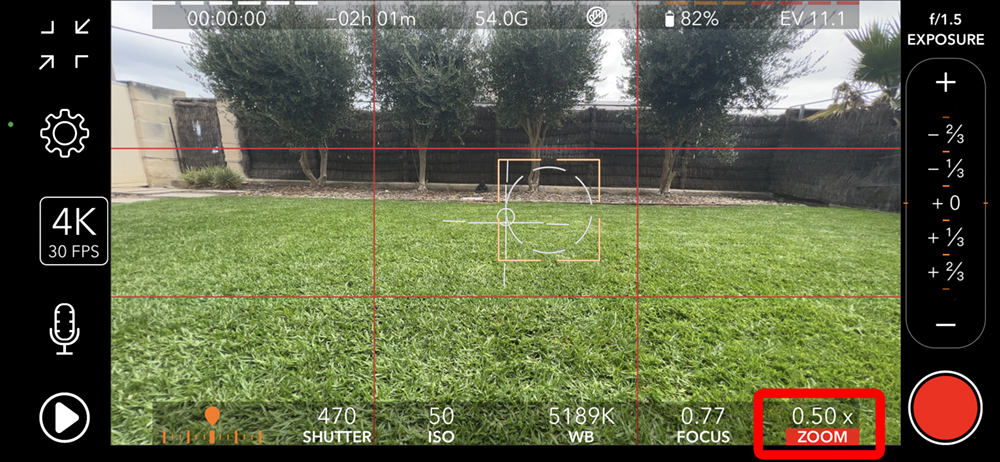
I selected “Triple”, which gave me back the ability to use all three lenses again, and choose from ultra wide angle and zoom al the way through telephoto. You can also lock in on a specific lens if you choose.

fix zoom in promovie recorder - wide

How To Bring Back Epic Browser PROXY VPN and AD Blocker Button Icons to Toolbar

Want To Bring Back Epic Browser PROXY VPN and AD Blocker Button Icons to Toolbar?

Epic Browser Logo

Epic Browser is a great alternative to the browsers that come with your computer like Edge and Safari. It is considerably more secure. But recently, the Proxy VPN service that was activated by default has been made an extension, and to get it back there are a few things you need to do. To get started, you can either watch the video below, or continue reading.

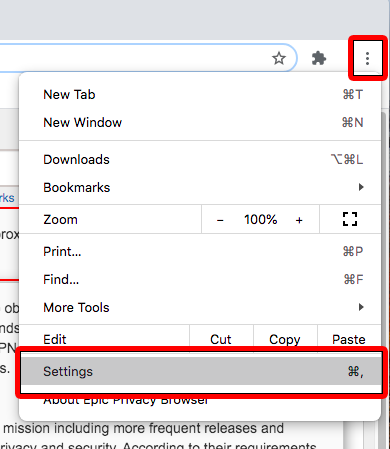
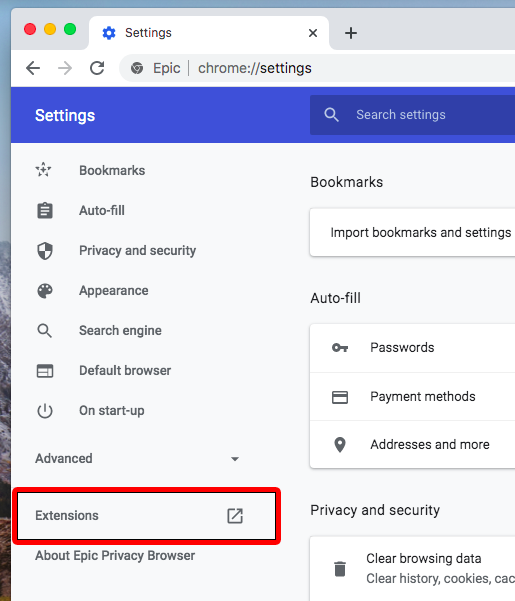
Firstly, click on the three dots in the top right hand corner, the select “Settings”

epic-browser-vpn-ad-block-settings-02

From the menu that appears, select “Extensions”

epic-browser-vpn-ad-block-settings-02a

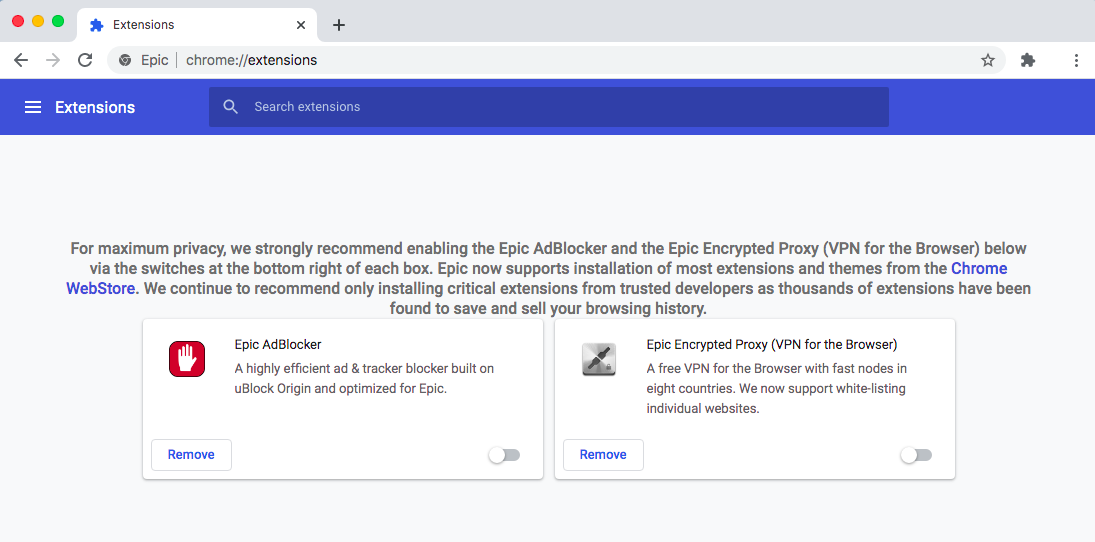
You will now find yourself seeing the extensions that come with Epic Browser

epic-browser-vpn-ad-block-settings-03

In the bottom right corner of each item you will see a toggle switch, toggle both to the “On” position

epic-browser-vpn-ad-block-settings-04

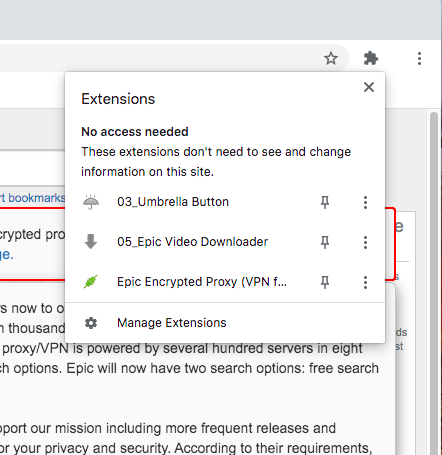
Windows users will now see the icons restored to the toolbar. For Mac users there is a few more steps to go. Close out of the extensions page and click the “Extensions Icon” in the toolbar – it’s the one that looks like a jigsaw puzzle piece

epic-browser-vpn-ad-block-settings-05

You will see the Ad Blocker and Proxy VPN listed

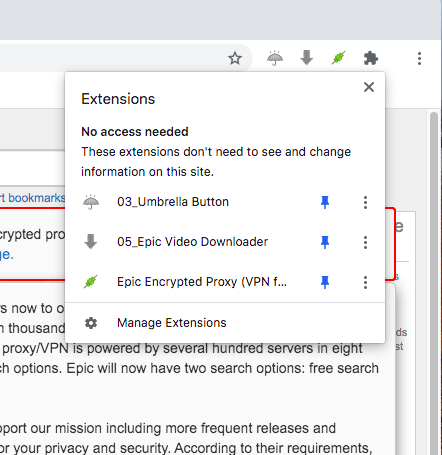
Now click the little pin next to each item you want to see in the toolbar, I clicked all three

epic-browser-vpn-ad-block-settings-07

And now you will see the icons have been restored to your toolbar, and you can go back to enjoying this fantastic and free browser

epic-browser-vpn-ad-block-settings-08


Get iSkysoft PDF Converter for Windows FREE!


iSkySoft PDF Converter

**SPECIAL OFFER**

Between July 16 and July 18, iSkysoft will be GIVING AWAY FREE their iSkySoft PDF Converter, which normally sells for $59.95!

With iSkysoft PDF Converter you can:

  • Convert PDF to Word, Excel, PowerPoint, HTML, EPUB, images and plain text.
  • Convert up to 200 PDF files at once.
  • Convert a 100-page PDF within 1 minute, super fast.
  • Supports password-protected PDF files.

Some words from iSkysoft:

“From July 16th to July 18th, we will giveaway our excellent product – iSkysoft PDF Converter for Windows (Original Price: $59.95), which is an awesome utility that makes working with PDF files in Windows a breeze. It lets you convert normal and password protected PDF files to various Office document including Word, PowerPoint, Excel, EPUB, HTML, images and plain text, it also supports batch conversion that can convert up to 200 PDF documents with fast speed.”

As mentioned, this offer is only available between July 16-18 2013. To get your copy visit the iSkysoft PDF Converter page HERE!

Bringing back the Icon Size Slider in OSX Lion

Mac Icon Size SliderBeing a web designer, graphic artist, and a photographer, well you could say I use my mac to deal with images quiet a lot. I estimate that in my “Resources” folder on my server (made up of stock photos and graphics) and my own photograph collection, I have around 100,000 images. When I need to find a texture, or a stock photo to suit a specific purpose, I may need to browse through a folder with up to a 1000 images in it. The great thing about having a 30″ monitor is that you can open the folder up, fill the screen and see a lot of the files quickly. My FAVORITE thing in Snow Leopard was the icon size slider. Just by dragging the slider located at the bottom right of every folder view left or right, you could make icons small to fit more on screen for faster browsing, and when you think you found what you need, you could drag it up to enlarge the icon for a closer look. It was GREAT!

One of the first things to piss me of in Lion was that the slider is gone. (Literally, It only took me about 3 mins to notice it missing).

Grrrr!!!In search of a solution, I found a icon slider in the “View Options”, but this meant each time I need to change icon sizes I had to open another window, and it was a real pain.

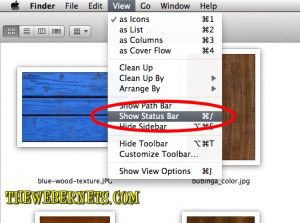
Today, I stumbled upon the solution – The slider is still there in Lion (YAY!), but it is just turned off by default (BOO!). To turn it back on, click any blank area on your desktop to select the finder, then open the View menu, slide down and select/check “Show Status Bar”

Show Status BarIt seems a bit ambiguous when you are looking for the icon size slider to have to select “Show Status Bar” to bring it back, but at least it is still there!Icon Size SliderAnother cool feature available in this view menu, is to select/check “Show Path Bar”. Once it is checked, you see a “breadcrumbs” style path to where your file is. Very Handy!

Show Path