Quick and Easy way to Clean Up and Speed up your Mac with ONYX

Onyx For Mac IconIn my opinion, the best first step to speeding up your Mac is to repair your permissions and run disk repair as outlined in my article Speed Up Your Mac Article HERE.

The next step is to clean your caches, rebuild your indexes, and run your macs daily, weekly and monthly maintenance scripts. This can all be done easily with the FREE and very powerful ONYX.

FREE Download Onyx from Titanium’s Software.

Once you have ONYX downloaded and installed, its a good idea to make sure that you have backed up ALL of your stuff. Like using any cleaning program, things can get moved or lost, so make sure you don’t get caught!

When you are satisfied your files are safe, go ahead and open ONYX. The first thing you will see is a alert box that asks if you want ONYX to check the S.M.A.R.T status of your hard drive. S.M.A.R.T stands for Self-Monitoring, Analysis and Reporting Technology. Most hard drives these days monitor their own performance and try to anticipate if a failure is imminent, and if their is something wrong with your drive, you will be notified after this test. It is well worth doing.

Onyx SMART screenOnce this has completed, the next alert will ask if you want to verify your drive. If you have already performed this task because you are following on from my first “Speed Up Your Mac” article this is not necessary. If you haven’t already done this, it is well worth doing as it will find any drive errors. This process can take some time, and it will require all other programs to be closed, so if you decide to run it, go get yourself a coffee and some fresh air after you begin.

ONYX Verify Start Up VolumeWhen Verification has finished, ONYX will ask you to type in your password to give it permission to make changes and clean thing up.

ONYX Password Box

You will now see the main menu bar for ONYX.

ONYX Main Menu BarAs you can see, this program has a lot of in depth features and can do a lot of different things, but for this tutorial, we will focus on cleaning up quickly and easily. To start cleaning, press the “Automation” button. You will now see the Automation screen.

Onyx Automation Defaults

The safest way to proceed is to accept the defaults and press “Execute”. If you are following on from my first “Speed Up Your Mac” article you might want to un-check “Repair Permissions” as you will have already done this. Other wise, leave it checked. If you are like me and like living on the edge, you can go ahead and check/un-check the items you feel necessary.

*BE WARNED* – As with every clean up program, there can be unwanted side effects, so proceed with caution!

For me personally, I do change it up as I like to clean my system deeply, and I am happy to put things back how I like them after the cleaning (such as re-arranging my icons how I like them on my desk top again). I also like to execute my Macs built in daily, weekly, and monthly maintenance scripts. Below is how I use ONYX.

*NOTE* – I take no responsibility if you copy my settings and loose something.

ONYX OptionsWhen you are happy with your cleaning options, its time to press execute.

Quit Open AppsONYX will tell you it is going to close any other programs that are open, so again, make sure you have saved your work.

Onyx In ProgressONYX will now start performing maintenance. In most cases this will take some time, so if you didn’t stretch your legs, get a coffee and some fresh air before, now is the time. When ONYX has finished, a dialogue box will appear. Click OK.

ONYX Maintainence Complete

ONYX will now want to restart you computer.

ONYX RebootRestart your computer and you are all done!

Easily view your 3D MPO Photographs Instantly on your Mac with ShowMe3D

showme3d-iconIf you have a camera capable of taking 3D photographs, and a Apple Computer, I have just found the simplest, quickest, easiest way to view your photos, It’s called ShowMe3D. Ever since I got my 3D camera I have been longing for a way to just unload my pics, and view them in 3D straight away, without having to jump through a million hoops, and this is it!

Open up App Store on your Mac and search for ShowMe3D, or click this link to Download ShowMe3D from the Mac App Store. It’s not free, but at just $4.99, it really is a bargain.

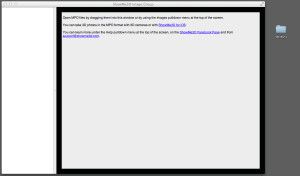
Once you have downloaded and installed ShowMe3D, open it up and you will see the main screen.

Showme3d ScreenNow, open the folder that contains the .mpo files (Multiple Picture Object) from your camera, and drag the pics you want to view onto the open window and put on your 3D glasses.

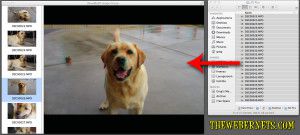
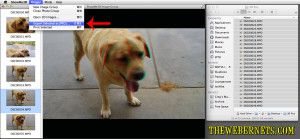
showme3d-loadedInstantly, you can view your 3D photos in 3D, and scroll through them in the same way you would using the “Preview” app. A feature of this program that I really like, is it also allows you to Export your .mpo files as Anaglyph Jpegs, so you can quickly and easily convert your .mpo’s to regular jpegs – cool huh!

Show Me 3D Save FeatureHere’s a Anaglyph 3D Jpeg I converted from an .mpo file using ShowMe3D – It’s my dog Benson.

Benson 3D

Easily find and delete BIG files that are taking up space on your Hard Drive

full-hard-driveEarlier today I tried to copy a large file I had made in Photoshop and I was told that the operation couldn’t complete because there wasn’t enough room on my hard drive for it. So, I needed a way to get a lot of space back, but I wasn’t sure what was taking up all of the room. I set about looking for ways to see what was going on on my drive and I happened upon some really great tools to help you visualize all your files. The process is called “Treemaps”.

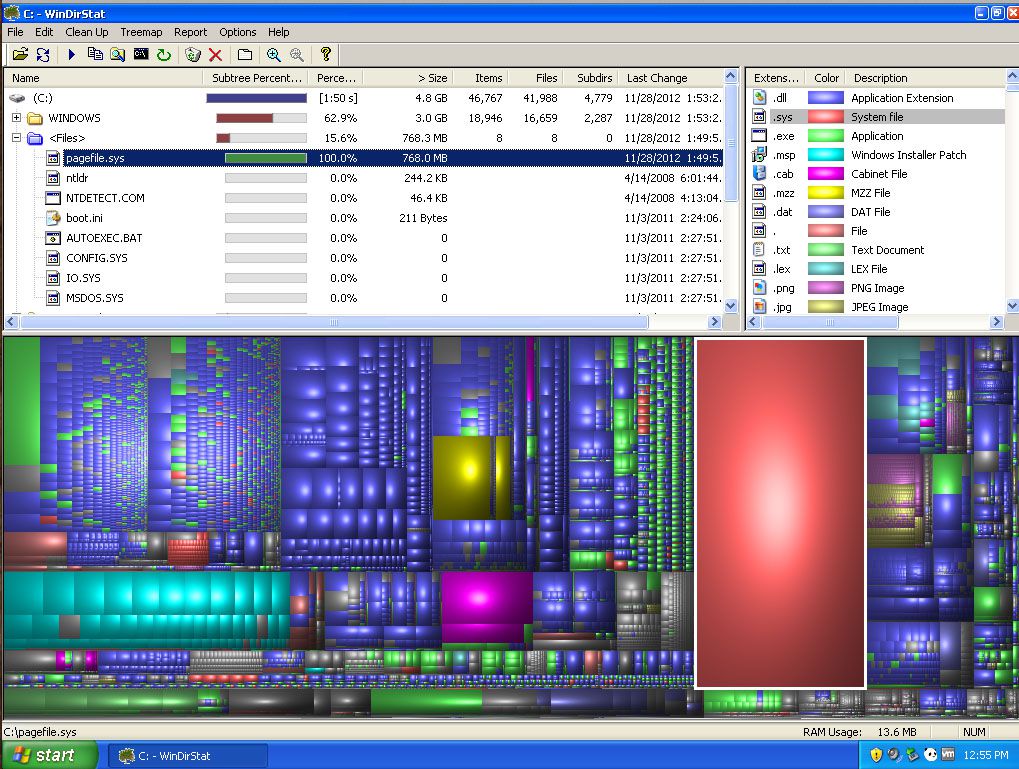
I managed to find free Treemap programs for Windows, Mac and Linux platforms. For Windows users, you need to get a copy of WinDirStat (Windows Directory Statistics) HERE. Once installed, you can start it up and tell it to either analyze your whole drive, or specific folders. Here’s how it looks.

windirstat-screen-cap

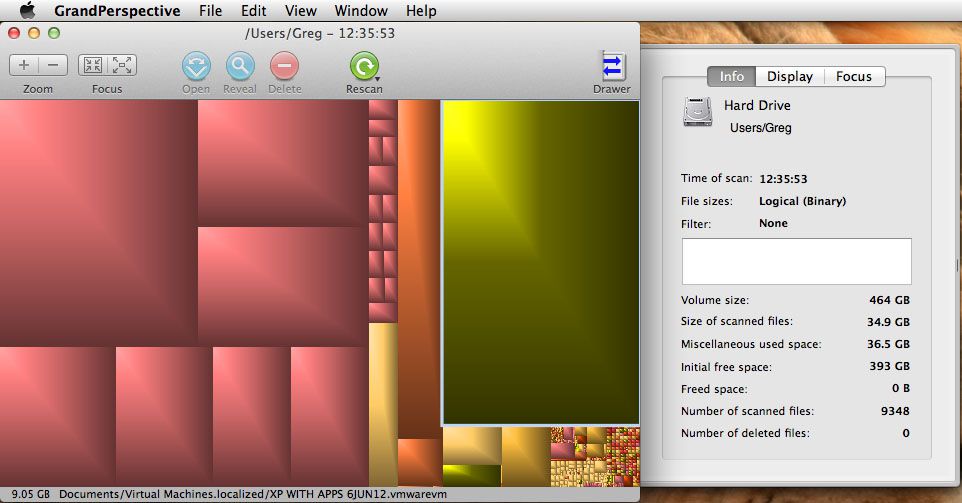
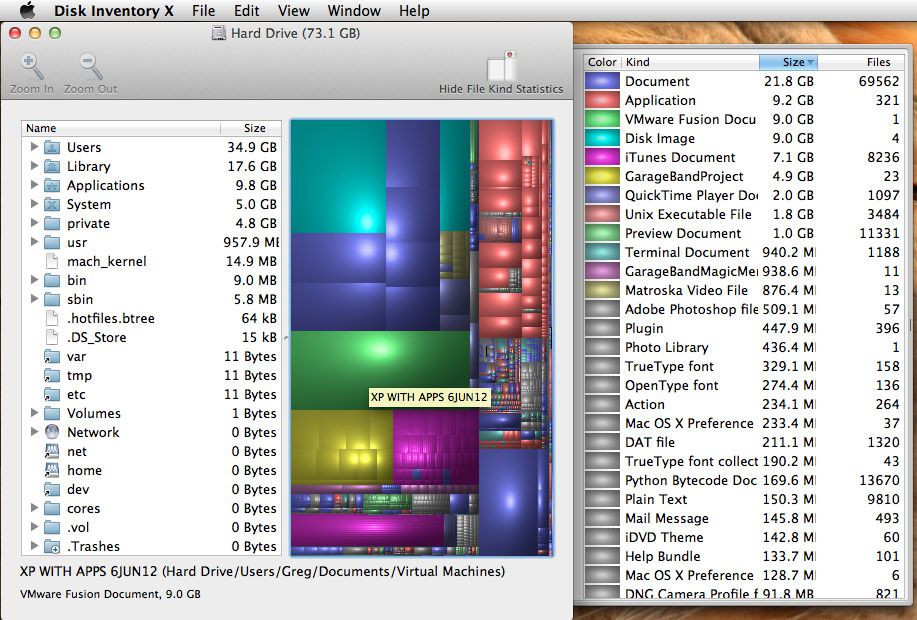
There is two options for Mac users. Grand Perspective (Gets up and going really quickly, easy to use) and Disk Inventory X (Longer to scan but a more thorough and detailed interface). Here’s how Grand Perspective looks.

grand-perspective-screen-cap

And this is how Disk Inventory X Looks.

disk-inventory-x-screen-cap

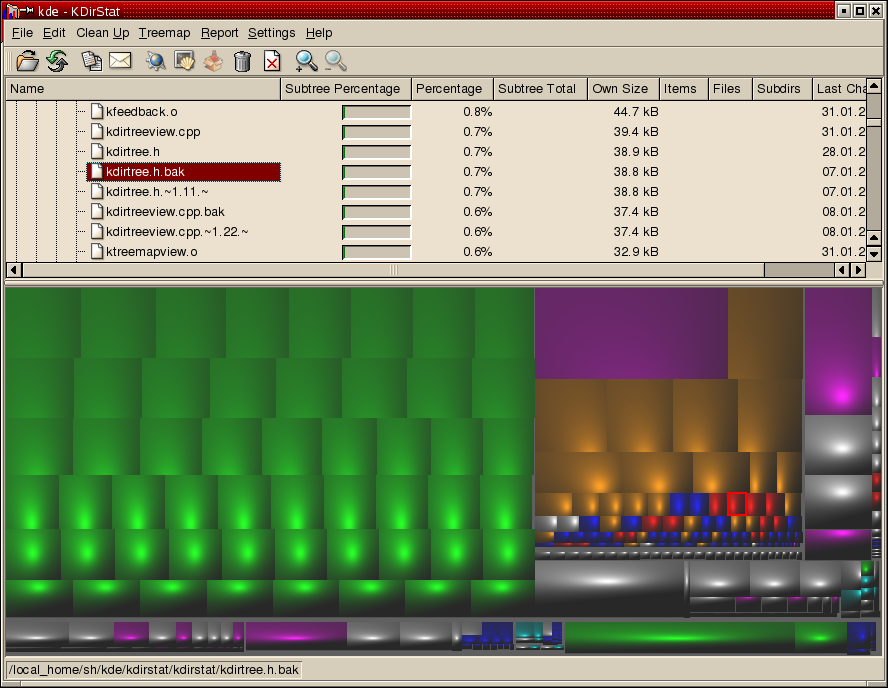
For Linux users, you can get KDirStat HERE. I havent tried it yet, but it looks very similar to WinDirStat. This screen capture is from their site.They are all fairly easy to use. Just roll your cursor over the big ones and the filename appears in the bottom left corner of the window. You can then decide which files you want to delete, and start enjoying some free space on your hard drive again.

Speed Up Your Mac – Quick Easy way to make Mac OS X Lion/Mountain Lion faster

Mac OS X LionI am sure there are dozens of methods, and dozens of programs and apps that do wonderful things for your Mac computer running OS X Lion/Mountain Lion, but in my opinion, the folks at Apple have built in the best, quickest, and easiest way to give your Apple computer a boost. It’s called “Repair Permissions”.

A few years ago I was involved heavily in editing high def video for a motorsport operation, and it never ceased to amaze me how much quicker and happier my mac pro was after a permissions repair.

**NOTE** – It can take a while for this operation to complete, so make sure you have plenty of down time before tying up your computer with this procedure.

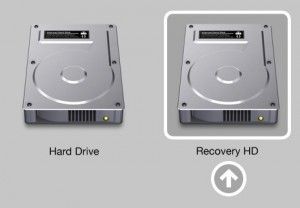
The good thing about OS X Lion/Mountain Lion is that you don’t have to go and find your install disk to do this anymore (Like you used to have to do with Snow Leopard, Leopard and Tiger). When you installed Lion/Mountain Lion, it created a rescue partition for you, and to access this partition, and speed up your mac, all you gotta do is hold down your “ALT” key, and turn your mac on! Once you here the “BONG” sound, you will see this:

Mac Alt Recovery HDWhen your Mac boots, it selects the regular hard drive automatically. But when you hold down the ALT key, your telling your Mac that you want to see what other devices you can boot. Lion/Mountain Lion creates a very small “Virtual” hard drive, that you can boot into instead of your normal hard drive and operating system, that lets you perform maintenance operations. To restore your permissions, click the arrow for “Recovery HD”. Your computer will boot from this second partition, leaving your main partition unmounted, so you can perform maintenance.

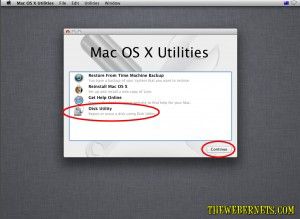
Once your computer has booted up from the Recovery Hard Disk you will see Utilities Window.

mac os x utilities windowTo get started, select the “Disk Utility” option, then click continue in the bottom right corner. The Disk Utility will now open.

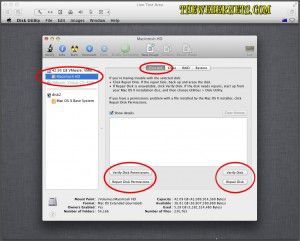
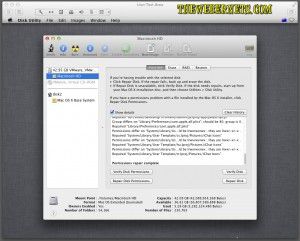
restore permissions mac osx lion disk utility windowSelect/Highlight your main hard drive partition (the one you want to speed up) in the left side of the window, and click “First Aid” to get to the repair window. Here you can verify/repair the condition of the disk. I usually just hit “Repair Disk” and let it do its thing. This can take a bit of time, so go put the coffee on!

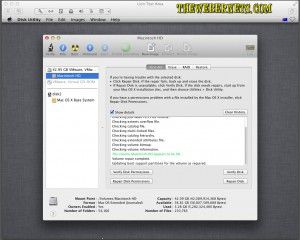
mac lion repair disk processYou will see all kinds of activity, but the only thing you need to worry about is that green text that says the disk is ok, and that the repair is complete. The next step is to click “Repair Permissions”. Again, this may take some time, but when it is complete it will tell you down the bottom of the window in bold font.

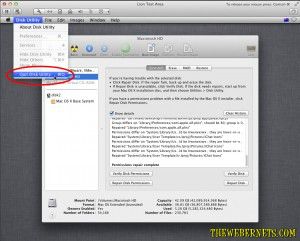
mac osx lion repair permissions window completeWhen its done, Quit out of Disk Utility using the “Disk Utility” menu bar option.

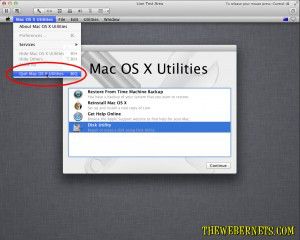
quit disk utilityThen Quit out of the Utilities Window from the Mac OS X Utilities menu bar option.

quit mac utilities

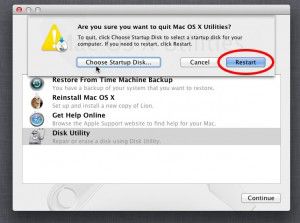
The final window/step is to click “Restart” from the “Choose Start Up Disk” Window. As we didnt permanently change the start up disk, there is no need to change any other parameters here, just click Restart.

choose start up disk

Your computer will now restart (It may take a little longer than normal to do so – so don’t worry if it does!) and hopefully you will notice a pleasant increase in performance!

If you want to go one step further and clean your caches and log files, rebuild indexes and execute your Macs built in maintenance scripts, check out my follow on article about using the free application called ONYX!

How to Save your OS X Mavericks, Mountain Lion and Lion Install Program and make a Install/Boot DVD or USB key

OS-X-Mavericks-Header

UPDATE – **I HAVE TESTED THIS METHOD WITH OS X MAVERICKS AND IT WORKS GREAT!**

This tutorial was written using Mountain Lion as an example, but it works for Mavericks as well – just follow the same process

Just like OS X Lion, it is really important to save your OS X Mountain Lion and Mavericks “Install File” BEFORE you install it. Without it, you can not make an install disk, and it is deleted automatically once you install your new operating system.

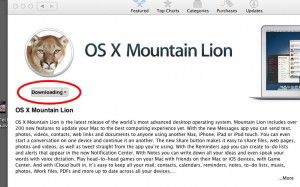
Once you have purchased Mountain Lion or Mavericks, your purchase/price button will turn into a “downloading” button.

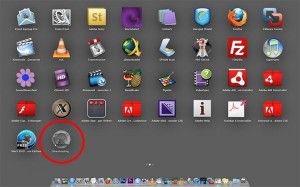
mountain lion download screenA short time after, your launchpad may spring open and show you the downloads progress.

mountain lion download progress screen in launchpadYou can leave it open and watch the progress if you want. Close it up when your finished watching, or when the file has completely downloaded.

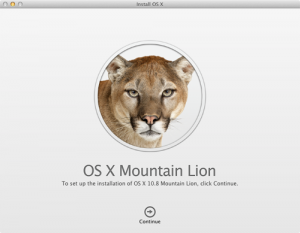
**CRITICAL** – When the file has finished downloading, a window will pop up and ask you if you want to go ahead and install the new software. QUIT THE INSTALLER IMMEDIATELY! This can be done by clicking the file menu and selecting the “Quit” option.

mountain-lion-install-begin-now

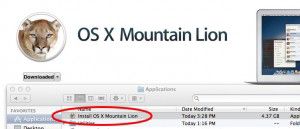
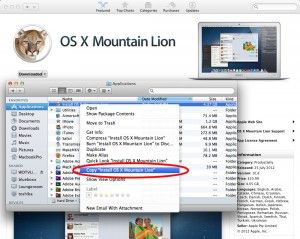
Don’t worry, you are not going to loose the program you just bought, you are just telling your computer that you want to install later. Once you have closed out of the installer, open a new finder window, then open your “Applications” folder. Inside this folder you will see your OS X Mountain Lion or Mavericks Install File.
mountain lion installer in applications folderRight click and “Copy” the installer file, then “Paste” it onto your desktop.

save your mountain lion install fileOnce the file finishes copying to the desktop, you can go back into your applications folder and double click and run the installer, if you are ready to install your update.

If you want to make a bootable install DVD disk or a USB Key, the easiest way to do this is with Disk Maker X (Formerly called Lion Disk Maker).

LDM_GemGo to the Disk Maker X web site HERE and download the latest version of the program. Once downloaded, unzip and run the program.

TO MAKE A DVD DISK:

With Disk Maker X open, select Mountain Lion to make a Mountain Lion DVD, Or Mavericks to make a Mavericks Install DVD.

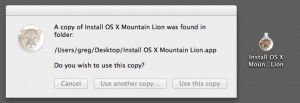
lion disk makerOnce you select your Operating System, the program will try to locate the install program automatically. It doesn’t matter if it uses the one in your Applications folder, or the one on your desktop. In my case, it found the one on my desktop.

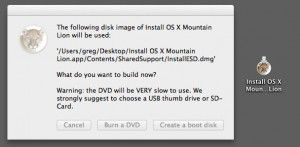
lion disk maker location confirmThe next step is to tell Disk Maker X if you want to make a DVD or a USB key. Keep in mind, if you want to make a DVD you will need a 8.5gb Dual Layer DVD, and a Dual Layer DVD Burner, as the installer will not fit on a single layer 4.7gb DVD.

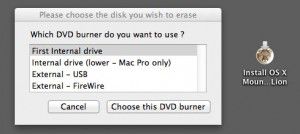
lion disk maker dvd or usbClick “Burn A DVD”. Disk Maker X will ask you to select your Burner.

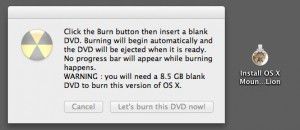
choose dvd driveYou will now be prompted to insert a disk, and begin the burning process.
burn disc now

TO MAKE A USB KEY:

With Disk Maker X open, select Mountain Lion to make a Mountain Lion USB or Mavericks to make a Mavericks install USB key.

lion disk makerOnce you select your operating system, the program will try to locate the install program automatically. It doesn’t matter if it uses the one in your Applications folder, or the one on your desktop. In my case, it found the one on my desktop.

lion disk maker location confirmThe next step is to tell Disk Maker X if you want to make a DVD or a USB key. Keep in mind, if you want to make a USB Key you will need a 8gb thumb drive, due to the size of the installer. Click “Create a Boot Disk”.

lion disk maker dvd or usbNext, Disk Maker X will ask you about your Thumb Drive. In keeping with the recommendations of the makers of the program, we will select “8gb USB Thumb Drive”.

(My understanding is, that this option will completely erase the entire USB drive, and ALL existing data will be over-written. If you have a larger drive, which is divided up into partitions, and you do not want to erase the whole drive, use the “Another kind of disk” option. IF this is incorrect, or there is also another reason, please reply in comments.)

You will now be asked to confirm your drive selection, and its location.

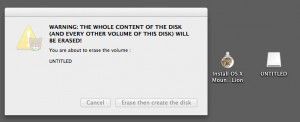
usb selectOne last warning! Your thumb drive will now be erased COMPLETELY!

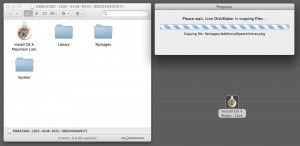
final warningDisk Maker X will now begin crunching files to make your USB Installer.

usb creation in progressDuring this process, particularly towards the end of the process, a lot of new windows and “Get Info” dialogues will pop up, and disappear. This is normal. This is just your computer acknowledging the creation and mounting of new drives and volumes.

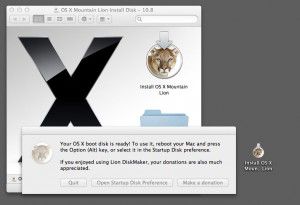
Once it is all completed, you will hear Homer yelling “WooHoo!” and see your new USB drive ready to go!

Finished!

homer-woohoo

Quickly and Easily check your web site SEO performance with the SEO Workers Analysis Tool

SEO Workers LogoOver the last 5 years I have built dozens of web sites. During that time I have assessed a lot of “Tools” that are designed to give you Search Engine Optimization feedback on how your site looks to search engines, but I always seem to find myself coming back to The SEO Workers Analysis Tool. It’s the best.

If you want to know how your web site looks to the likes of Google, Yahoo, Microsoft Bing etc etc, just go to seoworkers.com and plug your web site into their SEO Analysis tool, and it will tell you what is right with your site, what is wrong, and advise you what you can do to make your site rank better. They also have some really informative video’s you can watch, that appear automatically with your analysis results!

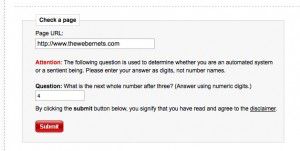
SEO Workers Analyzer Home PageOnce you are on their Analyzer Page, type in your sites URL, and answer the anti spam bot math question.

SEO Workers Submission WindowAfter you click submit, their analyzer will take a look at your site, assess it, and come back to you (Almost Instantly) with a complete Search Engine Optimization report, telling how your site looks to search engines, and advise on how you can tweak stuff to give you MORE POWER!

More PowerArgh Argh Argh!