This is a simple easy guide on how to make the best encodes with the smallest file size in Handbrake without having to know or understand all of the settings. Just copy my settings and you’re done!
**NOTE** – These settings are for DVD Video ONLY – You can find a Blu Ray Tutorial HERE.
Video encoding is a topic a lot of people are very passionate about. Factors like TV size, Viewing distance, hardware, drive space restrictions and a plethora of other concerns are all valid. But if you are like me, and just want to reduce your episodes to a more manageable size, whilst retaining most of the quality, here’s how to do it.
PLEASE NOTE – This method will produce very nice quality videos, that will look good on 1080p TV’s, but may take 2 hours or more to process each hour of video, so my advice is to let it run whilst you are sleeping each night.
Once you have ripped your Disks to MKV files with Make MKV, Open Handbrake (You can download the latest version for free HERE) then press the source button and select the file you want to convert, or if you want to do a batch of files, select the folder that contains all of your ripped MKV’s. Handbrake will import them all, but you will only see the first one. Now it’s time to make some adjustments to the settings.
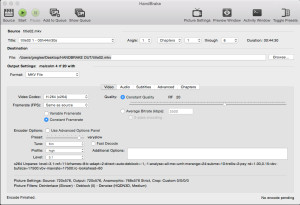
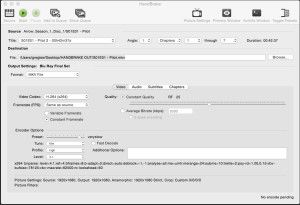
All of your settings should look like the above screen grab – Click it to enlarge.
1. Set the output format to MKV File
2. Click the button that says “Video”. Make sure the video codec is H.264 (x264)
3. The frame rate should be “Same as Source” and Constant Framerate should be selected.
4. Check Constant Quality and adjust the slider until the RF number goes to 20
5. For the encoder options, slide the preset slider to Very Slow. Trust me, it takes a while, but the quality is far superior, and usually yields a smaller file size. Unfortunately it is a trade off for speed vs quality. Like I said, run it while you are sleeping.
6. Leave “Fast Decode” unchecked.
7. Set Tune to Film
8. Set Profile to High
9. Set Level to 3.1
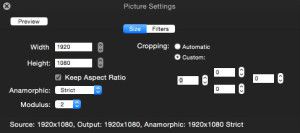
10. Now click the “Picture Settings” button in the top right side of the window.
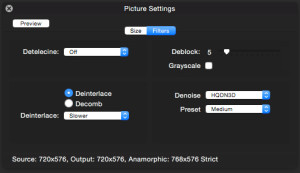
A new window will open. Change all of your settings look like this
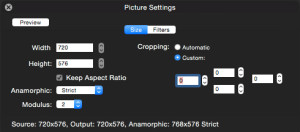
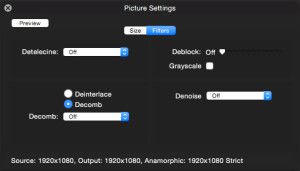
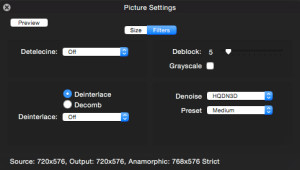
11. Whilst in the picture settings window, click “Filters” and change all of your settings to look like these as well. Denoise and Deblock will make the picture look SO much better when viewed on larger 1080p TVs.
**If you are in the USA you can skip this step, but for the rest of us, we need to know if our video is progressive or interlaced (the method used to draw each frame of video)**
If your video is progressive, you can skip this step, but if it is interlace, you will definitely want to de-interlace the video before you watch it on a 1080 screen, otherwise you will see all kinds of ugly horizontal lines in fast moving scenes like the image below.

(If you dont know whether your video is interlaced or progressive, Mac users can use Video Spec to find out, and Windows users can use G-Spot to find out)
If your video is interlaced, make sure “Deinterlace” is checked and select “Slower” for best results.
12. Now you can close out the Picture Settings window and select the “Audio” tab in the main window.
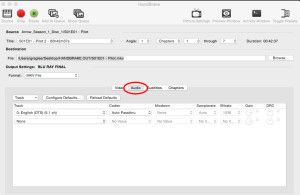
I am a real Audiofile, I love the Dolby Digital and DTS 5-7 channel audio tracks in movies, so I select “Auto PassThru”. But, if regular 2 channel Stereo is ok for you, you can configure that in this area if you want. I figure you are converting a DVD, so you might as well have the best sound quality available. Just select the Dolby Digital or DTS sound track from the drop down window, and choose “Auto Passthru”
13. Click the “Subtitles” tab and select none
14. Click the “Chapters” tab and make sure “Create Chapter Markers” is un-checked.
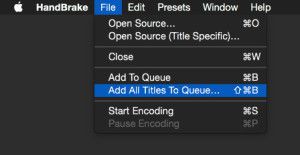
15. You are now ready to start encoding. If you are only doing one file, just press the “Start” button and Handbrake will start encoding. If you are doing a batch of files, open the File Menu and select “Add All Titles To Queue”
16. Press the “Show Queue” button to see all your files waiting to be encoded
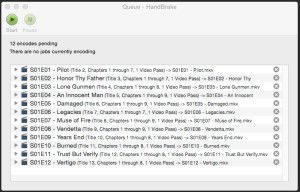
17. Press the “Start” button and your encoding session will begin.
Iconic Guitars – The Most Iconic Of All Time, In My Opinion
I am NOT a guitar player…I wish I was. I would love to be able to play guitar, it fascinates me. I do have a small collection of guitars, and I love looking at them, and imagining all the possibilities they possess. I was in my late teens and early 20’s in the 80’s/90’s, and this era was magical to me.
I was VERY much a fan of HAIRBANDS!
Great songs, with larger than life personalities doing stuff on a piece of wood with six metal wires that I have never been able to comprehend. How the heck do they do it?
For example, the GREATEST guitar player to ever come out of Australia (And one of the best in the world) has to be Tommy Emmanuel. Tommy often plays on his own what usually needs two people to play. Check him out playing both the rhythm and melodies of The Beatles songs Day Tripper and then Lady Madonna.
I am always looking to expand my collection of iconic guitars. I have done some searches today for articles about the most iconic guitars, and I must say, most of these article miss quiet a few. The first article I read said the number one guitar of all time was Angus Young’s black Gibson, and Steve Vai’s Gem and Universe weren’t even mentioned.
This is when I began to realise this topic is subjective. Everybody will see it differently. We all have different opinions, and we are all entitled to our own opinions. This is my opinion, and I would really love to hear your opinions in the comments. Lets just do it with respect ok.
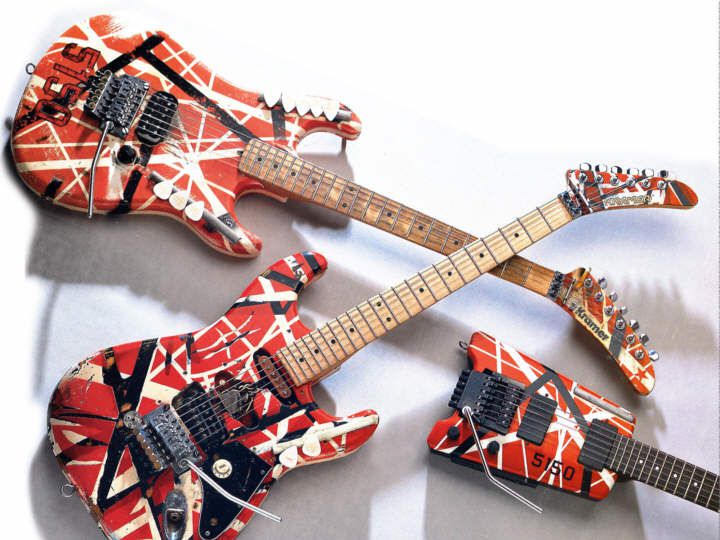
In my opinion, the most iconic guitar ever is easily, and with out doubt, Frankenstrat.
I really love the EVH Steinberger. It is actually the most recent addition to my collection. As a Lolcats fan, and a EVH fan, imagine my delight when I came across this pic today whilst researching this article.
Once again, here are the most iconic guitars in my opinion. The EVH Trio.
From here on, guitars appear in no particular order. They are just the most iconic guitars to me.
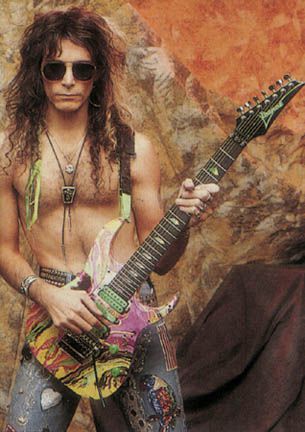
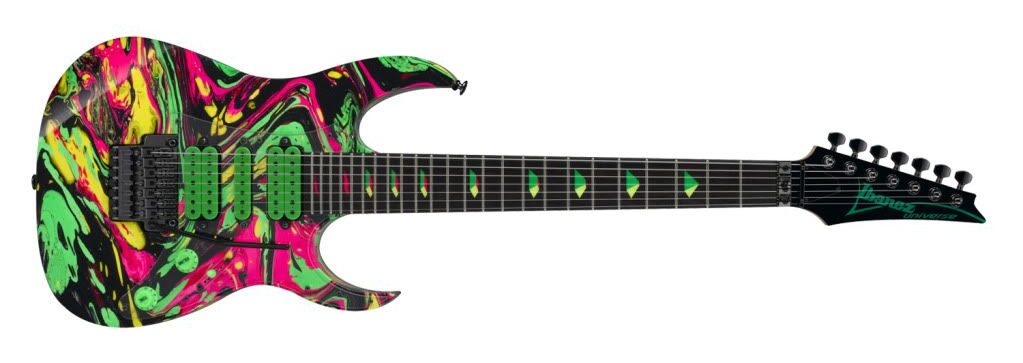
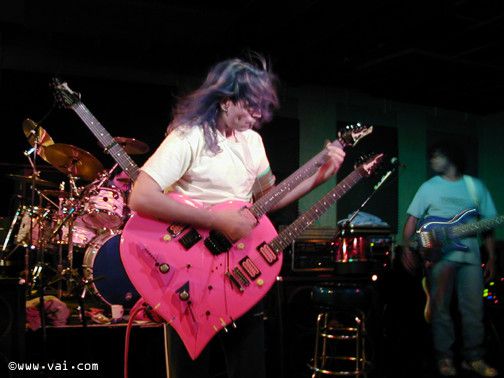
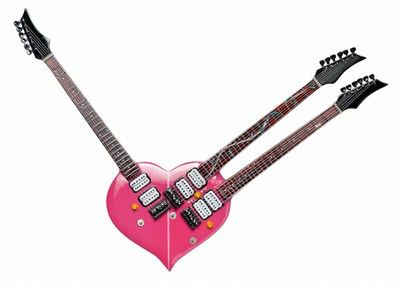
Steve Vai is Explosive. Brilliant. The Ibanez Gem and Universe are definitely on my wishlist. The 7 String Universe’s sound on the Passion and Warfare album (Particularly the song The Animal) was like nothing I had ever heard before.Whilst on the topic of Vai, the Heart guitar he played with David Lee Roth was pretty Cool too!
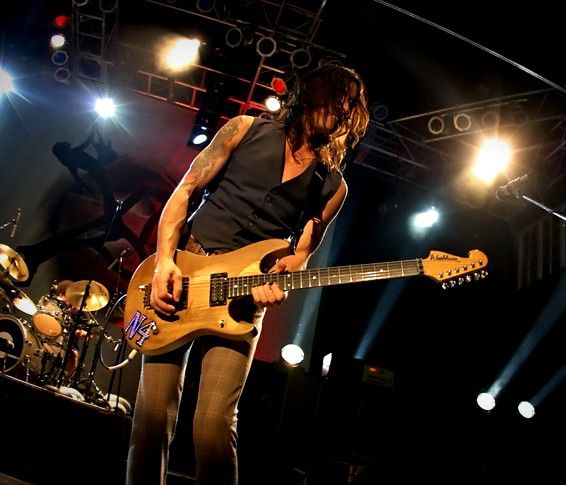
Next, is my most FAV guitar player of all time. I first heard him doing Mozart in the Bill and Ted movie, and he has continued to stun me ever since. I especially loved his efforts at the Freddie Mercury Tribute Concert. Nuno Bettencourt and the Washburn N4
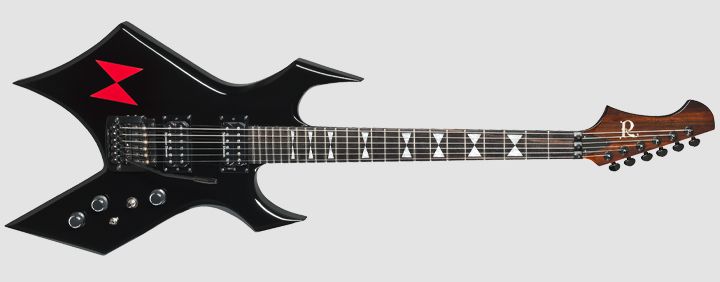
The Girls were very well represented in the 80’s as well. Lita Ford’s B.C Rich was another classic for me.
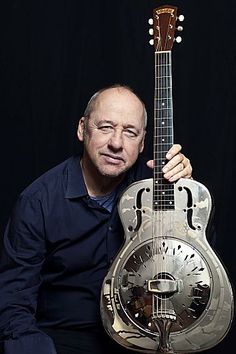
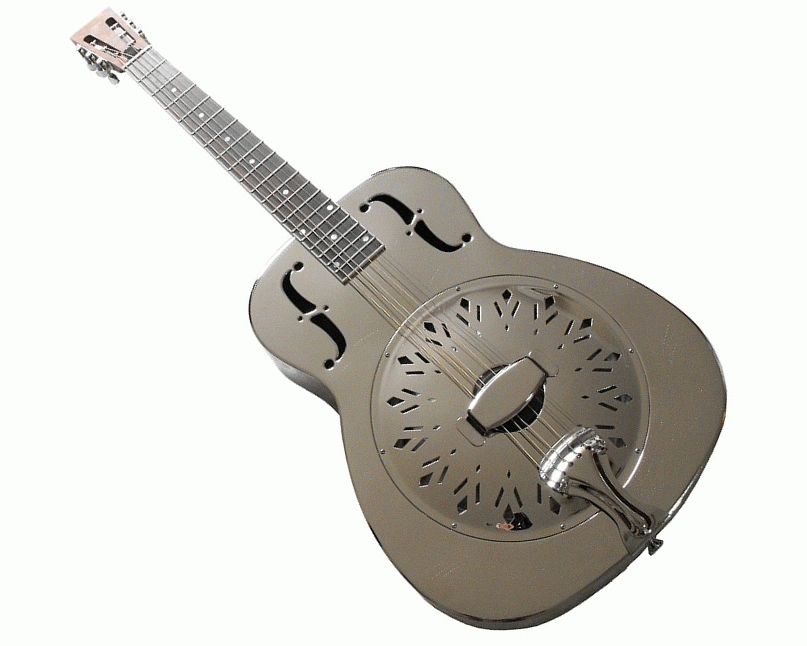
Previously, on the other side of the world, Mark Knopfler’s National Acoustic was pretty iconic to me. I loved it on the cover of the Brothers In Arms album.
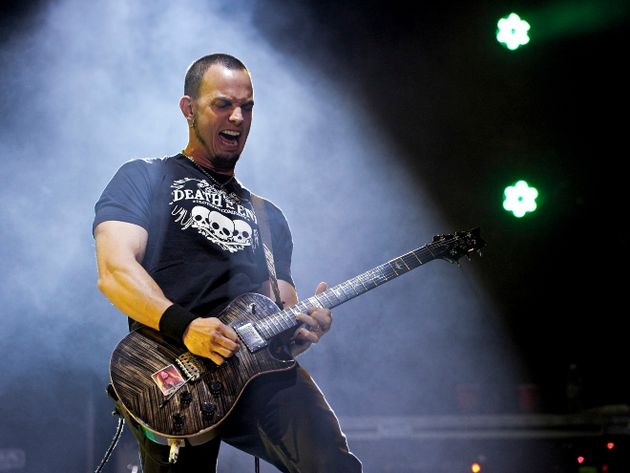
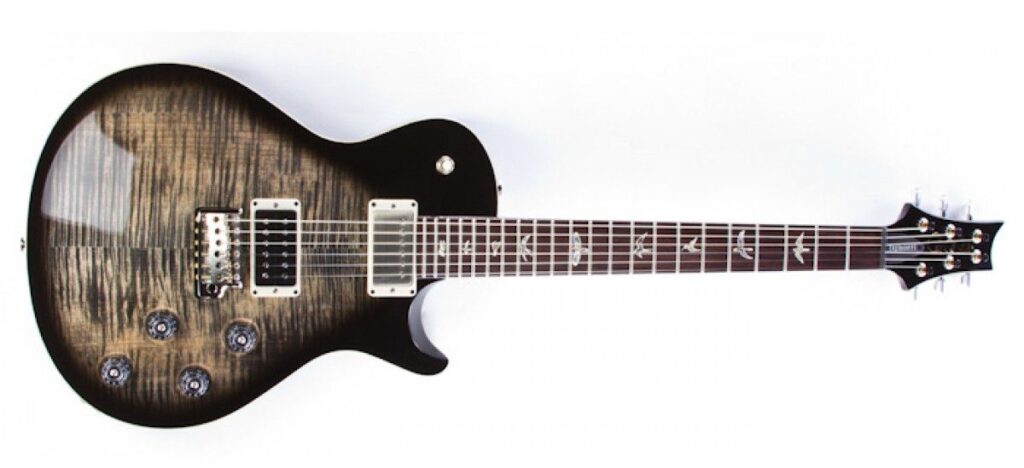
Before I got my Steinberger, my favorite guitar in my collection was my Paul Reed Smith Tremonti Blackbird. Mark’s Charcoal Burst PRS “Dimebag” Tribute Blackbird is one of my all time favs.
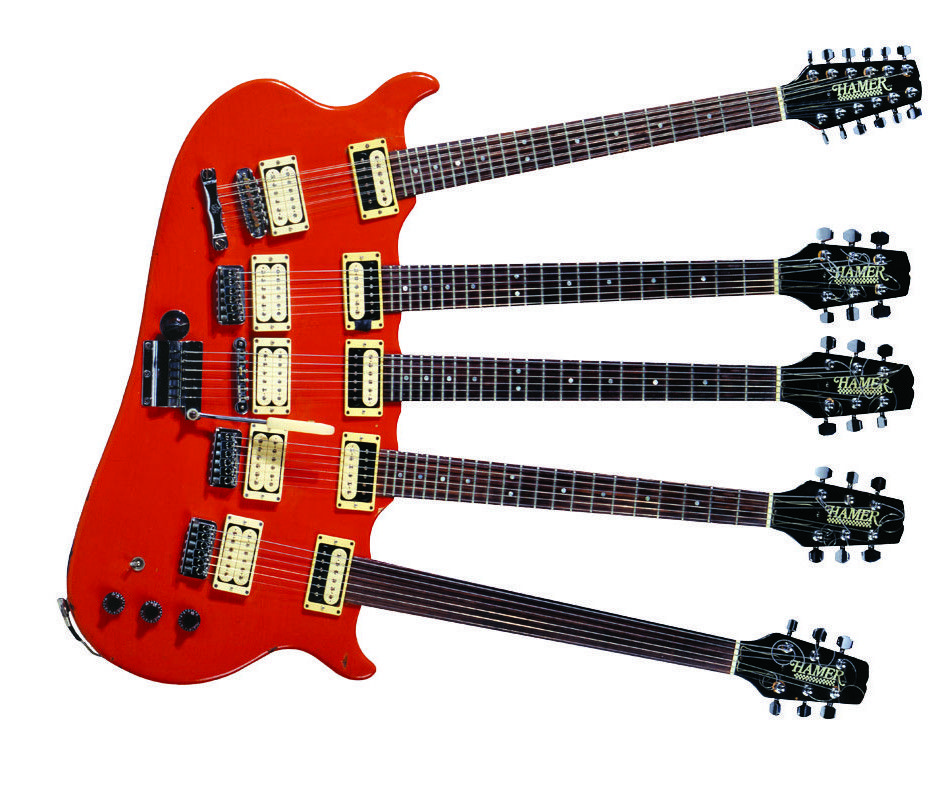
The “Funnest” guitar player I have ever seen live is The Clown Prince, Rick Nielsen from Cheap Trick. Now this guy knows how to put on a show! Here is Ricks Hamer 5-neck. My guess is that the 5 necks are from top to bottom, a 12 string, a regular tuned fixed bridge, and regular tuned with tremolo, another fixed bridge with alternate tuning (maybe drop d) and a fretless.
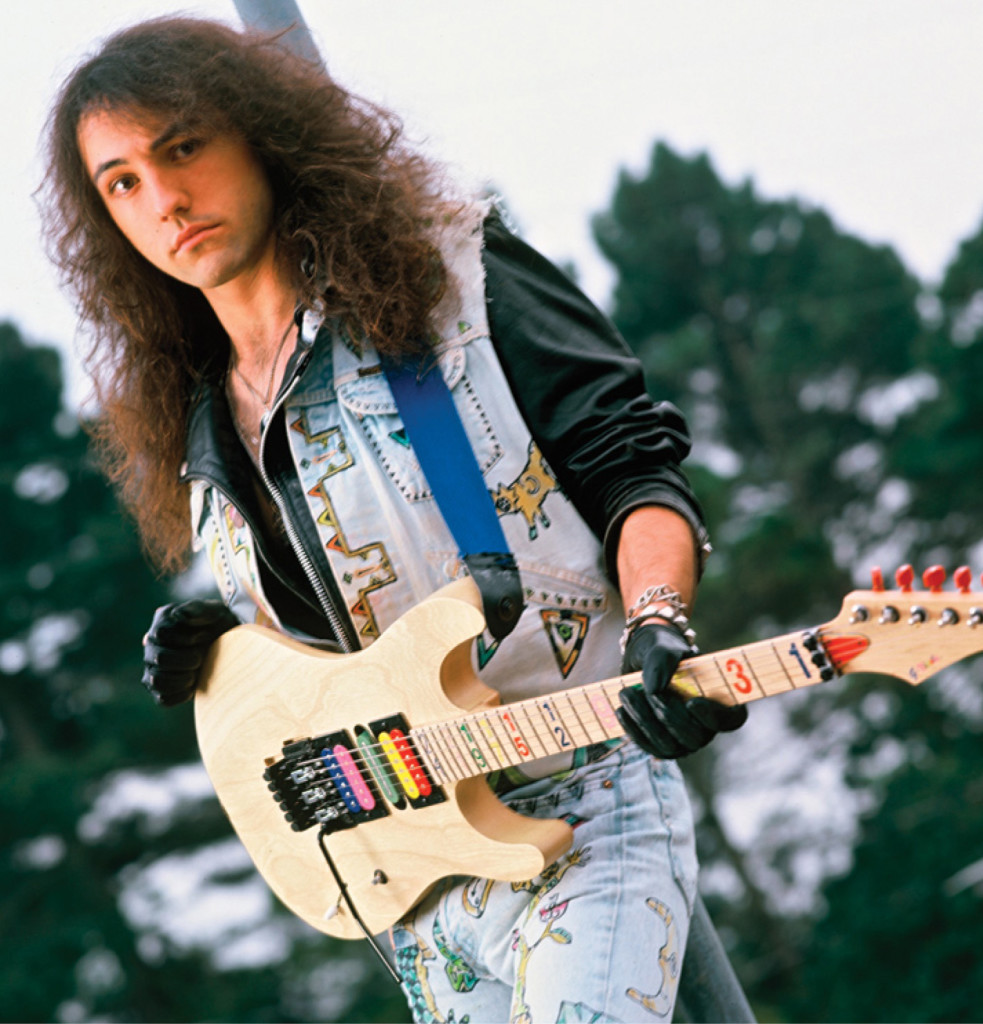
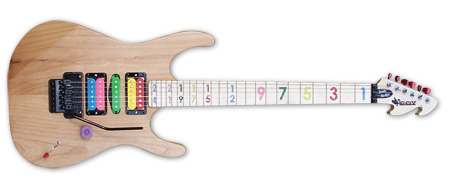
Jason Becker is an incredible musician who I most remember being referred to as “Beyond Prodigy”. His playing on David Lee Roth’s album A Little Aint Enough was brilliant. Carvin have recently released Jason’s Numbers Guitar.
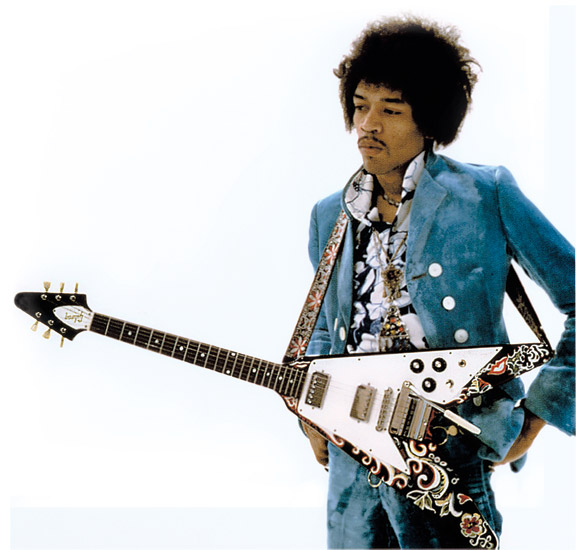
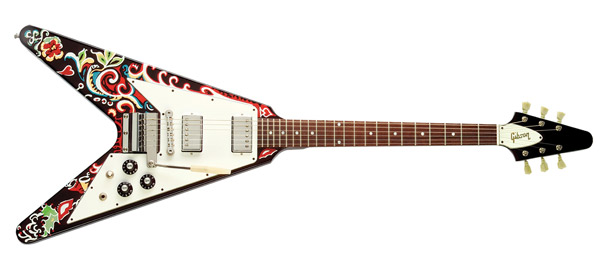
Jimmy Hendrix and The Flying V – what more can I say
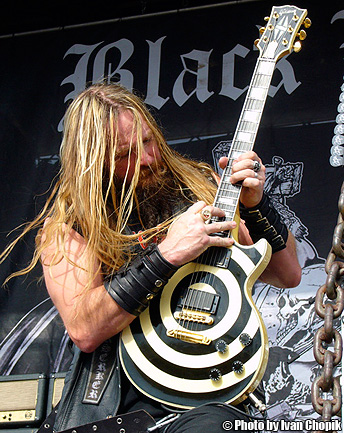
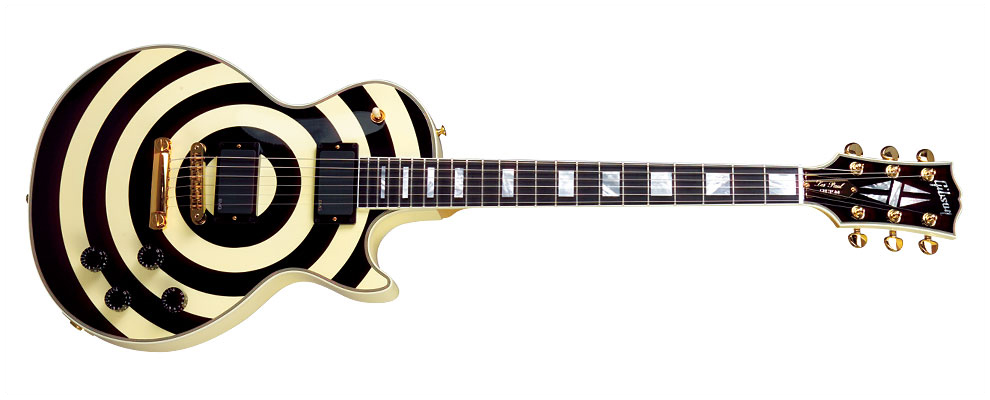
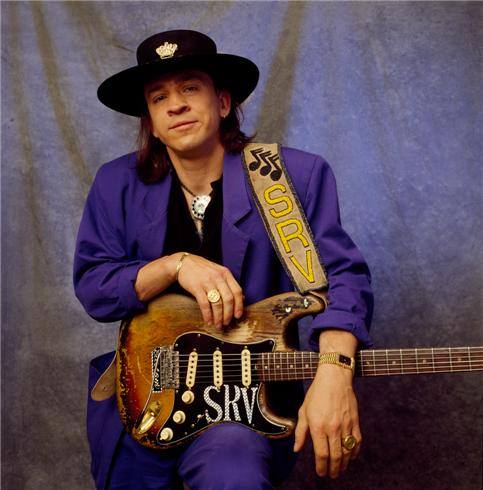
One of the loudest and most “In Your Face” guitar players would have to be Zakk Wylde. I absolutely LOVED his work on the movie Rockstar, and he is a perfect fit for Ozzy Osbourne as well. This is Zakk’s Gibson Bullseye.If you are reading this article, you will be familiar with Stevie Ray Vaughan’s SRV Fender Strat. A truly Iconic guitar in so many ways. I saw this guitar first hand in San Francisco a number of years ago, and the photos really don’t do it justice. The wear and tear on this axe is astonishing, Stevie must have notched up thousands and thousands of hours playing it.
Defining cool, here is Bo Diddley with his Gretsch
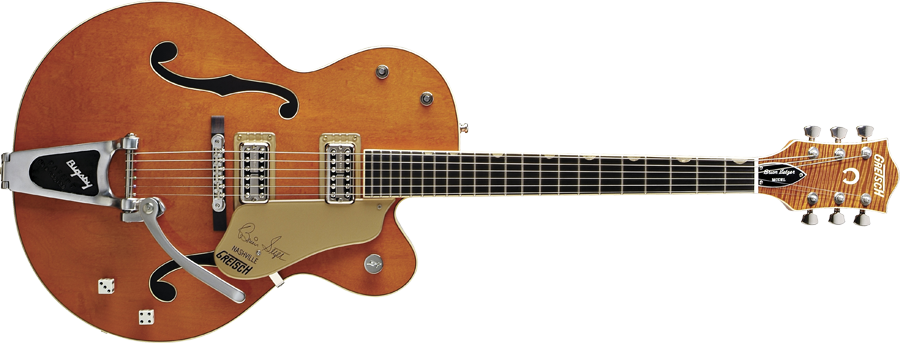
Brian Setzer has become one of my favs over the years. I love the 50’s Rockabilly sound and image. Gotta love those Gretsch guitars! If you haven’t already heard it, do your ears a favour and check out his Brian Setzer Orchestra Live In Montreal album. You won’t regret it!
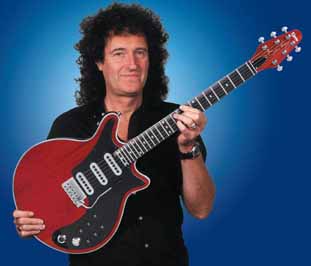
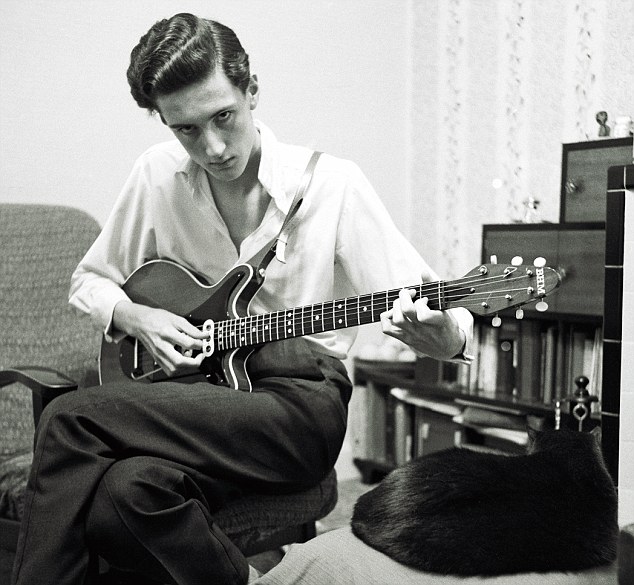
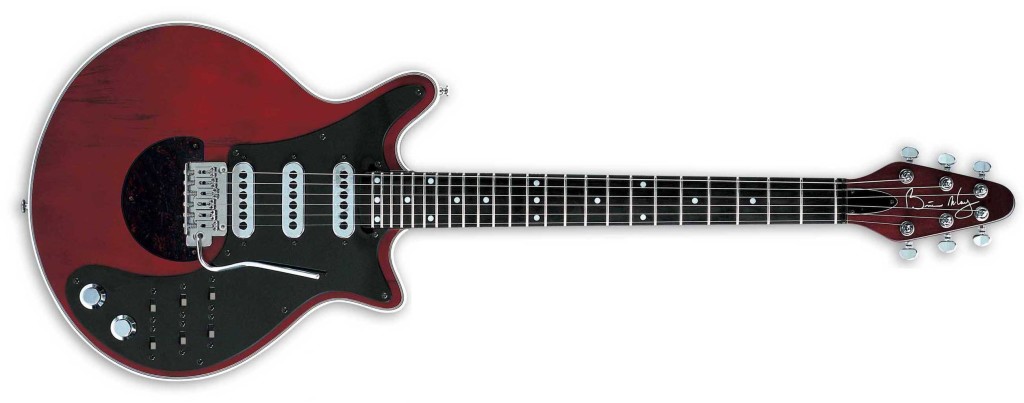
Brian May’s Red Special is a interesting guitar. Brian built it himself in 1963. I read recently that when Brian travels by air, he also buys the first class seat next to him for this guitar.
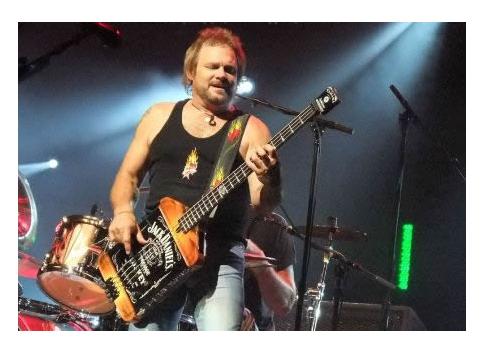
No list on iconic guitars is complete without Michael Anthony’s Jack Daniels Bass
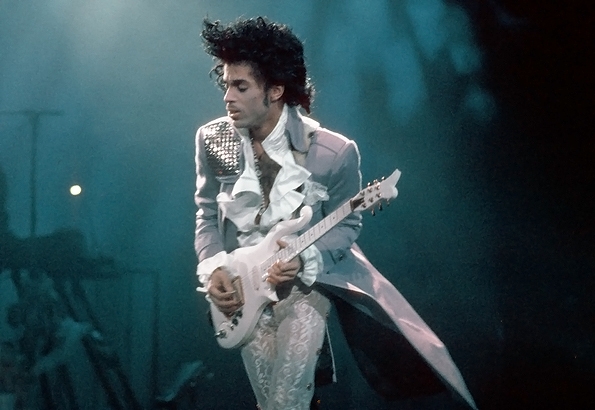
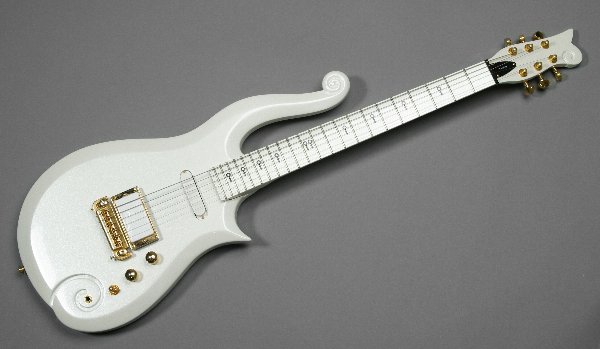
Prince had some interesting looking guitars over the years. Here is his Cloud Guitar
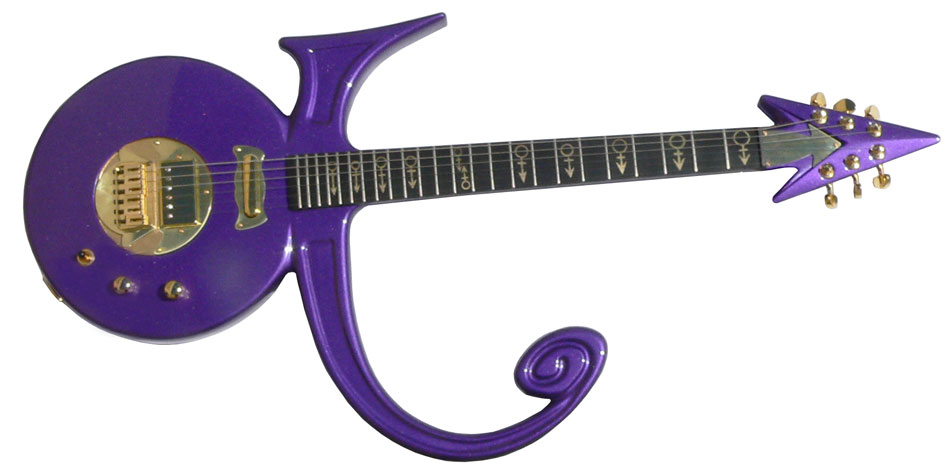
Prince had another super interesting axe, the Symbol guitar
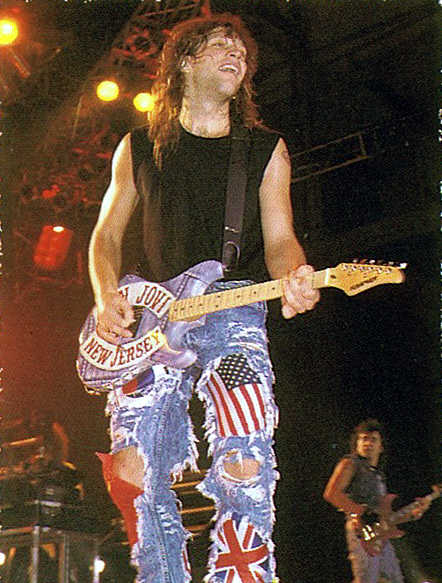
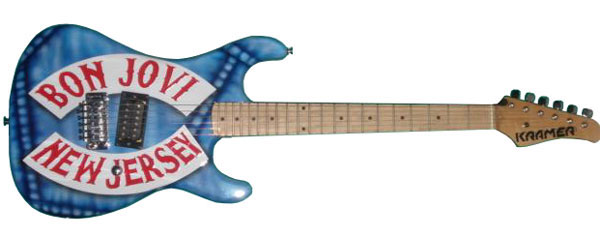
Bon Jovi has had a few iconic guitars over the years. Here is Jon’s New Jersey Kramer
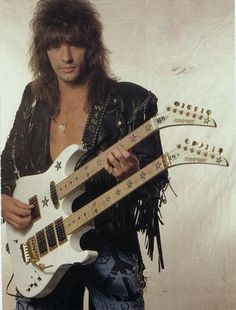
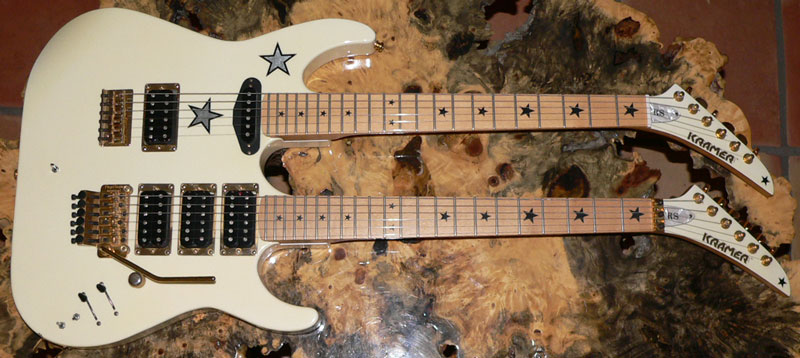
And this is Richie Sambora’s Kramer Double Neck. I remember this one most from the beginning of the “Lay Your Hands On Me” video clip.
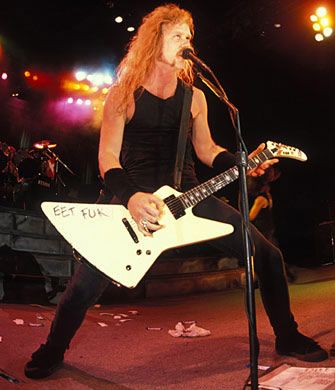
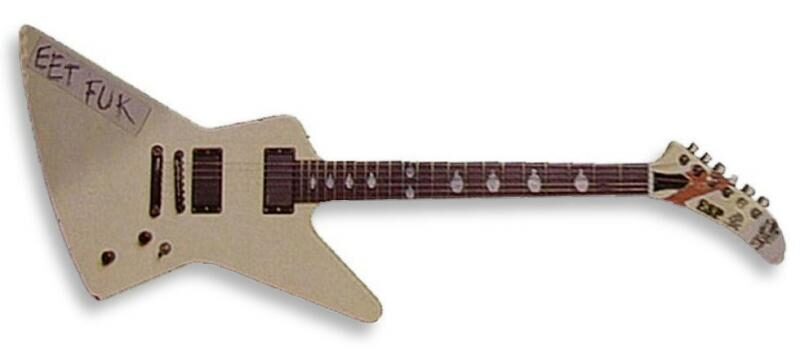
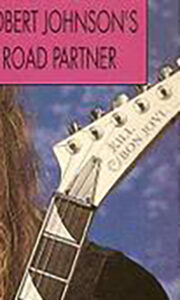
And on the topic of Bon Jovi, James Hetfield from Metallica had the “Kill Bon Jovi” guitar, which I have been unable to find a picture of. If anybody has a pic, please sent it in and I will add it to the list. In its abscense, here is James’s “Eet Fuk” Explorer.
**UPDATE MARCH 2023** – 8 Years after writing this article, I was finally contacted by a reader who found a photo of James Hetfield’s “Kill Bon Jovi” guitar from the April 1989 edition of guitar player. Thanks so much Mike for sending this!
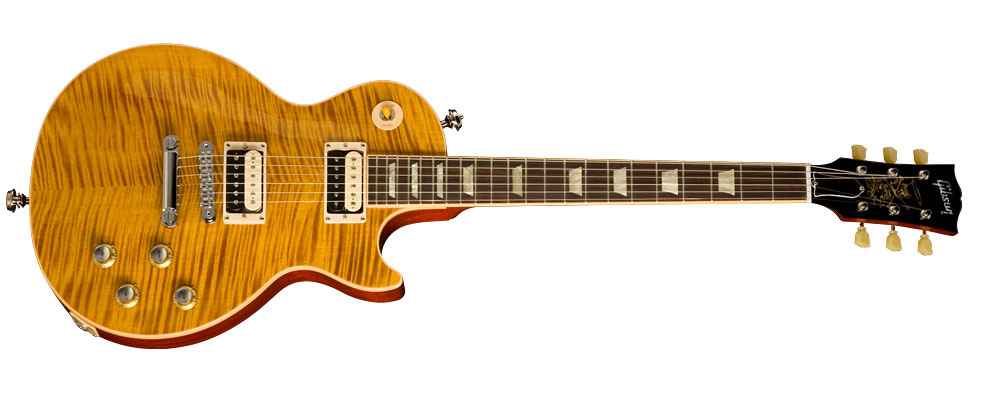
One of the most iconic pairings in guitar history would have to be Slash and Gibson.
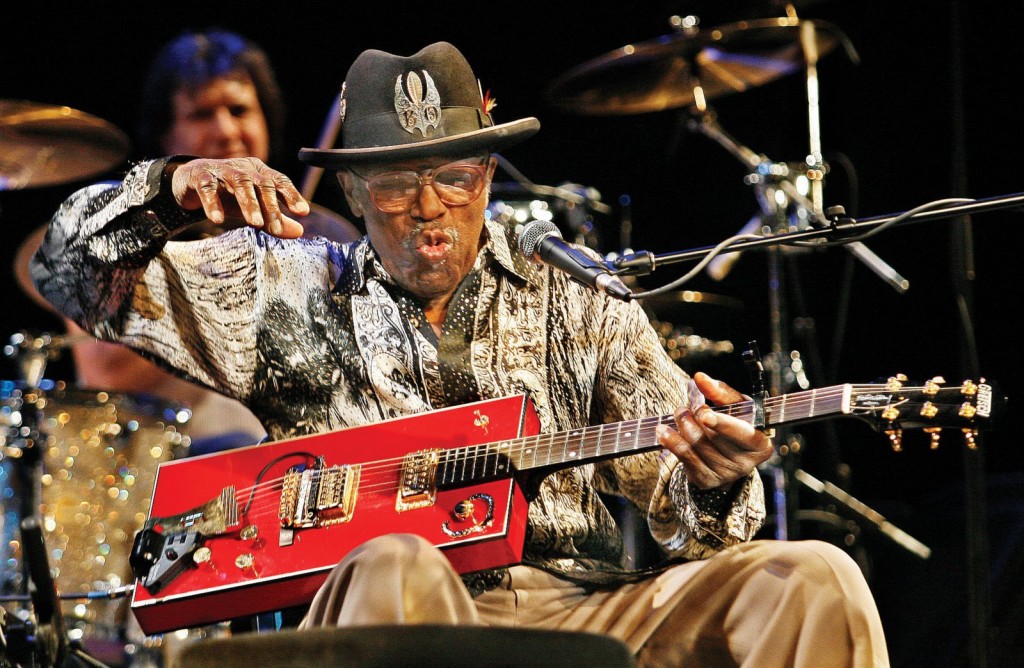
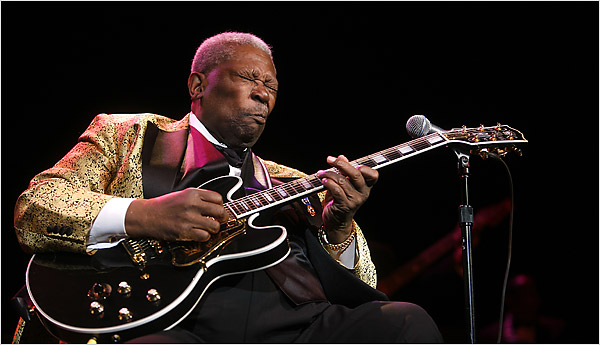
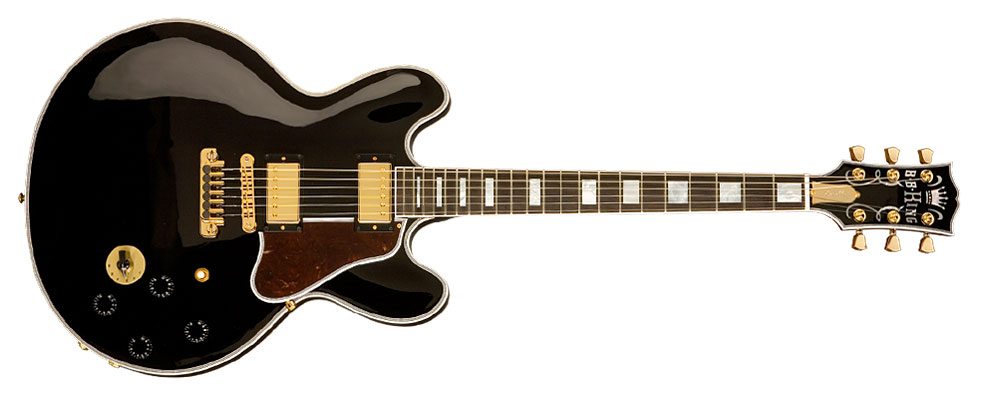
B.B. King and Lucille are another iconic duo for Gibson.
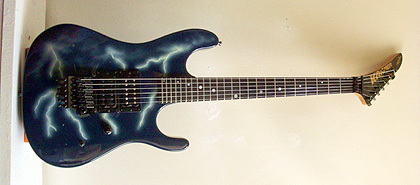
Vivian Campbell’s Kramer Nightswan was all the rage for a while in the 80’s. Still a cool looking guitar.
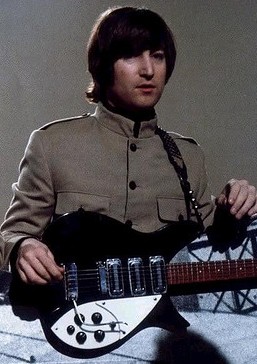
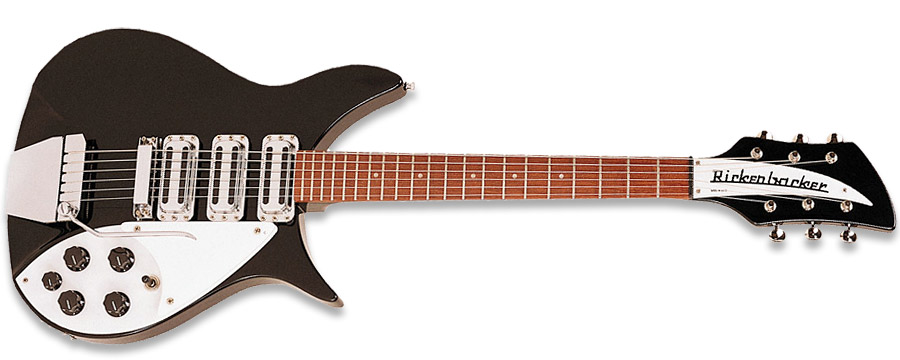
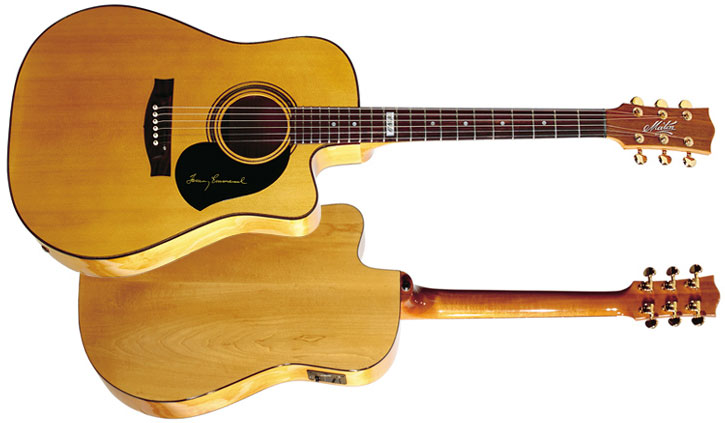
John Lennon and Rickenbacker made a pretty iconic pairingAnd rounding out the list, is again, Tommy Emmanuel and his Maton Acoustic
I hope you enjoyed this trip down memory lane, looking at some of the great guitars the made music what it is today. Please let me know in the comments if there is anything you think should be added.
This is a simple easy guide on how to make the best encodes with the smallest file size in Handbrake without having to know or understand all of the settings. Just copy my settings and you’re done!
**NOTE** – These settings are for Blu Ray Video ONLY – If you want to convert DVD Video see the tutorial HERE.
My Rant – (If your not interested in my rant, scroll down to where it says “Lets Get Started”)
Circa 2000 I got really pissed off at DVD’s. You start watching them, get relaxed and into the story, and when you least expect it they skip or freeze. Sometimes they even crashed completely. In my experience, the damn things were so unwatchable that I swore I would never buy another one again. Blu Ray has been around for a while now, and it started to feel like time to try again with this new technology. I did my research, and found a player that will play all regions (Regional Encoding – one of the stupidist restrictions in the history of technology), and made a somewhat hefty investment in starting a Blu Ray collection. I purchased all of the Marvel Movies, Agents Of Shield, Alcatraz, and I had been hearing a lot about Arrow, so I purchased a Season 1 and Season 2 box set for $80 AUD. I got through Episode 1 and 2 ok, but at episode 3 the old DVD issues appeared. To cut a long story short, EVERY one of the 8 discs in the set crashes about halfway through, and the last 2 episodes on each disc will not play at all. I cant believe the movie studios get away with it. Can you imagine how many bad discs there must be around the world? Again, they drive us to action that they deem illegal.
In order to watch the show I paid $80 for – I was forced to rip the discs to my hard drive. There are plenty of tutorials out there that show you how to do this, so I am not going to cover that here. Once I had ripped the episodes, each file was almost 6GB in file size. I set about trying to reduce the sizes and found thousands of different ideas and methods. It is a topic a lot of people are very passionate about. Factors like TV size, Viewing distance, hardware, drive space restrictions and a plethora of other concerns are all valid. But if you are like me, and just want to reduce your episodes to a more manageable size, whilst retaining most of the quality, here’s how to do it.
Lets Get Started
PLEASE NOTE – This method will produce very nice quality 1080p videos, but may take 2 hours or more to process each hour of video, so my advice is to let run whilst you are sleeping each night.
Once you have ripped your Disks to MKV files with Make MKV, Open Handbrake (You can download the latest version for free HERE) then press the source button and select the file you want to convert, or if you want to do a batch of files, select the folder that contains all of your ripped MKV’s. Handbrake will import them all, but you will only see the first one. Now it’s time to make some adjustments to the settings.
All of your settings should look like the above screen grab – Click it to enlarge.
2. Click the button that says “Video”. Make sure the video codec is H.264 (x264)
3. The frame rate should be “Same as Source” and Constant Framerate should be selected.
4. Check Constant Quality and adjust the slider until the RF number goes to 25
5. For the encoder options, slide the preset slider to Very Slow. Trust me, it takes a while, but the quality is far superior, and usually yields a smaller file size. Unfortunately it is a trade off for speed vs quality. Like I said, run it while you are sleeping.
6. Leave “Fast Decode” unchecked.
7. Set Tune to Film
8. Set Profile to High
9. Set Level to 4.1
10. Now click the “Picture Settings” button in the top right side of the window.
A new window will open. Change all of your settings look like this
11. Whilst in the picture settings window, click “Filters” and change all of your settings to look like these as well
12. Now you can close out the Picture Settings window and select the “Audio” tab in the main window.
I am a real Audiofile, I love the Dolby Digital and DTS 5-7 channel audio tracks in movies, so I select “Auto PassThru”. But, if regular 2 channel Stereo is ok for you, you can configure that in this area if you want. I figure you are converting a Blu Ray, so you might as well have the best sound quality as well. Just select the Dolby Digital or DTS sound track from the drop down window, and choose “Auto Passthru”
13. Click the “Subtitles” tab and select none
14. Click the “Chapters” tab and make sure “Create Chapter Markers” is un-checked.
15. You are now ready to start encoding. If you are only doing one file, just press the “Start” button and Handbrake will start encoding. If you are doing a batch of files, open the File Menu and select “Add All Titles To Queue”
16. Press the “Show Queue” button to see all your files waiting to be encoded
17. Press the “Start” button and your encoding session will begin.
Using this method I have been able to shrink each of the episodes from about 6GB in size down to about 1.3 to 1.5GB in size, retaining the full 1080p resolution and DTS sound track. The picture quality is very nice on my 42 Inch Samsung LCD TV. I play the files off my WD TV Live Hub and connect using HDMI cables. If you have a larger TV and notice some artifacts or “Blocks” in the picture, tweak the RF number slightly to 24 or at most 23. Adjustment here affects file size and quality considerably, so tread carefully and use small increments.
**NOTE** – THIS ARTICLE VERSION IS WRITTEN FOR MAC USERS – WINDOWS VERSION COMING SOON
PART 1 – Setting up MAMP (Experts Shortcut – Install MAMP and proceed to step 2)
If you have a WordPress Blog or Web Site, it can be VERY handy sometimes to be able to take your live published site and copy onto your local computer. This enables you to play with, set up and assess plugins, try out new themes and layouts, and generally mess with your site without affecting your real live site.
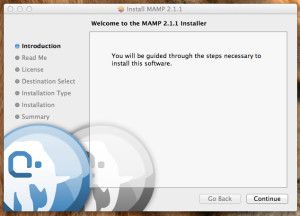
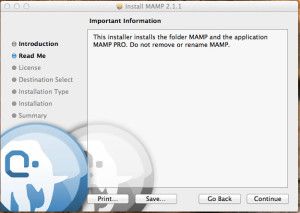
To get started you need to create an environment that will allow your site to function on your computer. The two main ingredients to a WordPress installation are PHP (web language) and SQL (Database). To get these two engines running on your computer you need to download some free software that installs them as part of a server. MAMP (Macintosh + Apache + MySQL + PHP) is excellant for this. It is available free from MAMP.info HERE. The free version and the paid version are bundled together, but for our purpose here, the free version will be fine, so lets go ahead and install that. Once you have downloaded MAMP, Unzip the zip file and run the installer package.
Click continue.
Click Continue.
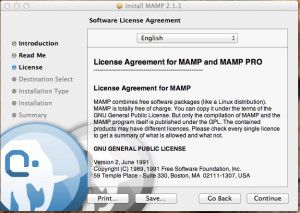
If you agree, click continue.
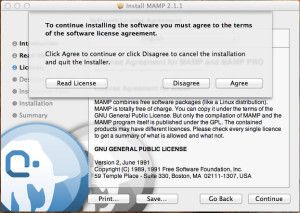
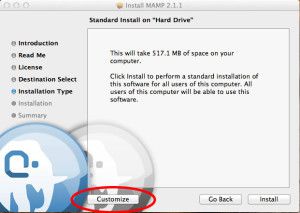
Confirm you Agree……click continue……And once you arrive at the screen below, we will tell the installer not to worry about MAMP PRO, and to just install MAMP Free. (If you want to try MAMP PRO free for 14 days, skip the following 2 steps).
Click the “Customize” button in the left.
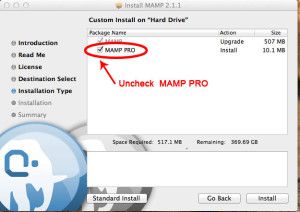
Uncheck the “MAMP PRO” option.
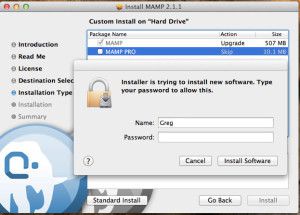
Type your password to allow the installer to run.
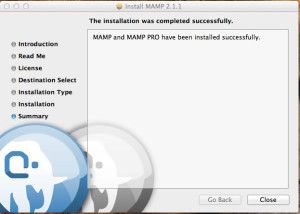
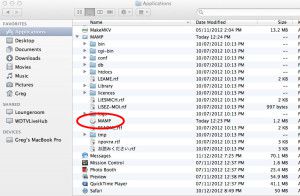
Once the installer has finished, click “Close” in the lower right hand corner. You can now open a new finder window, and in your Applications folder you will see a new folder called “MAMP”.
Double click the “MAMP” application to start it up.
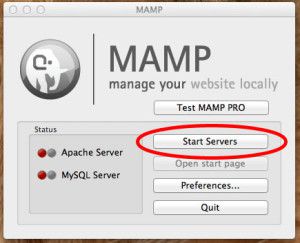
Now click the “Start Servers” button.
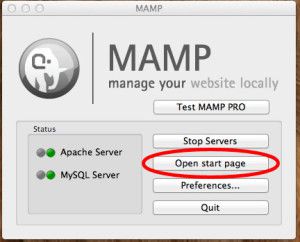
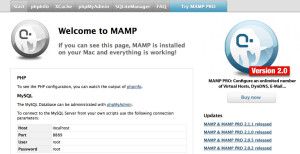
Once you have green lights, click “Open Start Page’. this will open your browser to a page that will tell you if all your services (IE PHP and SQL) are up and running on your machine.
WOOHOO! We’re ready to start copying our web site!
PART 2 – COPYING LIVE SITE
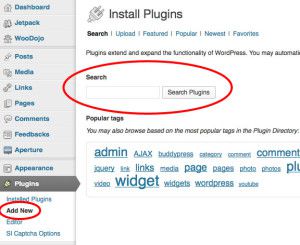
Its now time to copy over the files from the site we want to clone. To get started, log into that site, For this tutorial, I am going to use my Photography and Design site Gruffpuppy as an example. Once logged in, click “Plugins” and select “Add New”
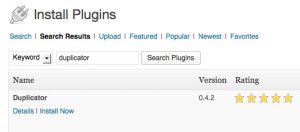
In the search field type “Duplicator”.
Once Duplicator is found, Install and then Activate the plugin.
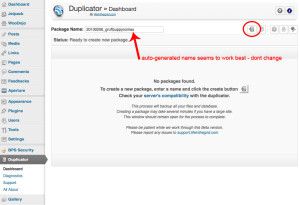
When activated a new item will appear in the Column Menu on the left side called “Duplicator”. Click it, and you will be brought to the main screen of the plugin. To begin downloading a copy of your live site, the Duplicator asks you to name the back up package. You can change the default name, but in my experience the default auto generated name that is already in there seems to work without error. If you are happy with the name, click the “Create” button, the first in the top right row.
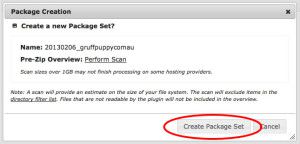
You will now be asked to confirm, and Duplicator will start compressing your entire site into a zip file, ready for download. This can take a while, so now is a good time to stretch your legs and get a drink. Once it has finished compressing, the screen will update automatically with your available downloads.
You will need to download both files (Installer and Package) to your desktop. If you have a large site, the package file can take some time to download. Once your files are downloaded, there’s one more small task.
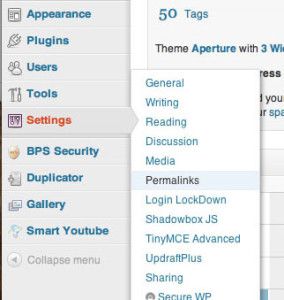
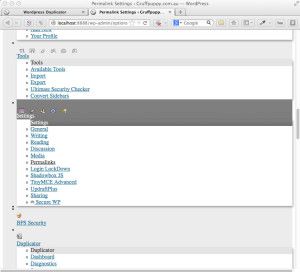
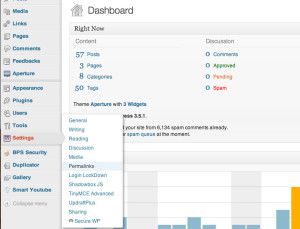
Select “Settings” from the column menu on the left and then “Permalinks”.
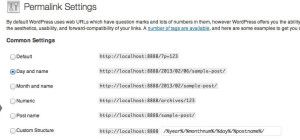
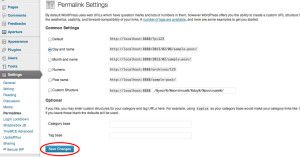
Although no action need be taken, It is important to take note of the setting. As you can see, mine is set to “Day and Name”, but yours could be different. We need to know this setting when we recreate and activate the copy/clone of our site later. Once you have written down or memorized your permalinks setting, you can log out of your site.
PART 3 – SETTING UP A DATABASE FOR YOUR CLONE
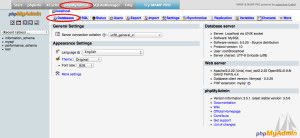
The next step is to set up a blank SQL database on your computer. With MAMP running, click the “Open Start Page” button again, and click “phpMyAdmin” from the top menu of the page that opens.
Now, click “Databases”.
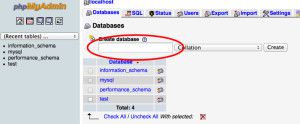
In the create databases field, type a name for the new database. It can be whatever you want, but it is important that you write it down, as we will need to use the name later. Im calling mine “gruffpuppy”, one word, all in lower case. Then click the “Create”. Once this is done, close out of the web browser window. There is no need to create “Users” for the database as we will use the root/default user account, which is automatically created for every database.
PART 4 – CREATE THE COPY/CLONE OF YOUR SITE
With MAMP still running, and your server active (Green Lights) , its time to move the files “Duplicator” created to your local server directory.
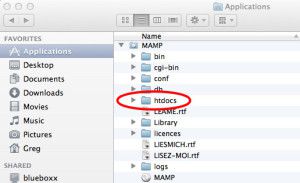
Open a new finder window, and go to “Applications”, open the “MAMP” folder, and then open “htdocs”.
Drop the zip folder and the “installer.php” file Duplicator created in and close the finder window.
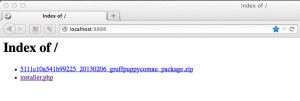
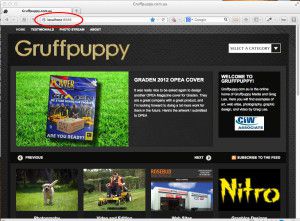
Open up your favorite web browser (For this tutorial I will be using Firefox, as there’s a little bug I want to show you, that doesn’t seem to appear in Safari) and in the address bar type “localhost:8888” and you will see a directory listing of your “htdocs” folder.
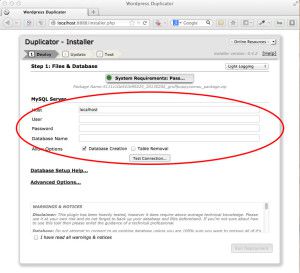
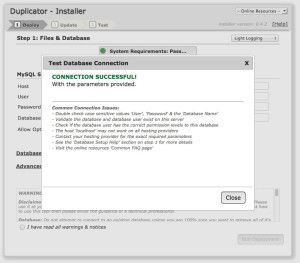
Double click the “installer.php” file and the Duplicator installer will open. YAY! This means your server is all working great, and you are viewing your first web page on your local server. Now it’s time to set up the database connection. In the MySQL Server area, leave “Host” set to localhost. in “User” type “root”, as we will be connecting using the automatically created user profile I mentioned earlier. In “Password” type the word “root” again, and for “Database Name” you need to type the name you specified earlier in phpMyAdmin. I used “gruffpuppy” so that’s what I am typing here. When your done, press “Test Connection”.
As you can see, my connection is good and I am ready to move on to the next step. If you receive an error here, you need to go back and check your credentials. It’s usually a typo of your credentials or database name. Once you have a successful connection click the “Close” button.
Check the warning box and click “Run Deployment”.
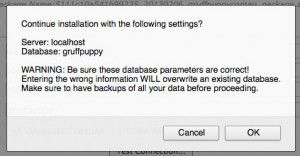
Another warning will pop up, which is irrelevant to this project, so go ahead and click “OK”.
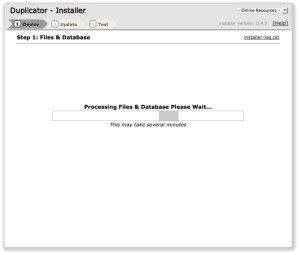
Duplicator will now start building the copy of your WordPress Web Site. This can take a while so be patient.
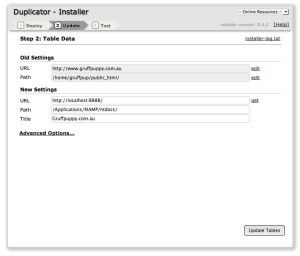
Once installation has finished, you are given an opportunity to change some parameters. Unless you have some special circumstances outside of the scope of this tutorial, your fine to accept the default settings. Click “Update Tables”
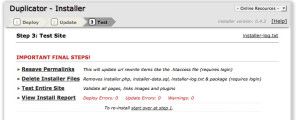
The next screen means the duplication of your site is now complete, and there’s just a little bit of house keeping to be done before you can use your site.
STEP 5 – FINISHING UP THE INSTALL
At this point, I recommend closing all open windows of your web browser and opening one new window with your default homepage showing, and then clear your browser history, cache and cookies etc. More often than not in Firefox the next step will yield an error in the process and you will not be able to continue. It looks to me like something that is kept in your browsers memory blocks the CSS (cascading Style Sheets) from loading and your site looks like this:
If you are using Firefox, Select “Tools” from the menu bar and then “Clear Recent History” gets you going, and in Safari, Click “Safari” and then “Reset Safari” to bring up the browser cleaning options. Once you are all cleaned up, type “localhost:8888/wp-admin” in your web browsers address bar and VOILA!
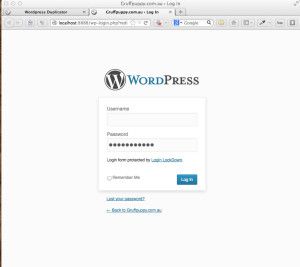
Log in to your site with your regular username and password.
From the menu column on the left select “Settings” and then “Permalinks”.
Referring back to the note we made in step 2, make sure the appropriate setting is selected (mine was Day and Name) and press “Save Changes”. Even if your setting is already selected, it is still important to press the “Save Changes” buttons so the option is written to the database.
Your site is now completely cloned/copied to your local machine and you can mess with it until the cows come home without affecting your live site in any way.
STEP 6 – HOUSEKEEPING
The last step is to delete your install files from your “htdocs” folder.
Locate the “installer-data.sql”, “installer-log.txt” and “installer.php” files, move them to the trash and give yourself a pat on the back! YOU DID IT!
We use cookies on our website to give you the most relevant experience by remembering your preferences and repeat visits. By clicking “Accept”, you consent to the use of ALL the cookies.
This website uses cookies to improve your experience while you navigate through the website. Out of these, the cookies that are categorized as necessary are stored on your browser as they are essential for the working of basic functionalities of the website. We also use third-party cookies that help us analyze and understand how you use this website. These cookies will be stored in your browser only with your consent. You also have the option to opt-out of these cookies. But opting out of some of these cookies may affect your browsing experience.
Necessary cookies are absolutely essential for the website to function properly. This category only includes cookies that ensures basic functionalities and security features of the website. These cookies do not store any personal information.
Any cookies that may not be particularly necessary for the website to function and is used specifically to collect user personal data via analytics, ads, other embedded contents are termed as non-necessary cookies. It is mandatory to procure user consent prior to running these cookies on your website.