Get iSkysoft PDF Converter for Windows FREE!


iSkySoft PDF Converter

**SPECIAL OFFER**

Between July 16 and July 18, iSkysoft will be GIVING AWAY FREE their iSkySoft PDF Converter, which normally sells for $59.95!

With iSkysoft PDF Converter you can:

  • Convert PDF to Word, Excel, PowerPoint, HTML, EPUB, images and plain text.
  • Convert up to 200 PDF files at once.
  • Convert a 100-page PDF within 1 minute, super fast.
  • Supports password-protected PDF files.

Some words from iSkysoft:

“From July 16th to July 18th, we will giveaway our excellent product – iSkysoft PDF Converter for Windows (Original Price: $59.95), which is an awesome utility that makes working with PDF files in Windows a breeze. It lets you convert normal and password protected PDF files to various Office document including Word, PowerPoint, Excel, EPUB, HTML, images and plain text, it also supports batch conversion that can convert up to 200 PDF documents with fast speed.”

As mentioned, this offer is only available between July 16-18 2013. To get your copy visit the iSkysoft PDF Converter page HERE!

Fix Connectivity Problems by Power Cycling your Home Network and Computers

Unplugged

Power Cycling sounds like riding a bike really fast up a hill, but in the technology field it refers to a way to get everything back online when things aren’t working right, or you have to recover from a failure or freeze.

A Power Cycle is achieved by turning everything off safely, disconnecting the power sources, and leaving everything to sit for a in-determined amount of time (some say 30 seconds, some say 30 minutes).

I find Power Cycling makes all my devices talk to each other quicker. As I have a somewhat sophisticated home network, yanking the cord on everything from time to time allows new routing tables to be created, and old machines that are no longer connected to the network (That may have been a Master Browser (Machine that tells other machines where everything is located)) to be removed from the environment.

We’ll use my network as an example to go through the procedure, as things do need to be done in a specific order. Using a IP Scanner (There’s lots of free ones available – just Google IP Scanner) I generated this view of my home network.
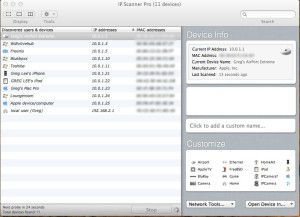
IP-Scanner

To begin a Power Cycle, I turn all off the Computers and my Server off. Once they are safely and completely shut down I yank the power cords from the sockets (This is important, if it is still plugged in, there is still power going in, keeping things in memory – So YANK IT!). With my Laptops, I take the batteries out. Next, I shut down and unplug my WD TV media machines and the “Elements” hard drives attached to them. My iPhone and iPad are now shut down by Pressing and holding the Sleep/Wake button (Power Button on top right side of device) for a few seconds until the red “slide to power off” slider appears, and then slide the slider. Lastly, My Airport Extreme Router, D-Link Switch, and ADSL Modem are all disconnected from the outlets.

Now I go throw a tennis ball with my Dog Benson for about 10 minutes. This allows plenty of time for any power left in the devices to drain away, and all caches and memory to clear.

Benson

After playtime I get ready to restart everything. First, I plug the modem back in and let it initialize and connect to the internet. Then I turn on my Switch, and my Airport Extreme Router is next. When they are all operational and happy, I turn my computers on one at a time, beginning with the one I use most, first (So it can become the Master Browser). Once it is up and connected to the internet, I turn the next one in my usage order on, and let it connect, then the next, etc, etc. Then, I boot up my WD TV Live Hub and reconnect the “Elements” storage drives, and lastly, I power on my iPhone and iPad by holding down the Sleep/Wake (Power Button on top right side) for a few seconds until I see the silver Apple logo appear.

Everything should be back up, running, and happy!

Some people will tell you there is no advantage to power cycling. I personally, do believe it helps, and if you are undecided, Try it for Yourself and make up your own mind! What have you got to loose?

 

Make Songs Play In Track Number Order Instead Of Alphabetically On iPhone, iPad and iPod using Play Order in iTunes

Aerosmith MelbourneI was lucky enough to go and see Aerosmith at Melbourne’s Rod Laver Arena – It was a KICK ASS show!

After the show, we really wanted to have a souvenir, and thanks to Youtube, we got one. Some other folks at the show recorded it on their phones and uploaded it. Using Flash Video Downloader I was able to download their vids, and using the awesome and FREE MacX Video Converter, I was able to save the audio from their video files to MP3, then to iTunes, and then sync the songs to our iPhones, so we have a playlist of the show. How cool huh!

The problem was, that the songs played in alphabetical order instead of the order they played the songs on the night (Track number order).

Grrrr!!!
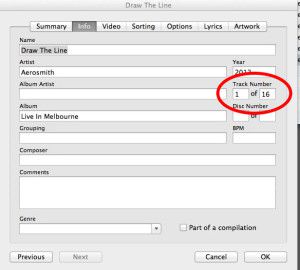
I did the whole Get Info thing in iTunes and set the track numbers….which didn’t work….

iTunes Track NumberI sync’d and sync’d to no avail. And then out of the blue, I right clicked the playlist, and there it was….PLAY ORDER!

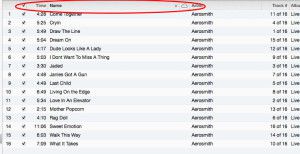
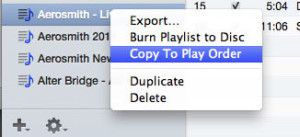
homer-woohooThis is SO hidden! I learned that if your songs are listed in alphabetical order in the album view in iTunes, with the highlight in the song name column, and you right click (command click) the playlist and select “Copy To Play Order”, and then sync your device your songs will play in alphabetical order.

Play Order

copy-to-play-order

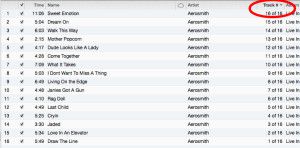
If you want your songs in your playlist to play in track number order on your device, click and highlight the track number column in iTunes,

Play Order

Then right click (command click) the play list and select “Copy To Play Order”

Play OrderNow Sync your device…….

YAY!

Compare and Syncronize your Files and Folders on Mac, Windows and Linux for FREE with FreeFileSync

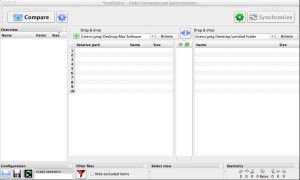
Free File Sync LogoBoy have I got a GEM for you! I’ve just stumbled upon Free File Sync – a FREE file and folder sync program. It does everything that the programs you have to pay for do, and more, FOR FREE!

Free File Sync Main Window

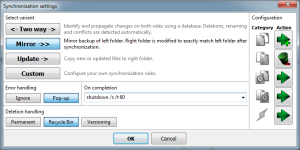
Free File Sync is available for Windows, Mac, and Linux. It can Mirror Sync (Left To Right) as well as Sync in Both Directions (Two Way), Can Compare before Sync, has lots of sync options such as Archiving/Versioning duplicates, Moving to trash and permanent deletion, and you can even make it shut down your machine once syncing is complete.

Free File Sync Setting

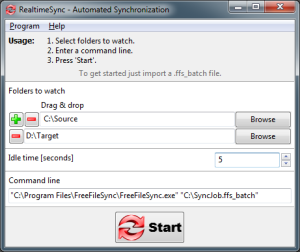
It will even do Live Real time syncing. Just select the folders you want it to watch and as soon as you add a file to that folder, Free File Sync will automatically sync the file to the your destination folder – How Cool Is That!

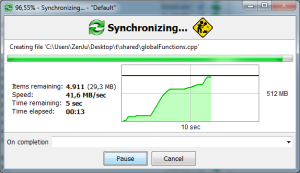
Real Time SyncWhen synchronization is occurring, you get a nice informative window telling what is going on.

Free File Sync Progress WindowI am really blown away by this program. I have just deleted my copy of Chronosync (Which I payed $40 for) as well as my copy of Martian Slingshot (Real Time Sync which I payed $30 for) and now have Free File Sync on all my machines – FOR FREE!

Download your copy of Free File Sync HERE.

And don’t forget to donate a few bucks via Paypal if you can! This program is well worth it!

Normalize Audio Volume Levels in your MP4 Videos with MP4Gain

MP4Gain – Normalize Audio Volume Levels in your MP4 Videos

MP4Gain-Logo

Mac users please see my Mac specific article HERE.

I have been saving episodes of the Discovery Channel show “How It’s Made” for years. Recently I compiled and organized them into an archive on my WDTV Live Hub, and I found that as I have used several different devices to record the episodes over the years, the audio volume levels range from barely audible to deafening. I needed a way to make the audio volume level of all of my mp4 video files the same. This process is called “Normalizing”.

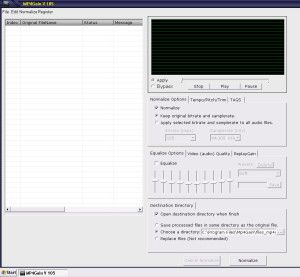
A Google search returned only one batch MP4 volume normalizer of note, MP4Gain. The author offers a trial version, which I downloaded and installed. This is what the main window looks like.

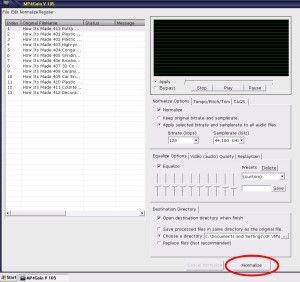
mp4gain video normalizer main windowThe program is VERY easy to use. For straight out “Normalizing” all you need to do is simply add your video files and press “Normalize”. In my case, I wanted to adjust the bit rates of the audio and do a little re-equalizing.

Equalizer

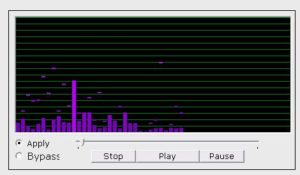
The program includes a level meter with fall-offs, so you can play your file and have a visual representation of the sound levels. The functionality is bit raw at the moment, but I’m sure in future versions this will be refined, and hopefully you will be able to adjust the fall-off times to make them stay at the peaks a little longer, as they seem to drop off a little to quickly.

MP4Gain Video Normalizer

Once I set my EQ levels and bit rates, I pressed “Normalize” and away it went!

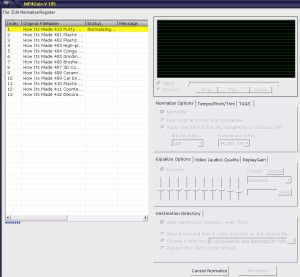
MP4Gain ProgressMP4Gain processes the files very quickly, and once it is complete, all your video files are the same volume! Its VERY cool!

You can download the trial version of MP4Gain HERE. The trial is fully functional and allows you to process about 15-20 files before asking you to buy a license.

In summary, this program is great, and I’m hoping that future versions polish up a few minor issues, like a missing vertical scroll bar (program is difficult to use on a small screen as the Normalize button is right down the bottom, and off the screen), and the jerky level meter. The major killer of this program is the price. At $40, it is pretty expensive (In My Humble Opinion). If it was somewhere in the $15 – $20 range it would definitely be hard to pass up.

It is able to normalize volume levels in the following video file types:

  • mp4, flv, avi
  • mpeg, mpg
  • 3gp, wmv

MP4Gain can also normalize your audio music files. It can also normalize MP3, MP2, AAC, AC3, FLAC, OGG, WAV and M4A files to!

Easily add Meta Tags to your music with Musicbrainz Picard

musicbrainz-picardThere’s nothing I hate more than dropping new music into my iTunes library only to learn once it has finished importing that it doesn’t have meta-tags (No Song Name, Artist, Album Title etc etc). So now, before I add new music, I run it through MusicBrainz Picard. Here’s the programs description from their site:

“MusicBrainz Picard is a cross-platform (Linux/Mac OS X/Windows) application written in Python and is the official MusicBrainz tagger.

Picard supports the majority of audio file formats, is capable of using audio fingerprints (PUIDs, AcoustIDs), performing CD lookups and disc ID submissions, and it has excellent Unicode support. Additionally, there are several plugins available that extend Picard’s features.

When tagging files, Picard uses an album-oriented approach. This approach allows it to utilize the MusicBrainz data as effectively as possible and correctly tag your music. For more information, see the illustrated quick start guide to tagging.

Picard is named after Captain Jean-Luc Picard from the TV series Star Trek: The Next Generation.”

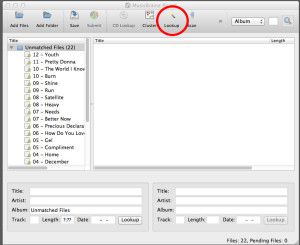
To get started, download and install MusicBrainz Picard HERE. Once you are up and running, drop the music files you want to tag anywhere in the window. They will then populate the list on the left called unmatched files.

mb1

When you have finished adding files, click the line of text with the folder icon next to it that says “Unmatched Files” to make it active. When it is active it will become highlighted. Now, go ahead and press the “Lookup” button, and MusicBrainz Picard will start scanning your music and comparing it to their database for identification.

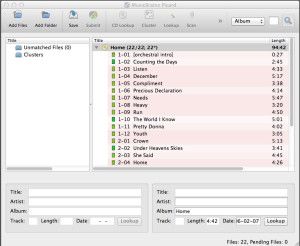
mb2

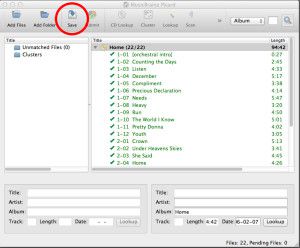
Once MusicBrainz Picard has identified the album and added all of the songs to it, the CD icon next to the album name will turn gold in color. If you don’t have all of the songs from the album, it doesn’t matter, you can still proceed, but the CD icon stays silver. The next step is to click Album Name next to the CD icon to make it active, and highlighted. You can now click “Save”.

mb3

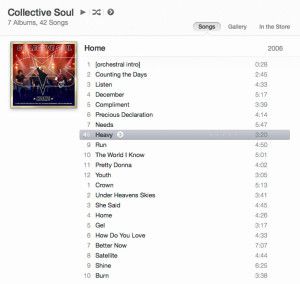
MusicBrainz Picard will now write the Meta Tag Data directly into your music files. Once it has completed, you can close out of the program, and then drop your music files into iTunes, and everything will be correctly categorised and ready to play.

mb4