Easiest Best Optimal settings for Handbrake 1080p Blu Ray Video Conversion on Mac, Windows and Linux – UPDATED – MARCH 2023

Convert BluRay to H.264 with Handbrake

Convert BluRay to H.264 2023 Handbrake 1.6.1

Convert BluRay to the smallest file size in Handbrake without having to know or understand all of the settings. Just copy my settings and you’re done!

H.264 Vs H.265 – Which one should I use?
If you have a 4K Television and a newer media player you will want to use H.265 – See THIS ARTICLE for instructions.
If you have a 1080 HD TV and an older media player H.264 is best, so use these instructions below.

*Whilst your user interface may appear slightly different than shown here (depending on if you are using Windows, Mac or Linux), the settings and results will be the same across all platforms.

**NOTE** – These settings are for 1080P BLURAY to H.264 Video ONLY
Use these settings if you have a 1080 HD Television and older media player
To convert 1080P BLURAY to H.265 – CLICK HERE!
To convert DVD to H.265 – CLICK HERE!
To convert DVD to H.264 – CLICK HERE!
To convert 4K BLURAY to H.265 – CLICK HERE!

THE SHORT VERSION

1 Open source file in Handbrake and make sure you are on the “Summary” tab
2 Set file format to “MP4’ and deselect “Passthru Common Metadata”
3 Click “Dimensions” tab and set Resolution Limit to 1080p and leave Anamorphic as Automatic, leave cropping “Automatic” and borders “None”
4 Click the “Filters” tab
5 Leave Interlace Detection set to Default, De-interlace set to Decomb, and Preset at “Default”
6 Click the “Video” tab
7 Select “H.264 (x264)” from the Video Codec drop down
8 Select “Same As Source” in “Framerate”
9 Check the “Constant Framerate” button
10 Set “Encoder Preset” slider to “Very Slow”
11 Set “Encoder Tune” to “Film”
12 Set “Encoder Profile” to “High”
13 Set “Encoder Level” to “4.1” – If this wont play on your system drop it back to “3.1”
14 Set the “Constant Quality” slider to “24”
15 In the “Additional Options” box add ref=5:bframes=5
16 Click the “Audio” tab
17 Select the preferred 7.1 or 5.1 channel soundtrack
18 Set “Codec” to “AC3” and the Bitrate to 448kb
19 Set Mixdown to “5.1 Channels” and Samplerate to “48”
20 Click the “Subtitles” tab
21 Click the “X” in the circle at the right side to remove the subtitles track on Windows, or select “None” from dropdown on Mac
22 Click the “Chapters” tab
23 Uncheck the “Create Chapter Markers” option if you don’t want them or leave it checked if you do
24 Give your output file a unique name and save it somewhere easy to find
25 Make a preset to save the settings and Press the Green “Start Encode” button

THE LONG VERSION

Continue reading “Easiest Best Optimal settings for Handbrake 1080p Blu Ray Video Conversion on Mac, Windows and Linux – UPDATED – MARCH 2023”

How to fix a 2gb 4gb 8gb 16gb etc USB Flash Drive Key that only shows 200mb in size and space for FREE

USB Flash Drive KeyHave you ever had a large USB drive that only shows 200mb when you plug it into your Windows computer? Frustrating isn’t it!

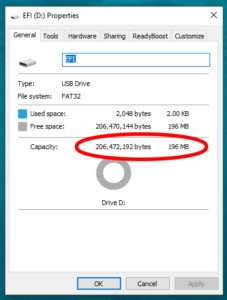
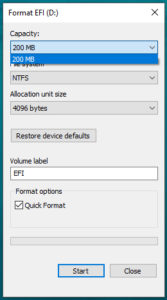
Fix USB 1And what makes it worse is that nothing you try in the “Format” utility will change it – it always says 200mb in the capacity drop down.

Fix USB 3The reason this happens is that in some stage in the USB Drive’s life it has been plugged into a Mac, and it has done “Mac Things” to the drive. Thankfully, there is an easy way to fix it.

Continue reading “How to fix a 2gb 4gb 8gb 16gb etc USB Flash Drive Key that only shows 200mb in size and space for FREE”

Telstra Gateway Max 2 Unboxing Features and Instructions

Telstra-Gateway-Max-2

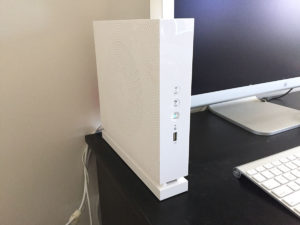
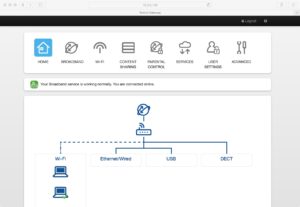
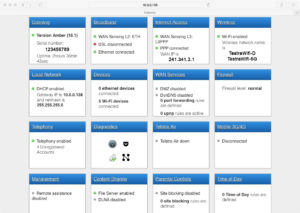
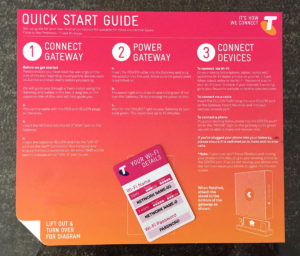
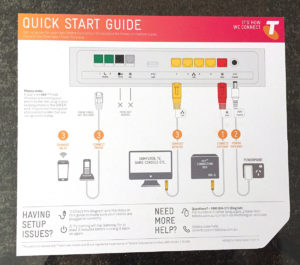
I have just received Telstra’s Gateway Max 2 Unit, and my first impressions are overall good. It is aimed very squarely at beginners/novices, with not much for the pro’s to tweak in the back end. It is ultra light, with a somewhat flimsy feel. It has been rock solid so far, with an uninterupted uptime of four days. The unit does not come with instructions, just a simple but adequate Quick Start Card. The firmware does have some nice features such as Dynamic DNS options, Port Forwarding, Parental Controls etc…But not much for those of us that really like to dig in and do some hardcore configuring.

The unit’s very basic interface is at 10.0.0.138

Gateway Max User Interface

Gateway Max User Interface

Telstra Gateway Max 2 Advanced Options

Telstra Gateway Max 2 Advanced Options

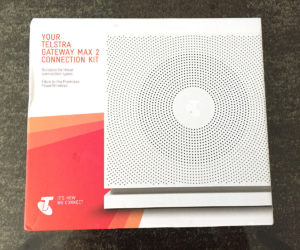
Telstra Gateway Max 2 Box Front

Telstra Gateway Max 2 Box Front

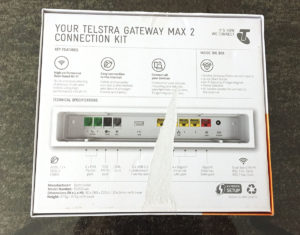
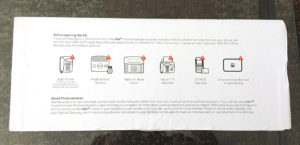
Telstra Gateway Max 2 Box Rear

Telstra Gateway Max 2 Box Rear

Telstra Gateway Max 2 Box Side

Telstra Gateway Max 2 Box Side

Telstra Gateway Max 2 Quick Start Card Front

Telstra Gateway Max 2 Quick Start Card Front

Telstra Gateway Max 2 Quick Start Card Rear

Telstra Gateway Max 2 Quick Start Card Rear

Telstra Gateway Max 2 Unit FrontTelstra Gateway Max 2 Unit Front

Telstra Gateway Max 2 Unit Front

Telstra Gateway Max 2 Unit TopTelstra Gateway Max 2 Unit Top

Telstra Gateway Max 2 Unit Top

Telstra Gateway Max 2 Unit BackTelstra Gateway Max 2 Unit Back

Telstra Gateway Max 2 Unit Back

Windows 10 Beta Trial “a component of the operating system has expired” error fix

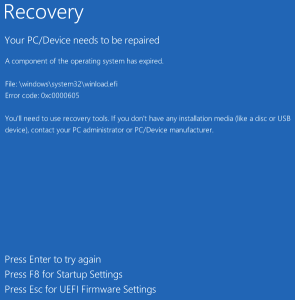
a component of the operating system has expired

I hate Windows……I really really do…….

Long story short, as I am a beta tester for Micro$oft I previously installed a preview version of Windows 10. My life circumstances have changed since, so I haven’t been keeping up with its development, nor have I been updating the brand new HP PC I bought for it.

So today (Some time after the trial version has expired) I turned on the machine……BRICK…….nothing.

Couldn’t boot from disk, couldn’t boot from a USB drive, NOTHING but:

“a component of the operating system has expired”

The bottom line, if you want to reclaim your files and reinstall or upgrade, just boot into BIOS and set the date to JUNE 2015.

How to run a USB Mic through an External Audio Mixer

USB Mic through an External Audio Mixer – How To

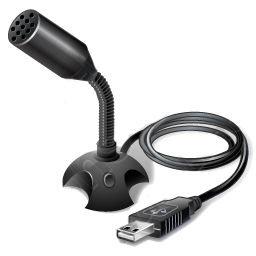
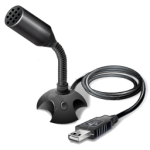
USB Mic through an External Audio MixerI have been reading on forums lately how some people would like to be able to run their USB Mic through their external hardware mixing desks, and it is relatively easy to do.

httpvh://youtu.be/K9vqNj0_CuU

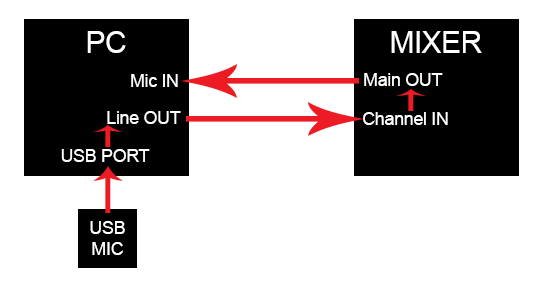
Below is a diagram on how to run your wiring between the devices.

sound-flow-direction-diagram

Plug your USB Mic into a USB Slot, run an appropriate lead from the Line Out/Headphone Out of your computer into a stereo input channel on your mixer. If your mixer has only mono channels, use channel one for your left, and channel 2 for your right. Next, run wires from the Main Output of the mixer to your Line in/Mic In on your computer, and the physical part is done.

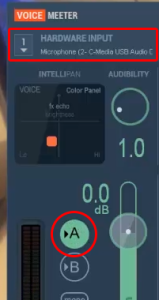
Next, open up Voicemeeter (If you don’t have Voicemeeter you can download it free at VB-Audio.com) and select your USB Mic as the device for channel 1. Make sure “A” is selected/highlighted and “B” is not selected.

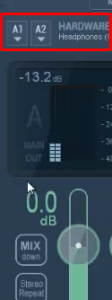
step 1Then, select your Line Out/Headphone Out jack as the device for Voicemeeters Main Output, “A1”.

Step 2Now it is time to select your Line In/Mic in as the device for Channel 2. Make sure that “A” is not selected, and “B” is selected.

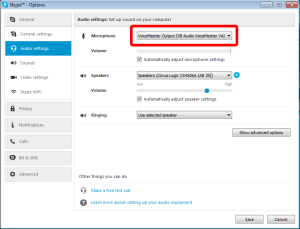
Step 3All that is left is to open up the app you want to use (eg – Skype, Vidblaster, or some other Web Cam program) and select Voicemeeter’s Virtual Device (Output “B” in Voicemeeter) as the input source audio device.

Skype InVoicemeeter can be downloaded FREE HERE at vb-audio.com. Don’t forget to make a donation – the programmer deserves a little something for a program this good!
vb_audio_logo_blue_175

How to use a USB Mic AND Mixer together in Skype or Vidblaster

How to use a USB Mic AND Mixer together in Skype or Vidblaster

USB Mic AND MixerWeb cam software like Skype and Vidblaster only allow for one audio source, so if your mixer is coming into the computer via the line input, and your mic is coming in through USB, you are generally out of luck….until now.

httpvh://youtu.be/rtWqR_AWV4M

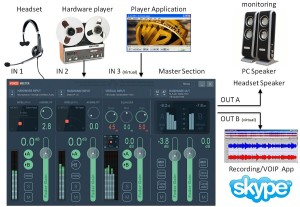
I recently stumbled upon a free piece of software called Voicemeeter which makes it incredibly easy to solve this problem. It is basically a software mixer that will allow you to take various inputs as well as your system sound and mix them with a great deal of control into one “Virtual” sound device, which you can then select as your audio input device in your web cam program.

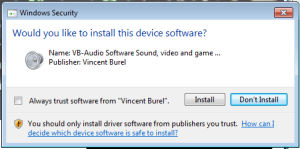
Voicemeeter Connection DiagramTo get started, Download your free copy of Voicemeeter HERE.During installation, you will get some dialogue boxes telling you it wants to install some drivers, this is completely normal.

voicemeeter-driver-installOnce you have installed it, you will need to restart your computer so the virtual drivers can register in your system. Once you have rebooted, open up Voicemeeter and you will see the mixing console.

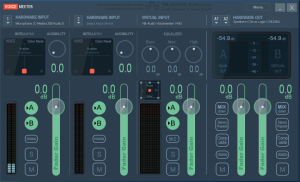
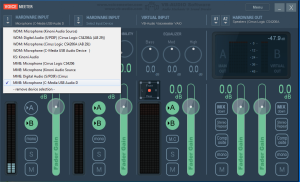
voicemeeter Mixing ConsoleLooks cool doesn’t it! In short, you have two hardware inputs and one virtual input. The virtual input seems to be your system sound, so anything that tries to output through your computers speakers, like Winamp or Windows Media Player, can be fed into your mix here if you want it, if not, just mute this track by pressing the “M” button at the bottom next to its slider. To mix your Mic and Line In (Mixer) click where it says “1 Hardware Input” and select your USB Mic from the drop down list.

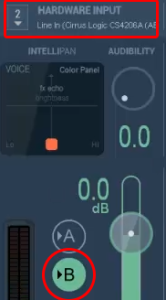
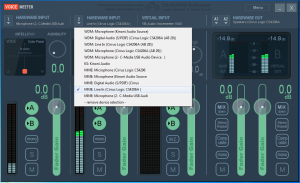
Select USB MicThe next step is to select your line in/mixer device in “2 Hardware Input”

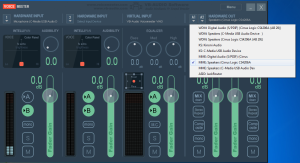
Select Line InNow its time to tell Voicemeeter where your speakers are. Select them from the drop down menu that says “Hardware OUT”

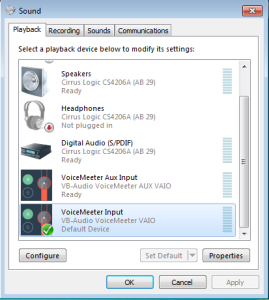
select-speakersThe last step to making this all work is to open your Windows menu and select control panel. When this opens select the sound icon to open your computers sound preferences window. In the “Playback” section select “Voicemeeter Input” and then set it as the default device.

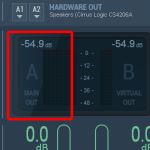
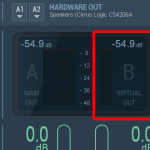
select-voicemeeter-in-soundNow you are all configured, you just need to do a small adjustment in Voicemeeter to stop feedback loops. The output of Voicemeeter has two channels, “Main Out” which will go to your speakers, and “Virtual Out” which is what will go into web cam software (Skype, Vidblaster etc….)

main out  virtual out
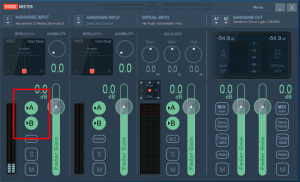
 In the “1 Hardware Input” channel, it is wise to de-select “A” as this will stop your mic from being played out aloud through your speakers. This will prevent feedback, but still allows your USB Mic to feed into your web cam program through the Virtual Out.

Channel SelectNow, all that’s left is to open your web cam program, Skype or Vidblaster etc, and select Voicemeeters output as your input device, and you can now use your USB Mic AND your external hardware mixer.

Skype In
Voicemeeter can be downloaded FREE HERE at vb-audio.com. Don’t forget to make a donation – the programmer deserves a little something for a program this good!

vb_audio_logo_blue_175