Easily Backup and Restore VMWare Virtual Machines

Recently, a Webernets reader (Yes, there is at least one person looking at this site) crashed their XP Pro virtual machine, and it made me think about a really quick and easy way to back up and restore a VMWare Virtual Machine in the unfortunate event of a terminal failure.

As VMWare Virtual Machines can grow in size pretty quickly, especially if they are not regularly “cleaned up“, in most cases you will need to use an external hard drive or a very large USB key to store your back up. Whilst it is convenient to keep your back up on the same computer, its also no help to you at all if that computer is the one that fails, so keeping a back up some where else is a pretty good idea. I actually would recommend doing BOTH. You can never have too many back ups in multiple locations – ask any one who has ever had a catastrophic failure!

To get started, you need to locate your Virtual Machines, and this is REALLY easy! Open a finder window, click “Documents”, and you will see a folder called “Virtual Machines”
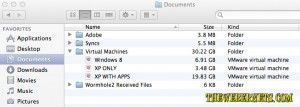
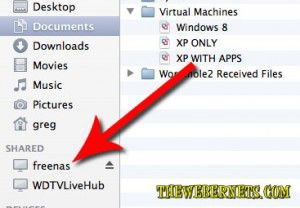
To back up your virtual machine, simply drag the virtual machine file to your back up destination. As you can see below, I have a virtual machine called “XP with Apps”, which is my main Windows computer, and I would be pretty lost if anything happened to it. I also have a FREENAS server, which is just basically a big hard drive that is attached to my home computer network, and shows up as a “Share”, so to back up my XP Machine, I just drag the virtual machine file onto the Freenas entry in the side bar menu, and let it do its work. As my Virtual Machine is quiet large, it does take some time for it to copy over.
Now that we have our Virtual Machine backed up, you are probably wondering how easy it is to restore it? Its just as easy! Check this out!

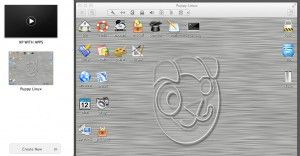
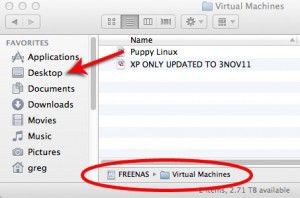
To restore a saved virtual machine, just locate it on your back up source (In my case, it is on my Freenas server), and drag it into your virtual machines folder. For this demonstration, I am going to restore my most FAVORITE Linux distro, PUPPY LINUX! I started by dragging the Puppy Linux Virtual Machine from my Freenas server to the desktop on my Mac.

Once the file had copied over, I moved it into the “Virtual Machines” folder in my “Documents” folder with my other virtual machines. Then to begin the restore, just double click the virtual machine file.
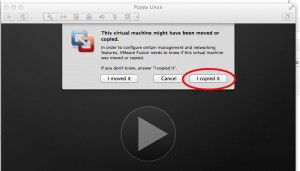
When you double click it, a window will pop up asking if you have copied or moved the virtual machine. In this case, we have performed both actions, we have moved, as well as copied the machine. Given the wording in the dialogue box, and the confusion that arises after being presented with a multiple choice question where both answers are applicable, I went with “If you don’t know, answer “I Copied It””, and I clicked “I Copied It”.

Almost instantly, my Puppy Linux virtual machine sprang into life, and before you can say “How the heck did I do that?” my Puppy Linux Virtual Machine was up and running!

Thanks to the folks at VMWare for making this so easy!

Stop DVD Player from starting automatically

I have been ripping my DVD’s of the hit show for car guys “Rides” for use on my WDTV Live Hub, and I gotta tell you, each time I change the disc Apple’s DVD pops up and it is starting to drive me nuts!

After spending 20 minutes combing through every single item in DVD Player’s preferences, it occurred to me that this is probably a system preference, and to stop it bugging the heck out of me, I could turn it off in there.

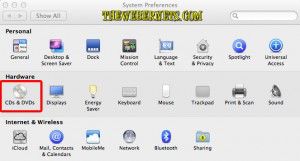
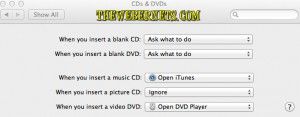
To stop DVD Playing automatically each time you insert a disk open your system preferences, and select “CD/DVD”.


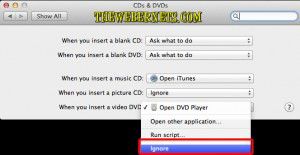
Right down the bottom as an entry for DVD, that says “Open DVD Player”


Change the setting to “Ignore” and now you can rip your DVD’s in peace!


In case you are wondering, I am using “MakeMKV” to rip my dvd’s from disc straight into a high quality MKV video format which is compatible and plays beautifully on the WDTV and WDTV Live Hub devices. You can check it out at makemkv.com.

The Fountains of Bellagio on Flip Mino HD

flip-mino-hd-pocket-video-recorderLast year I went to the U.S for a holiday and catch up with some friends, and whilst I was waiting to board Qantas”s sweet new Airbus A380 (which I might actually review here) I was browsing a duty free store and I saw the Flip Mino HD. At that time it was $149 I think? Anyways, upon reading the specs on the box I had to have one. It was smaller than my cell/mobile phone, shot 720P HD video with a bit rate of around 8Mbs, AAC audio, and 2hrs of record time. It is SUCH a cool device!

My wife and I have stayed in a lot of hotels all around the world, and we both agree (which rarely happens) that The Bellagio in Las Vegas is the most beautiful, opulent, and in short, the best. Whilst there I recorded a lot of the Fountain Shows on my Flip Mino HD, and below is what I got.

These video”s were shot through the tinted glass window of our suite in The Bellagio, and what you see is what was shot. Disclaimer – I have tried to clean the audio up a bit though. As any one who has seen a Fountain Show from Las Vegas Blvd will know, the audio on the strip is just wonderful, but 20 something floors up in the tower however,  it gets a little messy.

Anyways, enough rambling. Enjoy the show!

httpv://youtu.be/-fVxpQCMcRE

httpv://youtu.be/0xGoIfezqQI

Watch AVI files on your iPad, iPhone, or iPod Touch, Even Network Shares, without Jail Breaking!

AVI IconAlmost all of us were, and are still using Windows based computers, even though we have locked ourselves firmly into the Apple world by buying iPhones and iPads. I am sure you have noticed (Like I Have) there are definitely some issues that arise by being “Multi Platform”. Slowly but surely, the software writers of the world are delivering apps that allow your iPhone and Windows 7 Laptop to co-exist a little more seamlessly.

One such app is called “Buzz Player“.

For over a decade now, all of the home video I have, all of my DVD backups, TV programs I have recorded, in other words, my entire video collection is in AVI format. My movies are in DIVX format (I bought Dr DIVX years ago to rip my DVD’s and have stuck with it), and everything else is in XVID. That’s just the way it has ALWAYS been! And I sure as heck aren’t going to convert them all to Quicktime, I’ll be dead before it finishes re-encoding.

Enter Buzz Player, or in my case, Buzz Player HD for iPad. Buzz Player is an app for your iPhone/iPod Touch/iPad (Even iPhone 3GS) that will allow you to create folders, copy movie files to your device, and play them seamlessly without the need for jail breaking your device! And my favorite part, it will even stream from your network shares!

Woo-Hoo


To get started watching AVI files on your iPad/iPod Touch/iPhone, download the correct version of Buzz Player for your device from the iTunes app store, and in my opinion, the nominal fee of $2.99 for this app is ridiculously low for the functionality it provides.

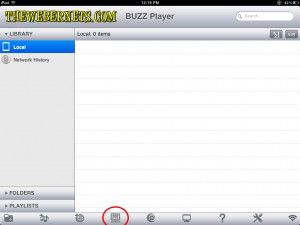
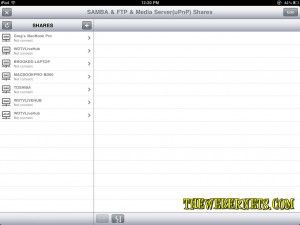
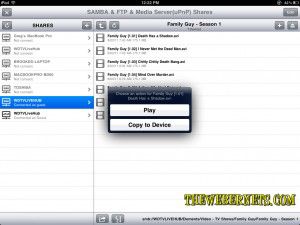
Buzz Player 1Once it is installed and open, you can start creating and organizing folders for your local media (media that is physically on your device), or if your like me, your gonna want to start watching stuff from Desktop and your Media Server. To watch stuff from other devices (In my case, my Western Digital WDTV Live Hub) click the icon that says “SMB/FTP”. This will query your home network and display a list of all devices that are set up to serve media on your home network. It also tells you the protocol they are using to serve.

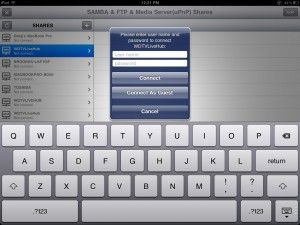
Buzz Player 2I noticed that some devices appear more than once, and I expect that is because they broadcast different services that they are able to provide. I selected my WDTV’s Samba feed, and was asked to input credentials.

Buzz Player 3As my network shares are not password protected within my own home network, I used “Guest” as my username, and left the password blank, and was able to connect easily. I tried to click “Connect As Guest” but that didnt work. I guess my WDTV needed to have at least the username of Guest. If your shares are password protected, this is the place to enter them to gain access. Don’t worry, Buzz Player can remember your devices and logins if you want it to, so you only have to do it once. Just remember to add it to your source list before you disconnect.

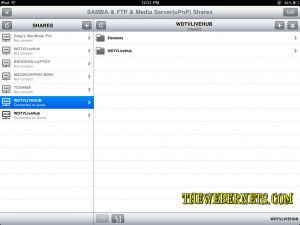
Once you have connected, you can see a list of all of the available drives/folders/files being shared.

Buzz Player 4Now, Its just a matter of selecting the file you want to watch from the appropriate directory, and selecting it. What comes next is pretty cool! Buzz Player asks you if you want to copy the file to your device, or if you want to watch it from a stream! YEAH BABY!

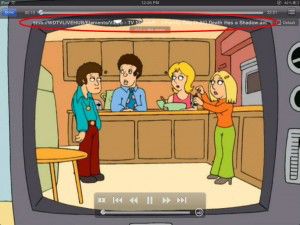
Buzz Player 5In my case, Im happy to watch the stream, so when you click play, it spends a few seconds buffering the file, and then starts to play your video!

Buzz PlayerAs you can see from the above screen cap, I’m streaming Family Guy “Death Has A Shadow.AVI” over Samba, and watching it flawlessly on my iPad!

great-successBuzz Player supports: .mpv, .mov, .mp4, .m4v, .3gp .avi, .divx, .dat, .vcd, .wmv, .bin, .iso, .vob, .mkv, .rmvb, .ogg, .flv, .swf, .rm, .ts, .nsv, .ram, .vfw, .mpg, .mpeg, .m1v, .m2v, .dv3, .gp, .mqv, .ogm, .ogv, .asf, .dvr-ms, .m2t, .m2ts, .rec, .bik, .dv as well as many audio codecs.

**HINT** – If your playback is choppy and/or breaks during playback, CHECK YOUR NETWORK!!!!!! I’ve seen a lot of people slagging this app because they cant stream a 2GB 720HD video over their 802.11g networks! VIDEO FILES ARE HUGE! Your network might not be capable of streaming it in real time, so COPY it to your device, and then watch it uninterrupted.


Bring back one tap dragging in Mac OSX Lion

One Tap Drag LockSomething else that has been bugging me lately about OSX Lion is that “One Finger Tap Dragging” has changed to “Click and Drag”. By default, you can’t just move the cursor to the windows top bar, tap once and drag it around the screen. It’s really difficult to break the habit if you have been a Mac user for several years. Thankfully, it is still available in Lion, but it is REALLY hidden away.

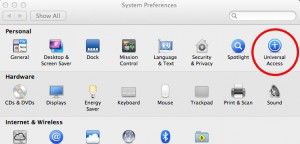
I spent ages going through every aspect of the “Trackpad” preferences pane, and watching all the little videos on gestures, but it turns out that this feature isn’t even in there. To turn One Tap Dragging back on, you need to go into “Universal Access”! How do you like those APPLES! Thanks APPLE!

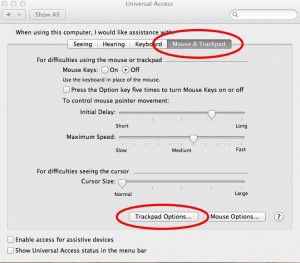
Universal Access Preference PaneOnce you have opened Preferences and clicked Universal Access, click the “Mouse & Trackpad” tab, and then “Trackpad Options” towards the bottom.

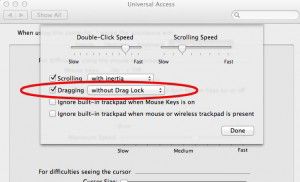
Trackpad PreferancesNow, by checking one simple checkbox, all of that anguish and suffering will go away! Simply check the box next to “Dragging” and One Tap Dragging is restored. And if you were used to the “Drag Lock” feature in previous versions (where you have to tap again to release”, you can also restore that feature in the drop down to the right of “Dragging” as well.

Dragging Check Box

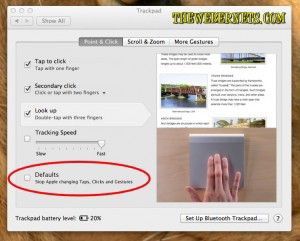
Below is a screen capture of an option I would REALLY like to see Apple implement in coming versions of their operating system.

Trackpad Option Recommendation for future OS's

How to stop OSX Mac Mail threading/grouping emails and conversations together

Grouped Conversations in Mac MailMac Mail has a feature now that groups emails with the same subject line together into a collapsed “forum thread” like manner, which saves space when you are looking at your inbox. The problem I find with it is that there just aren’t enough bells, whistles and foghorns to catch my attention when a new email arrives and its a reply to something in that thread. I need more than just the number in the bottom right corner incrementing. As a result, I have lost/not read some emails lately.

Thankfully, there is a solution for this, but it requires a bit of patience to implement as it is not a global fix. For some reason, emails are grouped by default, and you have to ungroup on a thread by thread basis…….Thanks Apple.

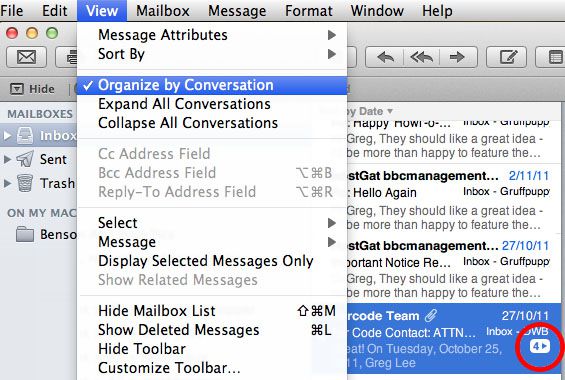
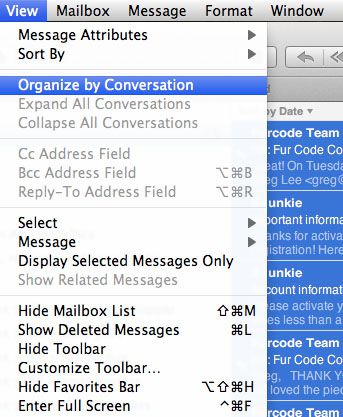
To do so, highlight the thread you want to ungroup, then in the menu bar select “View” and uncheck the option that says “Organise by Conversation”

Turn Off Email Grouping

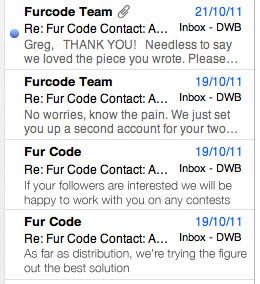
Now you will see each email as a single item in your inbox again, and new and unread emails will go back to having that little blue dot to the left. If you want to continue to see threads from specific contacts in an ungrouped way, you can just ad a rule (in the rules tab in mail preferences pane) to highlight email from them with a unique background colour.

Ungrouped Email Conversations

Again, as I said, this isn’t global, its thread by thread. So if you REALLY hate this feature, a quick way to start making it go away is to select all messages in your inbox simulataneously (Highlight one, then click command and A) and then uncheck “Organise By Conversation”.

Change All Threads

If you are using Mac Mail as an RSS reader, this method also works to ungroup new posts on sites you are following.

If you have any other idea’s on how to work around this annoyance, please reply in the comments.