 As mentioned in THIS post, I bought a WD TV Live Hub unit a month ago, and I have been fairly happy with it so far. The premise/purpose of the unit is good, it is well featured in hardware, but the firmware/operating system is not as good as it could be, given the potential of the units hardware capabilities. I have found it to be slow, kinda clunky, and a bit frustrating when it comes to finding media quickly, as I have a large collection. The current version at time of writing is 2.07.17. Since purchasing the machine I have tried several versions of the firmware, and have settled/rolled back (using WD’s own rollback instructions and previous OS builds on the WD Firmware Rollback Page) to version 2.04.13, which in my opinion, and the WD Community opinion, seems to be the best offering so far.
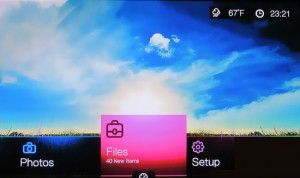
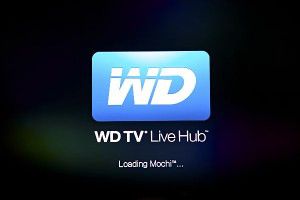
Last week however, my 3 week old unit simply refused to boot. It didn’t work. I would press the power button on the remote and see the screen above, and then the unit would just turn itself off. I tried the using the power button on the unit, and it yielded the same result, automatic shut down after the loading screen. I was quiet enraged. My wife gathered up the units box, dug the receipt out, and was set to drive me back to the store to exchange the unit, when I proceeded to do what any grumpy male geek with a failing piece of technology would do – I took to it with a screwdriver, pried it open and voided the warranty!
I did learn a lot about this unit during this process though, and will share it with you now – and as always, I am sharing MY experience! Should you CHOOSE to try to replicate my experience with your device, and FAIL, it is completely your own fault, and I take no responsibility what so ever!
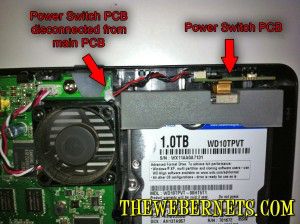
After Googling the symptoms, it appears that this is a VERY common problem with this unit, and the folks at WD refuse to acknowledge it as an issue. However, there is a VERY simple fix, but it does involve opening the unit. Inside the box is the main PCB (Printed Circuit Board), and there is a smaller PCB for the POWER button connected to the main PCB with a few wires. This seems odd for the power button to be on a different board, but it is a gift from god that it has been designed this way. It seems that something on the smaller power PCB, or perhaps the power button itself shorts/fails, hence as soon as you start the unit, the switch thinks its been pressed and it turns the unit off.

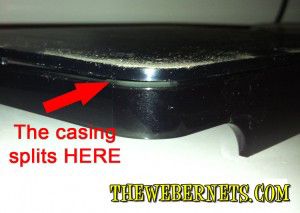
The cure, simply disconnect the smaller power button PCB. YES, you read correctly, just disconnect it! There is a power button on the remote you can use to switch the unit on and off anyways. The ironic part of this is that I actually found it harder to open the unit than disconnect the power button PCB. My first instinct was to crank on the thick chunky bit of plastic with the scallop shapes, but I soon learned that this was just an aesthetic, the actual lid is the thin piece above the groove in the aesthetic scallop bit.
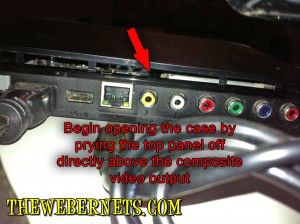
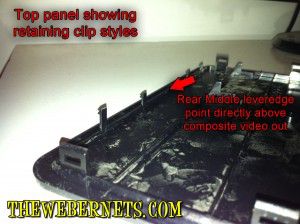
To open the case, take your preferred case opening screwdriver and insert it between the thick bit and the thinner top panel at the back of the unit above the composite (yellow) video output.
 Once you have made a gap you will see the fastening tabs that hold the lid on, and its just a matter of forcing the top upwards and gently pushing the fastening tabs towards the inside of the case. Below shows you the different types of tabs you will need to defeat to lift the lid.
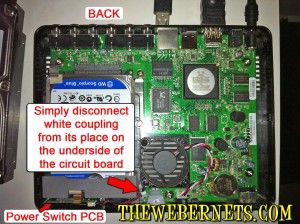
 Once you have the lid off, its a simple matter off locating the power button PCB, and the wires that join it to the main PCB. The power button PCB wires mount to the main PCB underneath, but the white terminal is easily visible, and requires little effort to disconnect. I just flicked it of with the screwdriver I used to open the case.

 Once the wire is disconnected, you can re-fit the top panel, plug the box in again, and watch your unit boot back into that familiar home screen!

Now, if you want to win a prize (Charlie Sheen’s Tiger Blood), look closely at the photo’s in this article and be the first to comment with the reason why everybody who reads these articles should take extra special note of my disclaimers, and why Australian Geek Guys die younger than American Geeks!
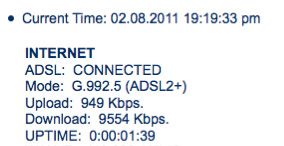 I learned this week that “Automatic” often means “Crap” in the world of network auto negotiations – I have a new internet connection, and when I allow my modem to auto-negotiate a connection, it gets “taken for a fool” by my ISP. I guess the ISP want’s to stop me from using all of the bandwidth I pay for, so they “encourage” customers modems to auto negotiate a slower connection. Upon digging into my ADSL 2+ modems settings, I found that under the “Line Mode” option in the ADSL Parameters menu, I could FORCE my modem to negotiate the ADSL2+ connection I am paying for, instead of the slower standard generic ADSL profile my ISP sneakily seems to want the device to auto negotiate.
