Quick and Easy way to Clean Up and Speed up your Mac with ONYX

Onyx For Mac IconIn my opinion, the best first step to speeding up your Mac is to repair your permissions and run disk repair as outlined in my article Speed Up Your Mac Article HERE.

The next step is to clean your caches, rebuild your indexes, and run your macs daily, weekly and monthly maintenance scripts. This can all be done easily with the FREE and very powerful ONYX.

FREE Download Onyx from Titanium’s Software.

Once you have ONYX downloaded and installed, its a good idea to make sure that you have backed up ALL of your stuff. Like using any cleaning program, things can get moved or lost, so make sure you don’t get caught!

When you are satisfied your files are safe, go ahead and open ONYX. The first thing you will see is a alert box that asks if you want ONYX to check the S.M.A.R.T status of your hard drive. S.M.A.R.T stands for Self-Monitoring, Analysis and Reporting Technology. Most hard drives these days monitor their own performance and try to anticipate if a failure is imminent, and if their is something wrong with your drive, you will be notified after this test. It is well worth doing.

Onyx SMART screenOnce this has completed, the next alert will ask if you want to verify your drive. If you have already performed this task because you are following on from my first “Speed Up Your Mac” article this is not necessary. If you haven’t already done this, it is well worth doing as it will find any drive errors. This process can take some time, and it will require all other programs to be closed, so if you decide to run it, go get yourself a coffee and some fresh air after you begin.

ONYX Verify Start Up VolumeWhen Verification has finished, ONYX will ask you to type in your password to give it permission to make changes and clean thing up.

ONYX Password Box

You will now see the main menu bar for ONYX.

ONYX Main Menu BarAs you can see, this program has a lot of in depth features and can do a lot of different things, but for this tutorial, we will focus on cleaning up quickly and easily. To start cleaning, press the “Automation” button. You will now see the Automation screen.

Onyx Automation Defaults

The safest way to proceed is to accept the defaults and press “Execute”. If you are following on from my first “Speed Up Your Mac” article you might want to un-check “Repair Permissions” as you will have already done this. Other wise, leave it checked. If you are like me and like living on the edge, you can go ahead and check/un-check the items you feel necessary.

*BE WARNED* – As with every clean up program, there can be unwanted side effects, so proceed with caution!

For me personally, I do change it up as I like to clean my system deeply, and I am happy to put things back how I like them after the cleaning (such as re-arranging my icons how I like them on my desk top again). I also like to execute my Macs built in daily, weekly, and monthly maintenance scripts. Below is how I use ONYX.

*NOTE* – I take no responsibility if you copy my settings and loose something.

ONYX OptionsWhen you are happy with your cleaning options, its time to press execute.

Quit Open AppsONYX will tell you it is going to close any other programs that are open, so again, make sure you have saved your work.

Onyx In ProgressONYX will now start performing maintenance. In most cases this will take some time, so if you didn’t stretch your legs, get a coffee and some fresh air before, now is the time. When ONYX has finished, a dialogue box will appear. Click OK.

ONYX Maintainence Complete

ONYX will now want to restart you computer.

ONYX RebootRestart your computer and you are all done!

Normalize Audio Volume Levels in your MP4 Videos with MP4Gain

MP4Gain – Normalize Audio Volume Levels in your MP4 Videos

MP4Gain-Logo

Mac users please see my Mac specific article HERE.

I have been saving episodes of the Discovery Channel show “How It’s Made” for years. Recently I compiled and organized them into an archive on my WDTV Live Hub, and I found that as I have used several different devices to record the episodes over the years, the audio volume levels range from barely audible to deafening. I needed a way to make the audio volume level of all of my mp4 video files the same. This process is called “Normalizing”.

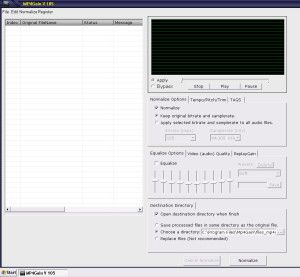
A Google search returned only one batch MP4 volume normalizer of note, MP4Gain. The author offers a trial version, which I downloaded and installed. This is what the main window looks like.

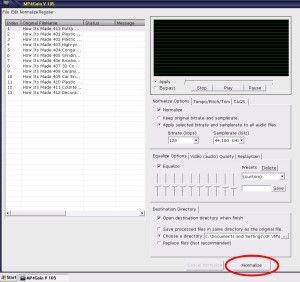
mp4gain video normalizer main windowThe program is VERY easy to use. For straight out “Normalizing” all you need to do is simply add your video files and press “Normalize”. In my case, I wanted to adjust the bit rates of the audio and do a little re-equalizing.

Equalizer

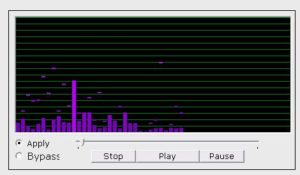
The program includes a level meter with fall-offs, so you can play your file and have a visual representation of the sound levels. The functionality is bit raw at the moment, but I’m sure in future versions this will be refined, and hopefully you will be able to adjust the fall-off times to make them stay at the peaks a little longer, as they seem to drop off a little to quickly.

MP4Gain Video Normalizer

Once I set my EQ levels and bit rates, I pressed “Normalize” and away it went!

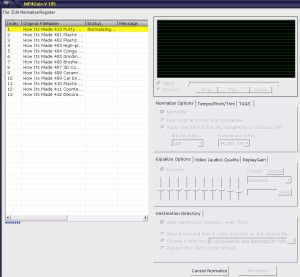
MP4Gain ProgressMP4Gain processes the files very quickly, and once it is complete, all your video files are the same volume! Its VERY cool!

You can download the trial version of MP4Gain HERE. The trial is fully functional and allows you to process about 15-20 files before asking you to buy a license.

In summary, this program is great, and I’m hoping that future versions polish up a few minor issues, like a missing vertical scroll bar (program is difficult to use on a small screen as the Normalize button is right down the bottom, and off the screen), and the jerky level meter. The major killer of this program is the price. At $40, it is pretty expensive (In My Humble Opinion). If it was somewhere in the $15 – $20 range it would definitely be hard to pass up.

It is able to normalize volume levels in the following video file types:

  • mp4, flv, avi
  • mpeg, mpg
  • 3gp, wmv

MP4Gain can also normalize your audio music files. It can also normalize MP3, MP2, AAC, AC3, FLAC, OGG, WAV and M4A files to!

Move and Insert Cursor anywhere in text on iPhone and iPad

magnifying-glass-icon

Have you ever typed out a bunch of words on your iPhone and wanted to go back and delete, change or insert something? There is an easy way to do it.

magnifying-glass-iphone

Just put your finger on the word or place you want to change, and leave/hold it there for a second or so, and a little magnifying glass will pop up. Without taking your finger off the screen, just move your finger left, right, up or down, and you will see the cursor inside the magnifying glass moving around the text. Just move the cursor to the place you need it to be, take your finger off the screen, the magnifying glass disappears and your cursor is right where you need it to be to make your changes.

Easily view your 3D MPO Photographs Instantly on your Mac with ShowMe3D

showme3d-iconIf you have a camera capable of taking 3D photographs, and a Apple Computer, I have just found the simplest, quickest, easiest way to view your photos, It’s called ShowMe3D. Ever since I got my 3D camera I have been longing for a way to just unload my pics, and view them in 3D straight away, without having to jump through a million hoops, and this is it!

Open up App Store on your Mac and search for ShowMe3D, or click this link to Download ShowMe3D from the Mac App Store. It’s not free, but at just $4.99, it really is a bargain.

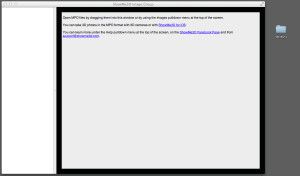
Once you have downloaded and installed ShowMe3D, open it up and you will see the main screen.

Showme3d ScreenNow, open the folder that contains the .mpo files (Multiple Picture Object) from your camera, and drag the pics you want to view onto the open window and put on your 3D glasses.

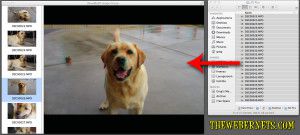
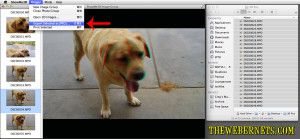
showme3d-loadedInstantly, you can view your 3D photos in 3D, and scroll through them in the same way you would using the “Preview” app. A feature of this program that I really like, is it also allows you to Export your .mpo files as Anaglyph Jpegs, so you can quickly and easily convert your .mpo’s to regular jpegs – cool huh!

Show Me 3D Save FeatureHere’s a Anaglyph 3D Jpeg I converted from an .mpo file using ShowMe3D – It’s my dog Benson.

Benson 3D

Easily add Meta Tags to your music with Musicbrainz Picard

musicbrainz-picardThere’s nothing I hate more than dropping new music into my iTunes library only to learn once it has finished importing that it doesn’t have meta-tags (No Song Name, Artist, Album Title etc etc). So now, before I add new music, I run it through MusicBrainz Picard. Here’s the programs description from their site:

“MusicBrainz Picard is a cross-platform (Linux/Mac OS X/Windows) application written in Python and is the official MusicBrainz tagger.

Picard supports the majority of audio file formats, is capable of using audio fingerprints (PUIDs, AcoustIDs), performing CD lookups and disc ID submissions, and it has excellent Unicode support. Additionally, there are several plugins available that extend Picard’s features.

When tagging files, Picard uses an album-oriented approach. This approach allows it to utilize the MusicBrainz data as effectively as possible and correctly tag your music. For more information, see the illustrated quick start guide to tagging.

Picard is named after Captain Jean-Luc Picard from the TV series Star Trek: The Next Generation.”

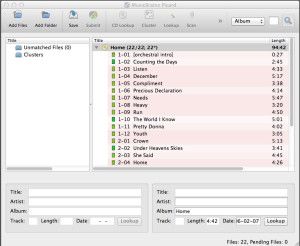
To get started, download and install MusicBrainz Picard HERE. Once you are up and running, drop the music files you want to tag anywhere in the window. They will then populate the list on the left called unmatched files.

mb1

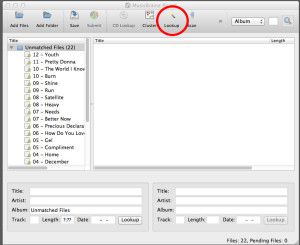
When you have finished adding files, click the line of text with the folder icon next to it that says “Unmatched Files” to make it active. When it is active it will become highlighted. Now, go ahead and press the “Lookup” button, and MusicBrainz Picard will start scanning your music and comparing it to their database for identification.

mb2

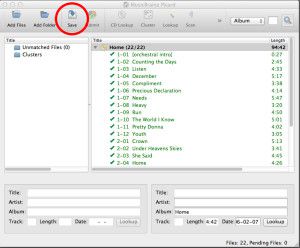
Once MusicBrainz Picard has identified the album and added all of the songs to it, the CD icon next to the album name will turn gold in color. If you don’t have all of the songs from the album, it doesn’t matter, you can still proceed, but the CD icon stays silver. The next step is to click Album Name next to the CD icon to make it active, and highlighted. You can now click “Save”.

mb3

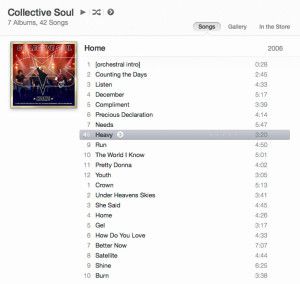
MusicBrainz Picard will now write the Meta Tag Data directly into your music files. Once it has completed, you can close out of the program, and then drop your music files into iTunes, and everything will be correctly categorised and ready to play.

mb4