Fix Bad DVD Encodes with Handbrake
I recently purchased the box set of Malcolm In The Middle. I love this show! It was always so funny, and those kids, OMG what horrible kids they were. However, whilst the show was fantastic, the quality of the DVD video was horrible, especially when I viewed it on my new 4K UHD TV.
Seriously…WTF Hollywood?
I paid $140 bucks for these discs, and there are more artefacts in the video than even Howard Carter can handle!
(A little Tutankhamun humour there)
Thankfully, we can fix this with a free program called Handbrake. At the time of writing the current version of Handbrake is v1.6.1. You can download your copy HERE.
Once you MakeMKV files from your grainy DVD’s, open up Handbrake and drop your first source video file in.
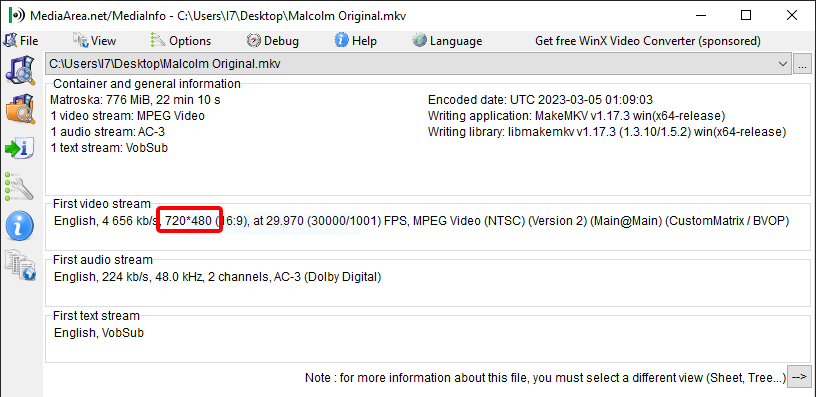
You will find yourself on the Summary tab. So from here there are two questions you need to answer that will determine how you proceed. Question 1, Is my DVD 480 lines high or 576? And Question 2, Is my media player an older one, or a new one like an Apple TV 4K that can play HEVC video? To answer Question 1, download and install Mediainfo. It’s a great and free program that can tell you all kinds of interesting thing about your video files. Download for Mac and Windows HERE. Once you have installed it drop your video file onto it a see what you are dealing with.
Ok my DVD is 480 lines high, so going forward in this article I will adjust the settings for 480P. If your source video is 576 lines high, I will point out where you need to make the changes for this resolution. Also note that this episode is 776MB if file size, we will reduce this quite a bit as well. If your DVD is 576 lines high, you will see something like below in MediaInfo
Regarding question 2, Have look at the manufacturers web page for your media player. If it lists H265 or HEVC as a format it can play, you will need to choose H265 and MKV as your output file formats. If your media player can’t play H265 HEVC, you will need to use H264 and MP4 as your output file formats.
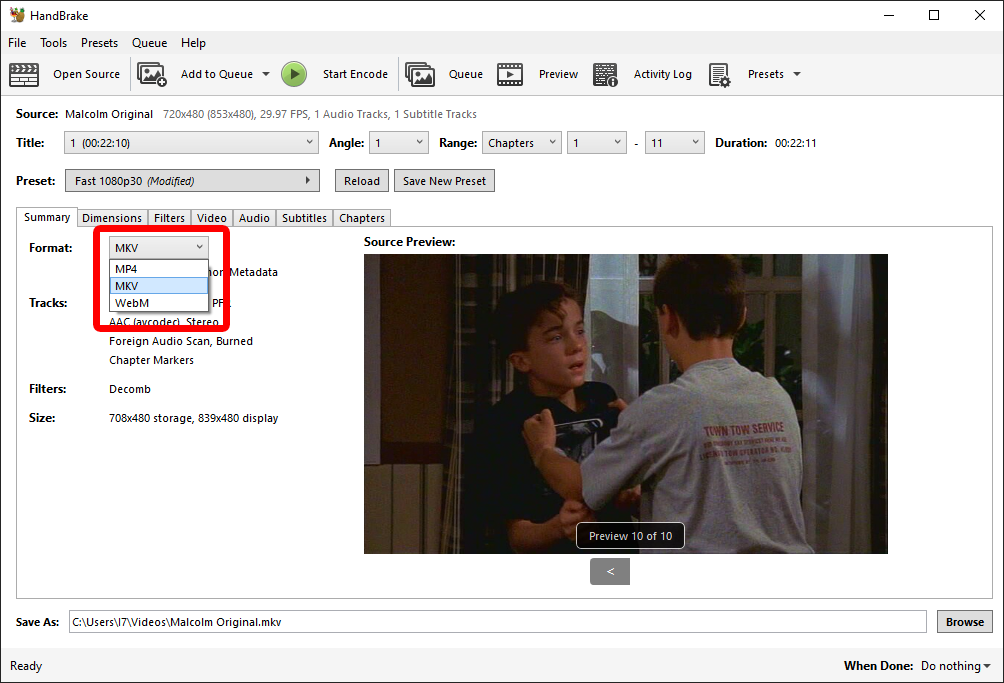
Open up handbrake and drop your source file in. You will be on the Summary tab.
This is where Question 2 becomes a factor. If you have a newer player that can handle H.265 HEVC select MKV as your format. If your player is older select MP4. Uncheck “Passthru Common Metadata” and we are done with this tab for the moment. Now click the “Dimensions” tab.
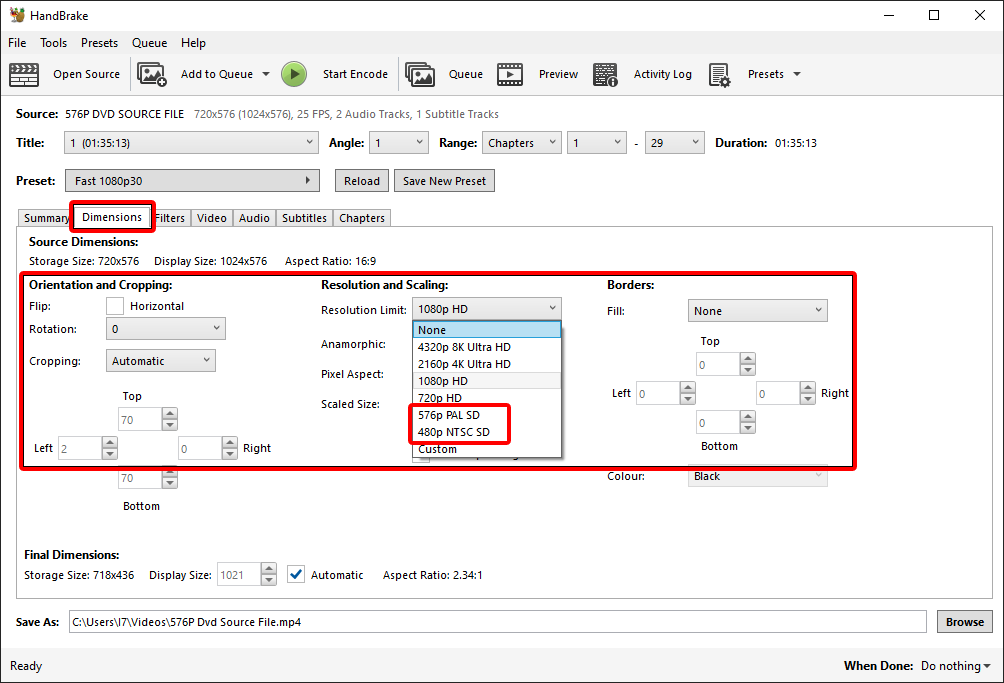
In this tab the defaults are all ok. The only thing we really need to be concerned with is “Resolution and Scalling” setting. Depending on what size your source DVD is, you need to adjust this setting accordingly. If MediaInfo said it is 480, select 480P here. If it said 576 select 576P instead. Next it is on to the “Filters” tab, this is where we will do all of our repair work and get that video looking great on your new 4K UHD TV.
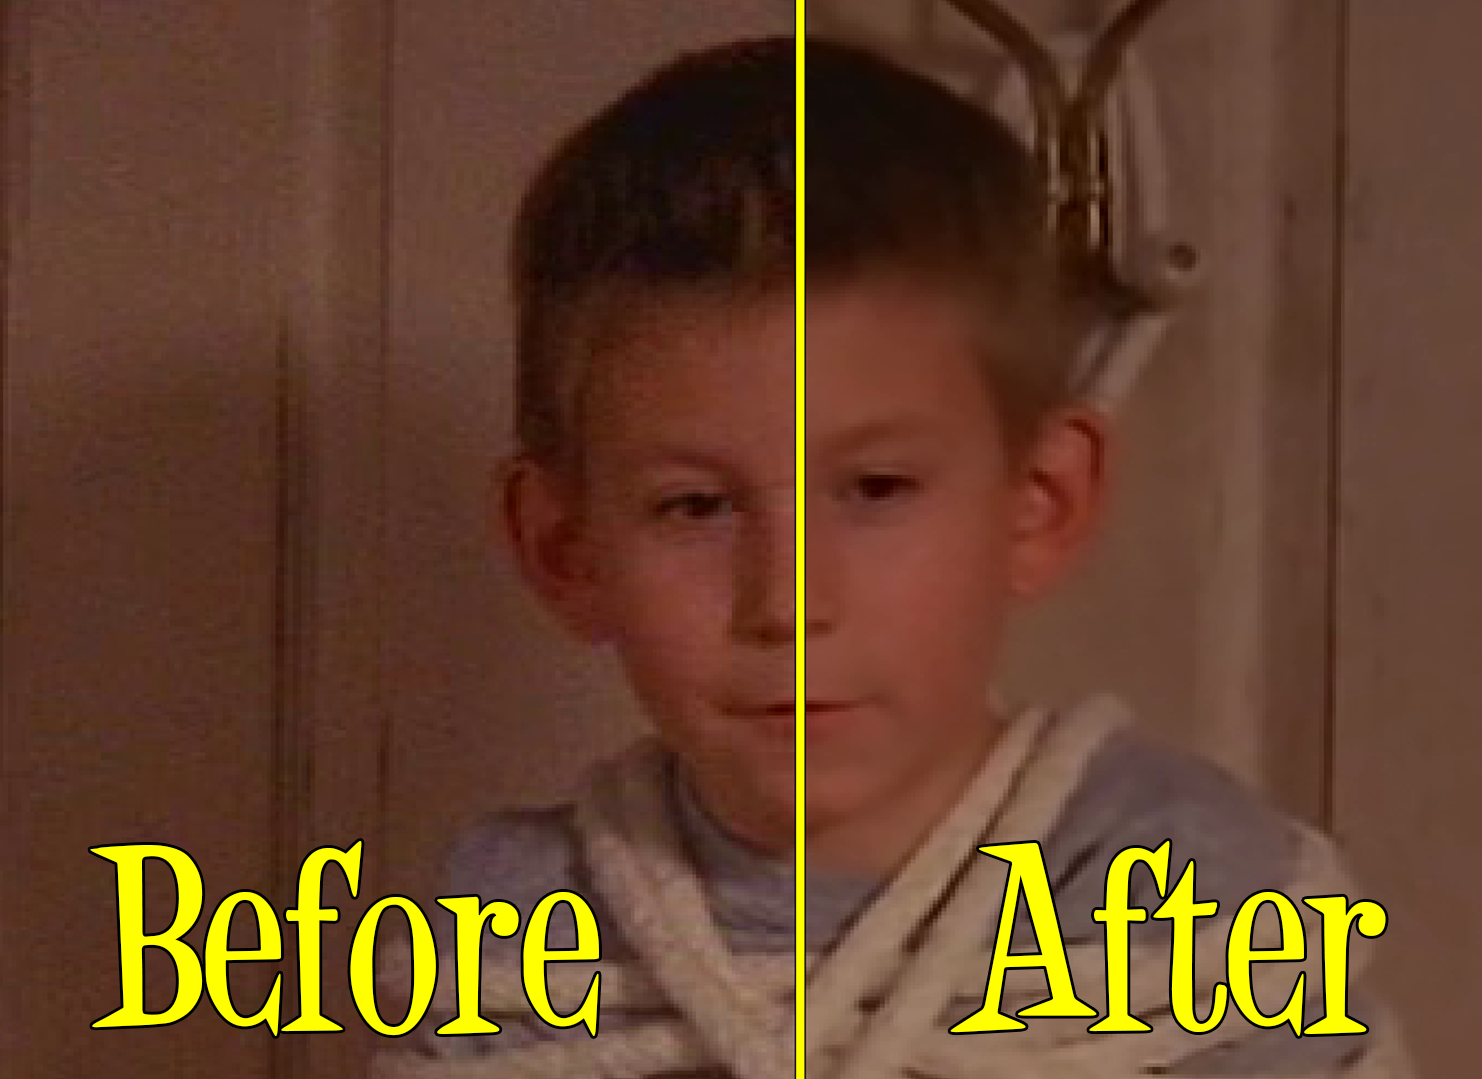
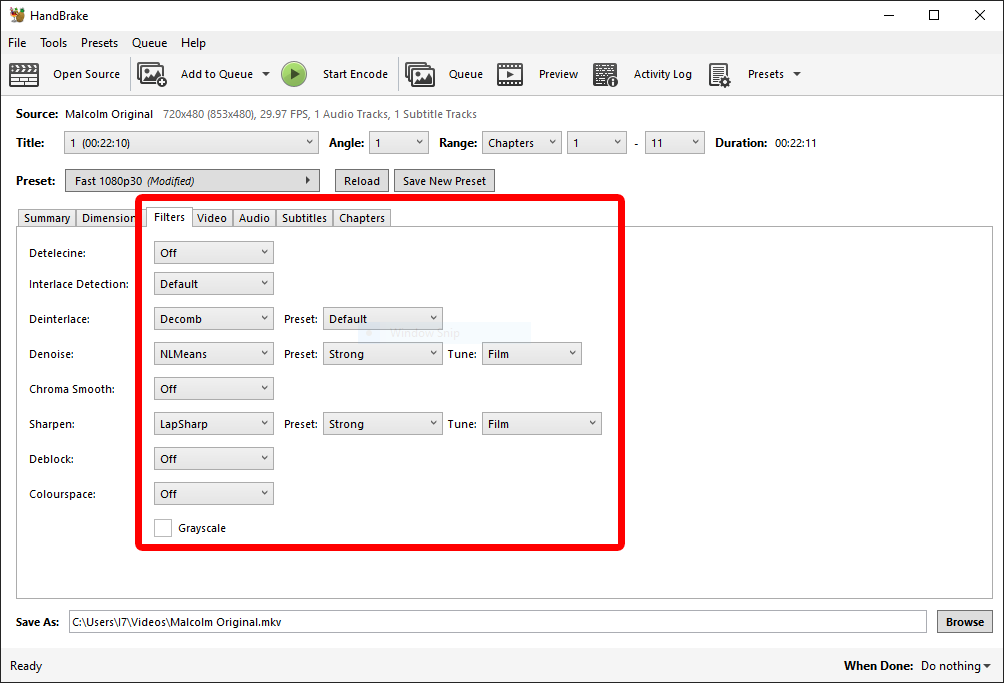
In this tab we need to make sure that Interlace Detection is set to “Default”, Deinterlace is set to “Decomb” and the preset is “Default”. This will result in a nicely combed progressively drawn video file. Now, lets clean it up. Set Denoise to “NLMeans”, Preset to “Strong” and Tune to “Film”. This will smooth out all of the noise and grainy textures. Now let’s sharpen things up. Next to Sharpen select “LapSharp”, set the press to “Strong” and Tune to “Film”. These settings are pretty extreme. If your video isn’t as bad as mine, and these settings remove to much detail, just drop the NLMeans preset from “Strong” back to “Medium”. This should get things looking a great deal better. Now it’s on to the Video Tab.
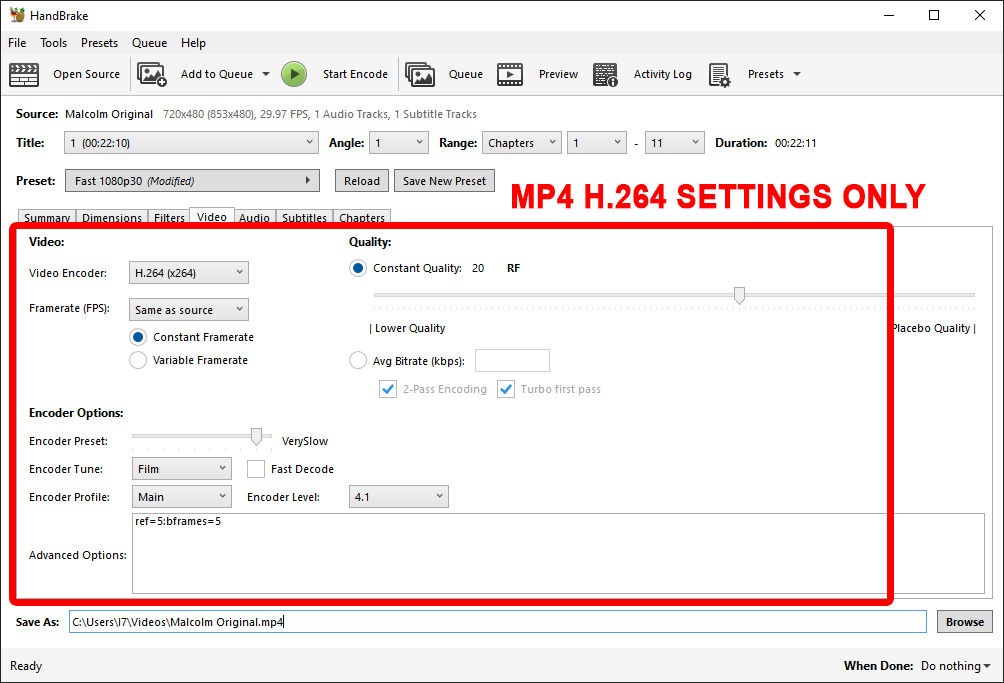
FOR MP4 ENCODES
If you are making an MP4, set Video Encoder to H.264 (x264). Set Framerate to “Same As Source” and select “Constant Framerate”. Set Encoder Preset to “Very Slow”, Encoder Tune to “Film”, Encoder Profile to “Main” and Encoder Level to 4.1. Set the Constant Quality Slider to “20”. In the Advanced Options paste the following code to further tune the encode: ref=5:bframes=5
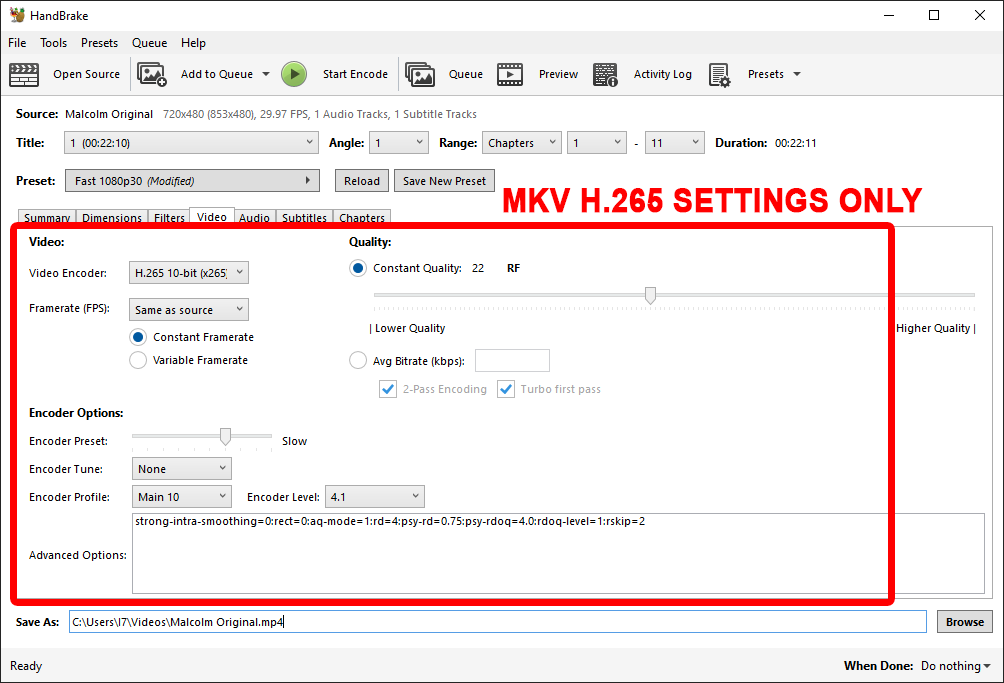
FOR MKV ENCODES
If you are making an MKV, set Video Encoder to H.265 10-bit (x265). Set Framerate to “Same As Source” and select “Constant Framerate”. Set Encoder Preset to “Slow”, Encoder Tune to “None”, Encoder Profile to “Main 10” and Encoder Level to 4.1. Set the Constant Quality Slider to “22”. In the Advanced Options paste the following code to further tune the encode: strong-intra-smoothing=0:rect=0:aq-mode=1:rd=4:psy-rd=0.75:psy-rdoq=4.0:rdoq-level=1:rskip=2
Next up is the Audio Tab
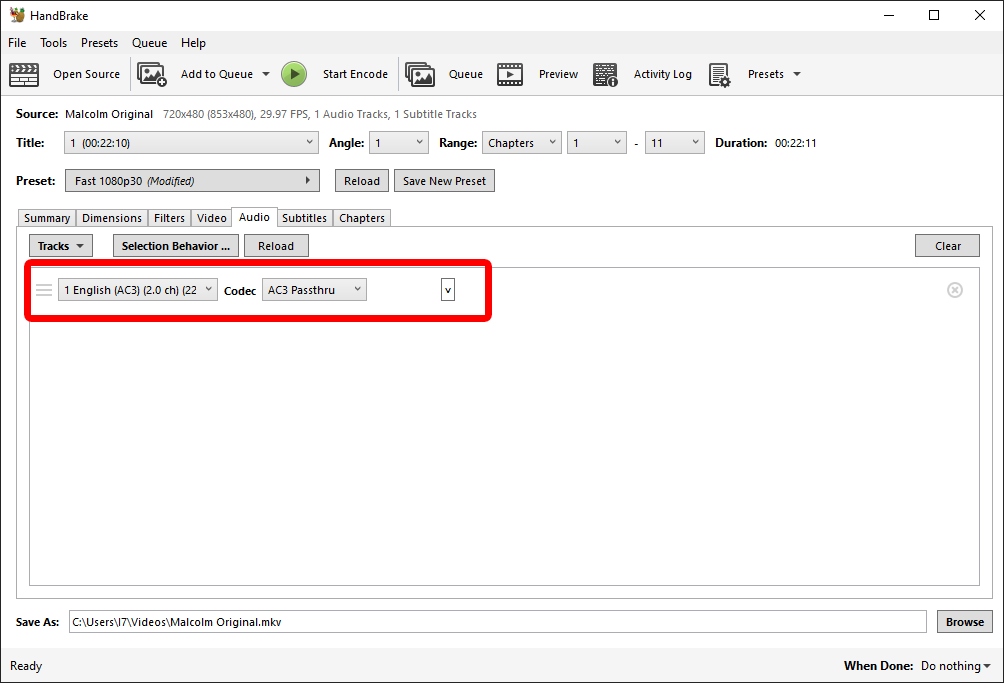
There is not much we need to do here. Just select the primary audio track and “Pass It Through”, which means it is not touched in any way during our encode, it just passes through Handbrake. Next is Subtitles.
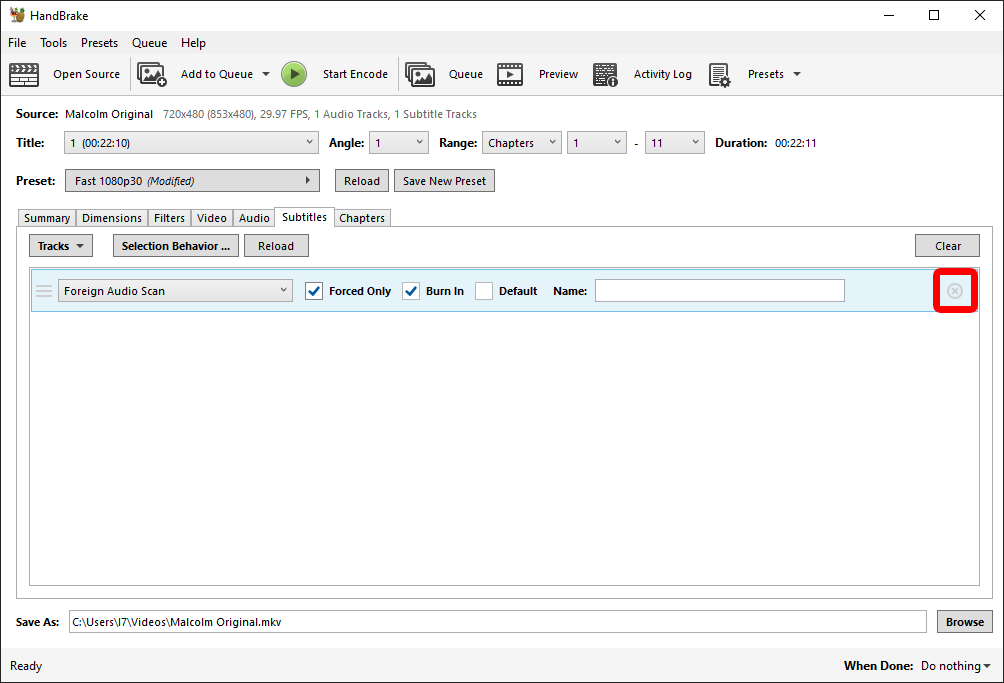
If you want to include subtitles you can take care of that here. If you don’t want them click the light grey “X” in the circle at the right hand end to clear all subtitles out of the encode. On a Mac you can clear away subtitles by selecting “None” from the drop down. On to the final tab, Chapters.
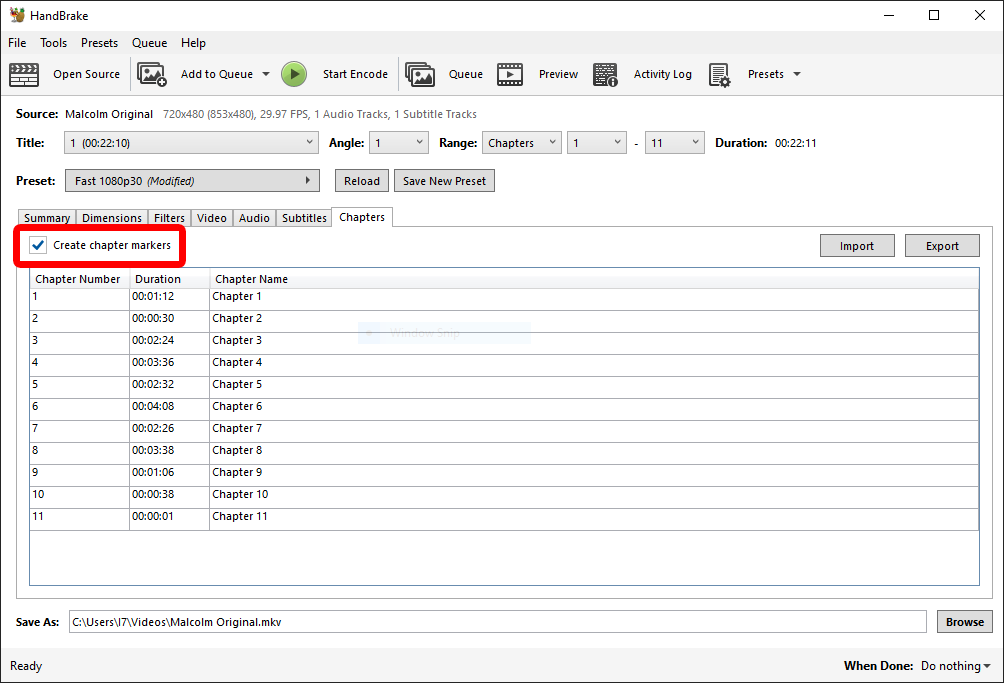
Again there is not much to do here. If you want to keep the chapter markers, leave “Create Chapter Markers” checked. They don’t take up a great deal of space, and can be useful. If you don’t want then, simply uncheck this setting. Now back to the Summary Tab.
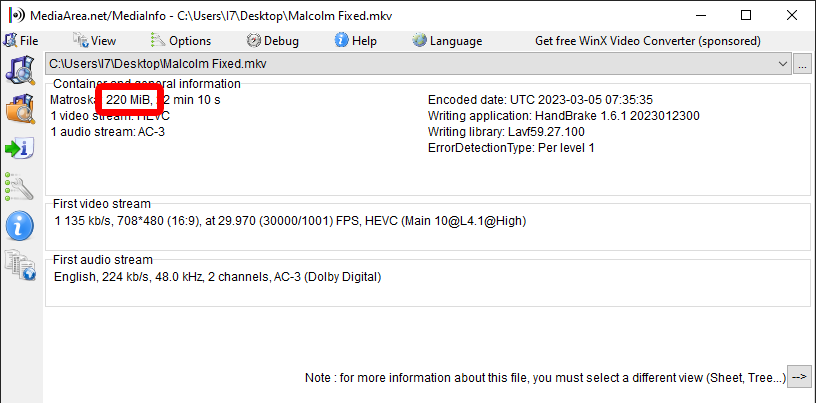
Make sure to give your encode a unique name, and save it to a location that is easy to find such as your desktop. Now press the green “Start Encode” button and let Handbrake do its thing. Once it has finished you will have a new file in the location you chose to save. Drop that new file into MediaInfo.
You can see I reduced the size of my file from 776MB down to 220MB – a reduction of over 70%. We’ve made a file 70% smaller with a considerably better picture quality! Pretty Cool Huh!


Put these settings into handbrake and it took over 6 hours to encode a 90 minute DVD. Any suggestions?
encode time is 10 hours? is this normal?
If you are trying to encode to H265 with an older machine it can be pretty slow. You could use the H264 method instead, that will be quicker. You could also set the encode preset to medium, but the quality might not be as good. As I always say, good encodes take time, and let them run overnight